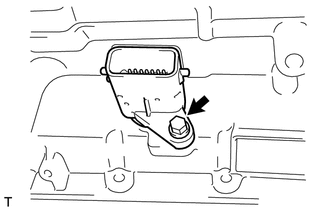
REMOVAL PROCEDURE 1. DRAIN AUTOMATIC TRANSMISSION FLUID (a) Remove the drain plug and gasket, and drain the ATF. (b) Install a new gasket and the drain plug. Torque: 20 N·m {204 kgf·cm, 15 ft·lbf} 2. REMOVE AUTOMATIC TRANSMISSION OIL PAN SUB-ASSEMBLY 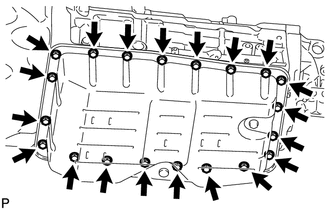 (a) Remove the 20 bolts, oil pan and gasket from the transmission. NOTICE: Some fluid will remain in the oil pan. Remove all the pan bolts, and carefully remove the oil pan assembly.
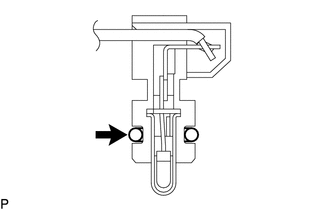
3. REMOVE VALVE BODY OIL STRAINER ASSEMBLY 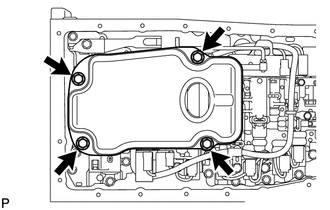 (a) Remove the 4 bolts and oil strainer. NOTICE: Be careful as some fluid may leak out of the oil strainer. (b) Remove the O-ring from the oil strainer. 4. DISCONNECT TRANSMISSION WIRE 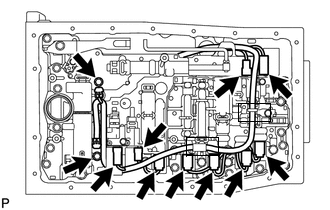 (a) Remove the 2 bolts and 2 temperature sensor clamps. (b) Disconnect the 2 ATF temperature sensors.
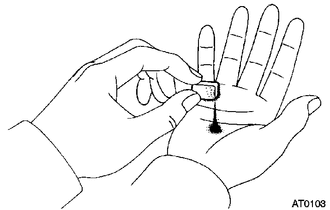
(d) Disconnect the 9 solenoid valve connectors. (e) Detach the wire harness from the 2 clamps. 5. REMOVE TRANSMISSION WIRE 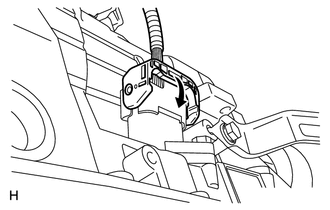 (a) Disconnect the wire connector. (1) Detach the claw, press down the lever, and then disconnect the transmission wire connector.
(c) Remove the O-ring from the transmission wire connector. |
Toyota Tundra Service Manual > Exterior: Rear Door Belt Moulding(for Double Cab)
Components COMPONENTS ILLUSTRATION Installation INSTALLATION CAUTION / NOTICE / HINT HINT: Use the same procedures for the RH side and LH side. The procedures listed below are for the LH side. PROCEDURE 1. INSTALL REAR OUTER DOOR GLASS WEATHERSTRIP LH (a) Attach the claw to install the weatherstrip. ...