REMOVAL CAUTION / NOTICE / HINT HINT:
PROCEDURE 1. SUPPORT BODY WITH SAFETY STANDS (a) Jack up and support the body on safety stands. (b) Lower the axle housing until the leaf spring tension is free, and keep it at this position. 2. REMOVE SPARE TIRE 3. REMOVE REAR WHEEL 4. DISCONNECT NO. 3 PARKING BRAKE CABLE ASSEMBLY 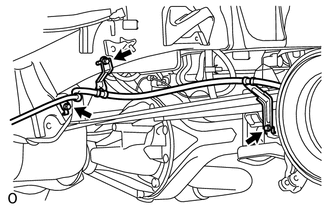 (a) Remove the 3 bolts and disconnect the cable from the vehicle. 5. DISCONNECT REAR SHOCK ABSORBER ASSEMBLY LH 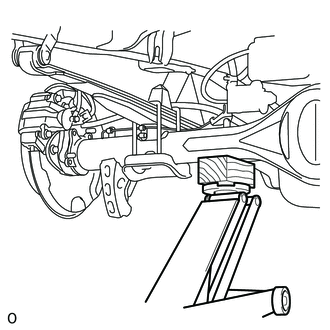 (a) Support the rear axle housing with a jack using a wooden block to avoid damage.
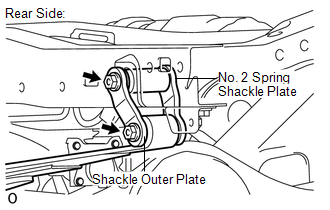
6. REMOVE REAR SPRING U BOLT 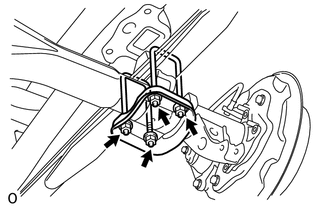
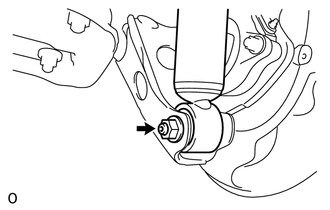
(a) Remove the 4 nuts, 4 washers and spring seat. (b) Remove the 2 U bolts. 7. REMOVE REAR SPRING BUMPER SUB-ASSEMBLY (a) Remove the spring bumper. 8. REMOVE REAR SPRING ASSEMBLY LH 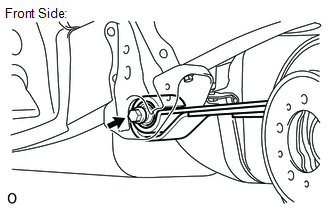 (a) Remove the nut, washer and bolt from the front side.
9. REMOVE TUBE 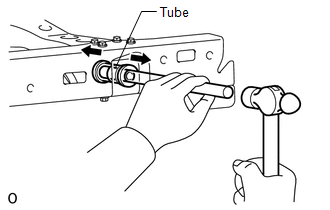 (a) Using a brass bar and hammer, remove the tube from the frame. 10. REMOVE REAR SPRING SHACKLE BUSH (a) Remove the 2 bushes from the frame. |
Toyota Tundra Service Manual > Windshield Glass: Installation
INSTALLATION CAUTION / NOTICE / HINT NOTICE: When replacing the windshield glass of a vehicle equipped with a forward recognition camera, make sure to use a Toyota genuine part. If a non-Toyota genuine part is used, the forward recognition camera may not be able to be installed due to a missing brac ...