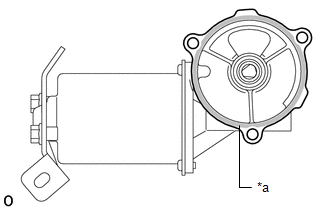
Components COMPONENTS ILLUSTRATION 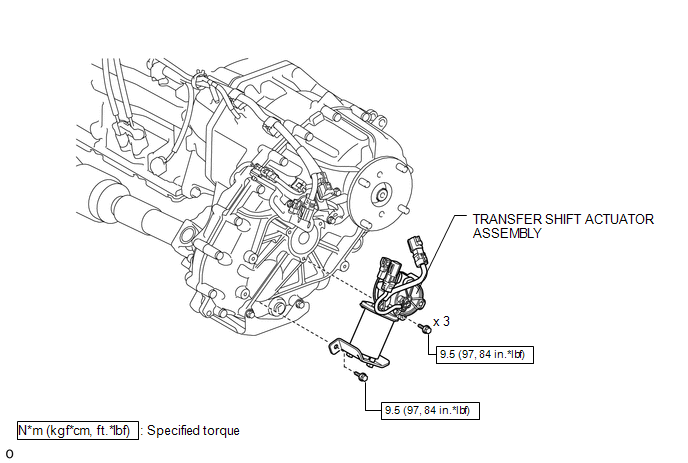 Inspection INSPECTION PROCEDURE 1. INSPECT TRANSFER SHIFT ACTUATOR ASSEMBLY (a) Measure the resistance according to the value(s) in the table below. (1) Connect the connectors to the vehicle side wire harnesses, operate the motor, and then measure the resistance at each position. 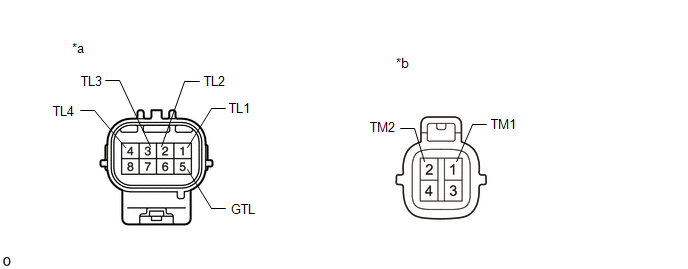 Standard Resistance:
Installation INSTALLATION CAUTION / NOTICE / HINT NOTICE: Change the vehicle to 2WD mode before removing the transfer shift actuator assembly. If the vehicle cannot be changed to 2WD mode, since the new transfer shift actuator assembly is set in the 2WD position, connect all the connectors to the vehicle side wire harnesses to set the new transfer shift actuator assembly to the drive state of the vehicle before installing the new transfer shift actuator assembly. PROCEDURE 1. INSTALL TRANSFER SHIFT ACTUATOR ASSEMBLY
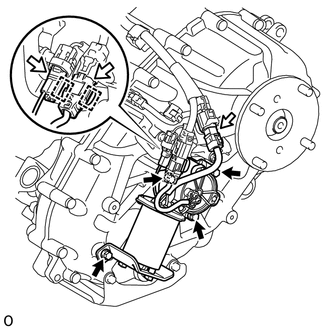
(b) Install the transfer shift actuator assembly with the 4 bolts. Torque: 9.5 N·m {97 kgf·cm, 84 in·lbf} NOTICE: Tighten the bolts of the transfer shift actuator assembly within 10 minutes of applying the seal packing. The seal packing will dry very quickly. (c) Connect the 3 connectors and attach the 2 clamps. Removal REMOVAL CAUTION / NOTICE / HINT NOTICE: Change the vehicle to 2WD mode before removing the transfer shift actuator assembly. If the vehicle cannot be changed to 2WD mode, since the new transfer shift actuator assembly is set in the 2WD position, connect all the connectors to the vehicle side wire harnesses to set the new transfer shift actuator assembly to the drive state of the vehicle before installing the new transfer shift actuator assembly. PROCEDURE 1. REMOVE TRANSFER SHIFT ACTUATOR ASSEMBLY
(b) Remove the 4 bolts and transfer shift actuator assembly. |
Toyota Tundra Service Manual > Pre-collision System: Front Radar Sensor Beam Axis Not Adjusted (C1A14)
DESCRIPTION After installing a new millimeter wave radar sensor assembly, if sensor beam axis adjustment has not been performed, DTC C1A14 will be stored. DTC No. Detection Item DTC Detection Condition Trouble Area C1A14 Front Radar Sensor Beam Axis Not Adjusted When the vehicle is being driven at a ...