Components COMPONENTS ILLUSTRATION 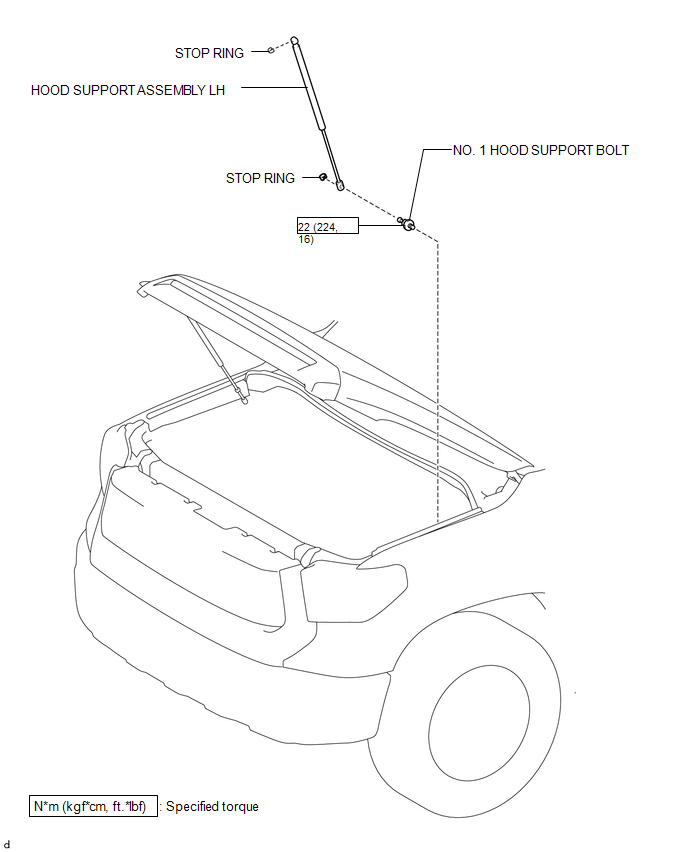
Disposal DISPOSAL CAUTION / NOTICE / HINT HINT:
PROCEDURE 1. DISPOSE OF HOOD SUPPORT ASSEMBLY LH
(b) Using a metal saw, gradually cut anywhere in the area labeled A to release the gas. Standard
CAUTION: As metal debris may be blown outward by the gas, you must:
NOTICE: The gas inside the hood support assembly LH is colorless, odorless and harmless. As there is a possibility that metal debris could scatter, cover the hood support assembly LH with a piece of cloth or other material. Installation INSTALLATION CAUTION / NOTICE / HINT CAUTION: Install the hood support assembly LH while holding the hood. NOTICE:
HINT:
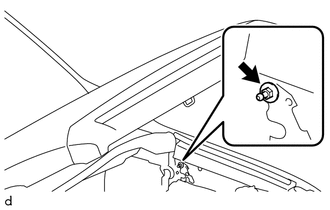
PROCEDURE 1. INSTALL NO. 1 HOOD SUPPORT BOLT
2. INSTALL HOOD SUPPORT ASSEMBLY LH 
(a) Install the 2 stop rings to the hood support assembly LH. (b) Attach the 2 ball joints to install the hood support assembly LH. (c) Check that the hood support assembly LH is connected to the ball joint and cannot be pulled off. CAUTION: Install the hood support assembly LH while holding the hood. NOTICE: Check that the hood support assembly LH is engaged in the ball joint and it cannot be pulled out. Removal REMOVAL CAUTION / NOTICE / HINT CAUTION: Remove the hood support assembly LH while holding the hood. NOTICE:
HINT:
PROCEDURE 1. REMOVE HOOD SUPPORT ASSEMBLY LH
(b) Detach the 2 ball joints and then remove the hood support assembly LH. 2. REMOVE NO. 1 HOOD SUPPORT BOLT
|
Toyota Tundra Service Manual > Transfer Assembly: Removal
REMOVAL CAUTION / NOTICE / HINT CAUTION: Be sure to perform this procedure with several people as the transfer assembly is very heavy. NOTICE: Change the vehicle to 2WD mode before removing the transfer shift actuator assembly. If the vehicle cannot be changed to 2WD mode, since the new transfer shi ...