INSTALLATION CAUTION / NOTICE / HINT HINT:
PROCEDURE 1. INSTALL FRONT NO. 3 SPEAKER ASSEMBLY (for 12 Speakers)
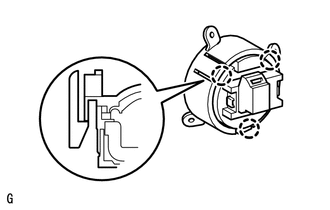
2. INSTALL FRONT NO. 1 SPEAKER ASSEMBLY (a) Connect the connector. 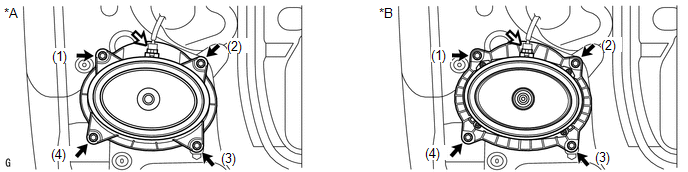 Text in Illustration Text in Illustration
(b) Install the front No. 1 speaker assembly with the 4 screws. NOTICE: Do not touch the cone part of the speaker. HINT: Install the screws in the order shown in the illustration. 3. INSTALL FRONT DOOR TRIM BOARD SUB-ASSEMBLY LH
4. INSTALL FRONT DOOR ARMREST COVER LH 5. INSTALL FRONT UPPER ARMREST BASE PANEL LH
6. INSTALL FRONT DOOR INSIDE HANDLE BEZEL PLUG LH 7. INSTALL FRONT LOWER DOOR FRAME BRACKET GARNISH LH |
Toyota Tundra Service Manual > Rear View Monitor System(for Radio And Display Type): Screen Flicker or Color Distortion
PROCEDURE 1. CHECK DISPLAY SETTING (a) Reset the display settings (contrast and brightness) and check that the screen appears normal. OK: The display returns to normal. OK END NG PROCEED TO NEXT SUSPECTED AREA SHOWN IN PROBLEM SYMPTOMS TABLE ...