REMOVAL PROCEDURE 1. REMOVE FRONT WIPER ARM AND BLADE ASSEMBLY LH (a) Remove the nut, wiper arm and blade. 2. REMOVE FRONT WIPER ARM AND BLADE ASSEMBLY RH (a) Remove the nut, wiper arm and blade. 3. REMOVE HOOD TO COWL TOP SEAL
4. REMOVE FRONT FENDER TO COWL SIDE SEAL LH (a) Using a clip remover, detach the claw and remove the cowl side seal. 5. REMOVE FRONT FENDER TO COWL SIDE SEAL RH HINT: Use the same procedures described for the LH side. 6. REMOVE COWL TOP VENTILATOR LOUVER SUB-ASSEMBLY
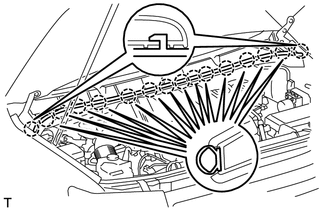
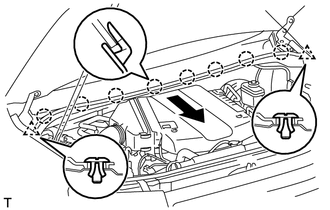
(b) Detach the 8 claws and remove the ventilator louver. 7. REMOVE FRONT WIPER MOTOR AND LINK ASSEMBLY
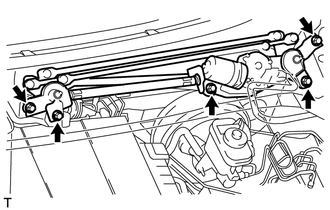
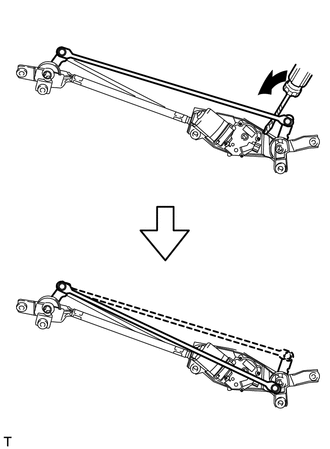
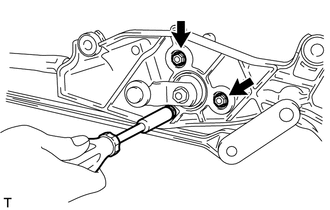
(b) Remove the nut. (c) Remove the 4 bolts and wiper motor and link assembly. 8. REMOVE WINDSHIELD WIPER MOTOR ASSEMBLY
|
Toyota Tundra Service Manual > Window Defogger System: Parts Location
PARTS LOCATION ILLUSTRATION *A for Automatic Air Conditioning System *B for Manual Air Conditioning System *1 BACK WINDOW GLASS *2 ENGINE ROOM RELAY BLOCK, JUNCTION BLOCK - DEFOGGER RELAY (DEF) - DEFOG FUSE - NOISE FILTER *3 DRIVER SIDE JUNCTION BLOCK ASSEMBLY - ECU-IG1 NO. 3 FUSE *4 DLC3 *5 AIR CON ...