Head restraints are provided for all seats.
Front seats
Rear seats ■ Center seat
Double Cab models
CrewMax models
■ Outer seat
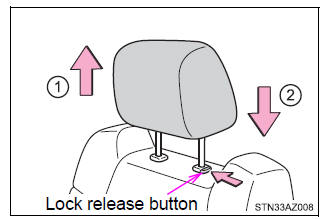
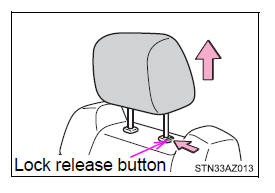
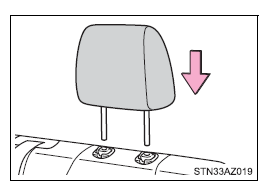
■Removing the head restraints Front seats and center rear seat (CrewMax models) Pull the head restraint up while pressing the lock release button.
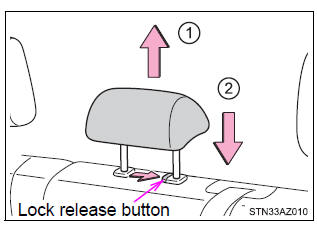
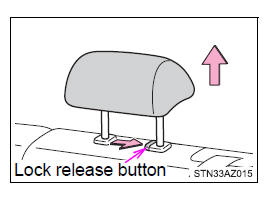
Center rear seat (Double Cab models) Pull the head restraint up while pressing the lock release button.
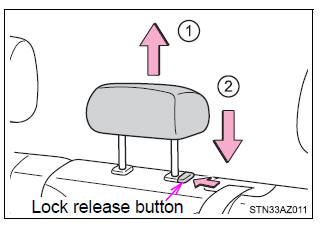
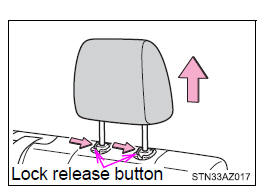
Outer rear seat Pull the head restraint up while pressing both lock release buttons.
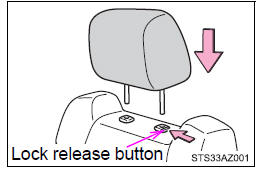
■Installing the head restraints Front seats and center rear seat (CrewMax models) Align the head restraint with the installation holes and push it down to the lock position. Press and hold the lock release button when lowering the head restraint.
Center rear seat (Double Cab models) Align the head restraint with the installation holes and push it down to the lock position. Press and hold the lock release button when lowering the head restraint.
Outer rear seat Align the head restraint with the installation holes and push it down to the lock position.
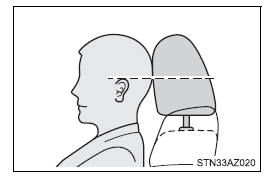
■Adjusting the height of the head restraints (front seats) Make sure that the head restraints are adjusted so that the center of the head restraint is closest to the top of your ears.
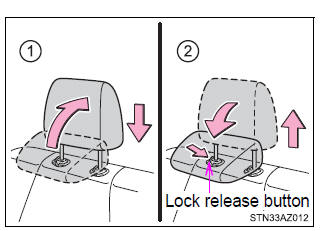
■Adjusting the front center seat (bench type seat) and rear center seat head restraints Always raise the head restraint one level from the stowed position when using.
|
Toyota Tundra Service Manual > Transfer Assembly: Inspection
INSPECTION PROCEDURE 1. INSPECT OUTPUT SHAFT COMPANION FLANGE SUB-ASSEMBLY (FRONT) (a) Using a micrometer, measure the outer diameter of the output shaft companion flange sub-assembly (front) journal surface. Minimum Diameter: Journal Specified Condition A 34.962 mm (1.376 in.) B 39.955 mm (1.573 in ...