DISASSEMBLY CAUTION / NOTICE / HINT HINT:
PROCEDURE 1. REMOVE REAR WHEEL LH 2. DISCONNECT REAR DISC BRAKE CYLINDER ASSEMBLY LH
(b) Hang the disc brake cylinder with a piece of wire. 3. REMOVE REAR DISC 4. REMOVE PARKING BRAKE SHOE RETURN SPRING
5. REMOVE NO. 1 PARKING BRAKE SHOE ASSEMBLY LH
(b) Disconnect the tension spring. (c) Remove the No. 1 parking brake shoe and shoe adjuster screw set. 6. REMOVE NO. 2 PARKING BRAKE SHOE ASSEMBLY LH
(b) Remove the No. 2 parking brake shoe. 7. REMOVE PARKING BRAKE SHOE LEVER LH
(b) Remove the parking brake shoe lever. 8. DISCONNECT NO. 3 PARKING BRAKE CABLE ASSEMBLY
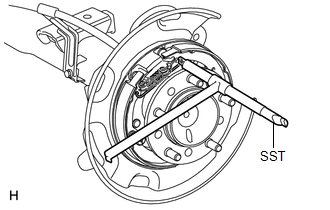
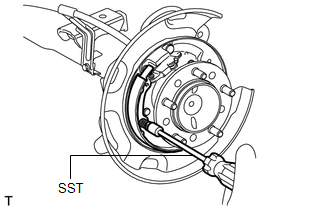
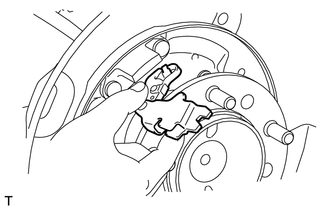
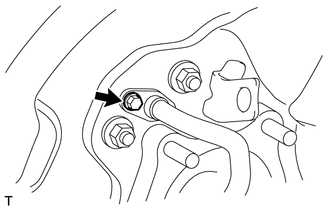
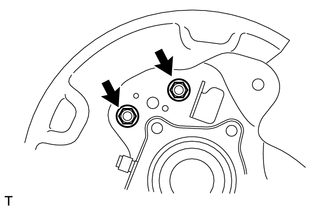
9. REMOVE PARKING BRAKE ANCHOR BLOCK
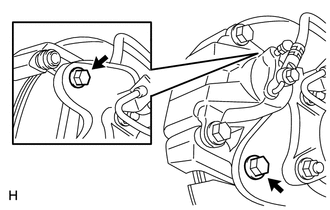
|
Toyota Tundra Service Manual > Sfi System: Throttle / Pedal Position Sensor / Switch "D" Circuit (P2120,P2122,P2123,P2125,P2127,P2128,P2138)
DESCRIPTION The accelerator pedal position sensor is mounted on the accelerator pedal bracket and has 2 sensor circuits: VPA (main) and VPA2 (sub). This sensor is a non-contact type and uses Hall-effect elements in order to yield accurate signals even in extreme driving conditions, such as at high s ...