Toyota Tundra Service Manual: Air Injection Driver

Components

COMPONENTS

ILLUSTRATION
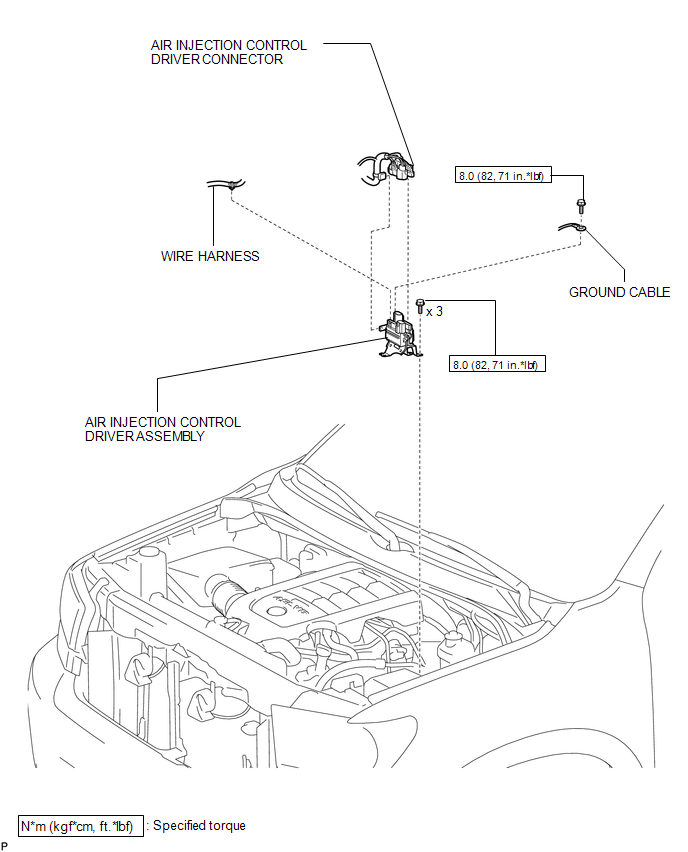
ILLUSTRATION

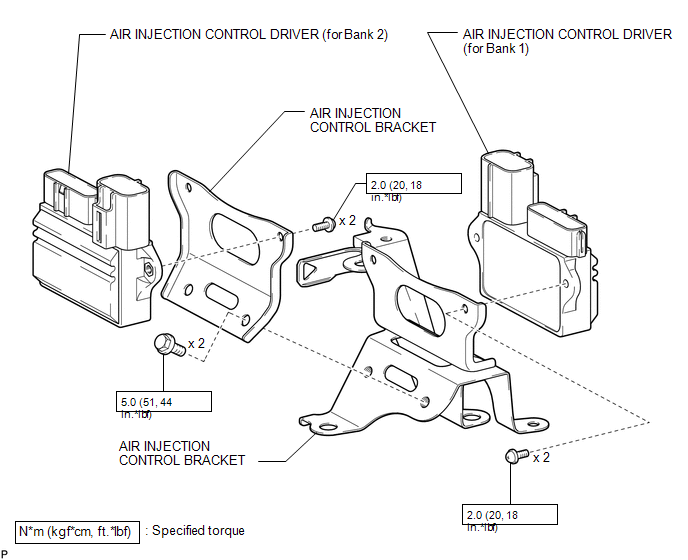
Disassembly

DISASSEMBLY

PROCEDURE

1. REMOVE AIR INJECTION CONTROL DRIVER (for Bank 1)

(a) Remove the 2 bolts.

(b) Remove the 2 screws and air injection control driver.

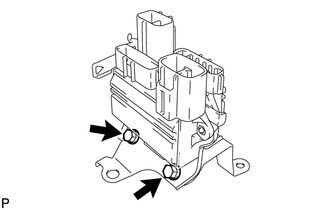
2. REMOVE AIR INJECTION CONTROL DRIVER (for Bank 2)

(a) Remove the 2 screws and air injection control driver.

Installation

INSTALLATION

PROCEDURE

1. INSTALL AIR INJECTION CONTROL DRIVER ASSEMBLY

(a) Install the air injection control driver with the 3 bolts.

Torque:

8.0 N·m {82 kgf·cm, 71 in·lbf}

(b) Connect the 2 wire harness clamps.

(c) Install the ground cable with the bolt.

Torque:

8.0 N·m {82 kgf·cm, 71 in·lbf}

(d) Connect the 4 air injection control driver connectors.

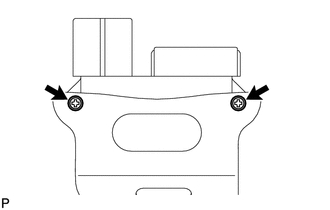
Reassembly

REASSEMBLY

PROCEDURE

1. INSTALL AIR INJECTION CONTROL DRIVER (for Bank 2)

(a) Install the air injection control driver with the 2 screws.

Torque:

2.0 N·m {20 kgf·cm, 18 in·lbf}

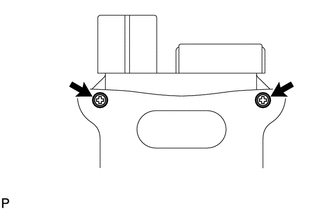
2. INSTALL AIR INJECTION CONTROL DRIVER (for Bank 1)

(a) Install the air injection control driver with the 2 screws.

Torque:

2.0 N·m {20 kgf·cm, 18 in·lbf}

(b) Install the 2 bolts.

Torque:

5.0 N·m {51 kgf·cm, 44 in·lbf}

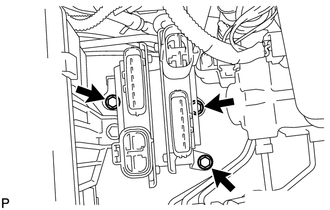
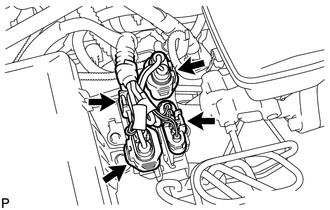
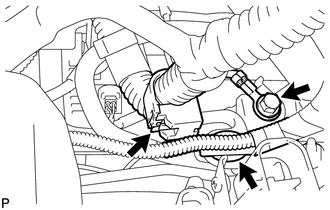
Removal

REMOVAL

PROCEDURE

1. REMOVE AIR INJECTION CONTROL DRIVER ASSEMBLY

(a) Disconnect the 4 air injection control driver connectors.

(b) Remove the bolt and disconnect the ground cable.

(c) Disconnect the 2 wire harness clamps.

(d) Remove the 3 bolts and air injection control driver.

    1ur-fe Emission Control

    Air Pump

    See More:

    Toyota Tundra Service Manual > Air Fuel Ratio Sensor: Removal
    REMOVAL CAUTION / NOTICE / HINT CAUTION: Wear protective gloves when removing the exhaust pipe assembly. The exhaust pipe assembly is extremely hot immediately after the engine has stopped. Confirm that the exhaust pipe assembly has cooled down before removing it. PROCEDURE 1. REMOVE FRONT EXHAUST P ...

    Toyota Tundra Owners Manual

    Toyota Tundra Service Manual

    © 2025 Copyright www.ttundra.com
    0.0301