REMOVAL PROCEDURE 1. REMOVE TIMING CHAIN COVER SUB-ASSEMBLY (a) Remove the timing chain cover (See page 2. SET NO. 1 CYLINDER TO TDC / COMPRESSION
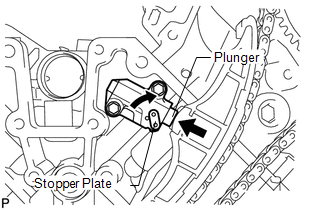
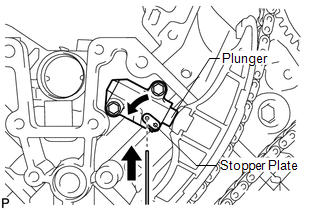
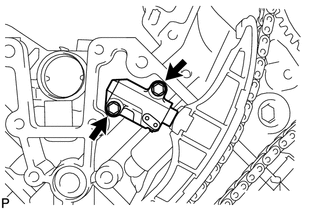
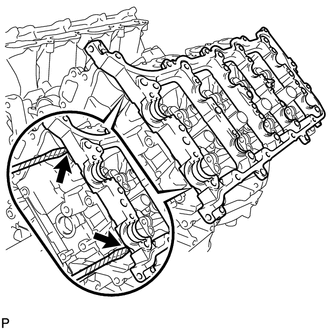
3. REMOVE NO. 1 CHAIN TENSIONER ASSEMBLY LH
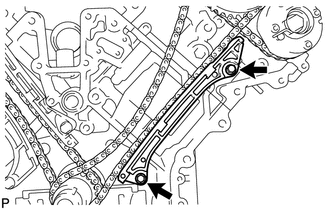
4. REMOVE NO. 1 CHAIN TENSIONER SLIPPER LH 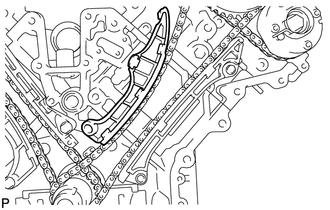 5. REMOVE NO. 1 CHAIN VIBRATION DAMPER LH
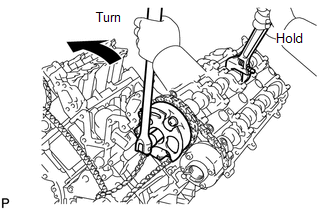
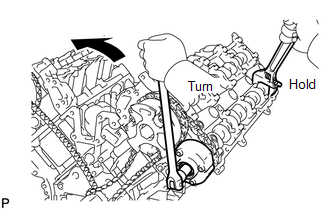
6. REMOVE NO. 1 CHAIN SUB-ASSEMBLY LH  (a) While pushing down the No. 3 chain tensioner, insert a pin of φ1.0 mm (0.0394 in.) into the hole to fix it in place.
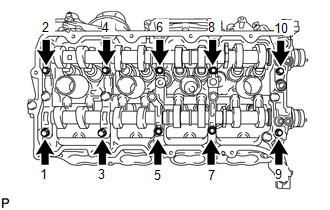
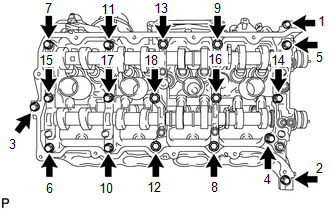
(d) Remove the 2 bolts. Then with the No. 1 and No. 2 chains still connected to the gears, remove the camshaft timing gear, camshaft timing exhaust gear and crankshaft timing sprocket LH. (e) Remove the No. 1 and No. 2 chains from the gears. 7. REMOVE NO. 3 CHAIN TENSIONER ASSEMBLY 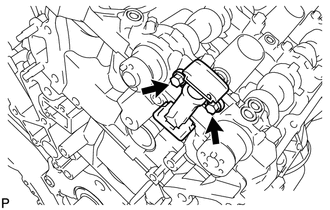 (a) Remove the 2 bolts and chain tensioner. 8. REMOVE CAMSHAFT BEARING CAP LH 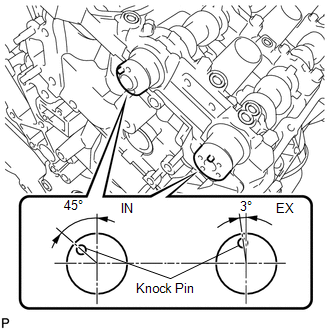 (a) Make sure that the knock pin of the camshaft is positioned as shown in the illustration.
(d) Remove the 6 bearing caps. HINT: Arrange the removed parts in the correct order. (e) Remove the No. 3 and No. 4 camshafts. 9. REMOVE CAMSHAFT HOUSING SUB-ASSEMBLY LH
|
Toyota Tundra Service Manual > Condenser: Removal
REMOVAL PROCEDURE 1. RECOVER REFRIGERANT FROM REFRIGERATION SYSTEM (a) for HFC-134a(R134a): Click here (b) for HFO-1234yf(R1234yf): Click here 2. PRECAUTION NOTICE: After turning the ignition switch off, waiting time may be required before disconnecting the cable from the battery terminal. Therefore ...

 ).
).