REMOVAL PROCEDURE 1. PRECAUTION NOTICE: After
turning the ignition switch off, waiting time may be required before
disconnecting the cable from the battery terminal. Therefore, make sure
to read the disconnecting the cable from the battery terminal notice
before proceeding with work (See page 2. DISCHARGE FUEL SYSTEM PRESSURE CAUTION:
(a) Disconnect the cable from the negative (-) battery terminal. (b) Disconnect the fuel pump ECU connector (See page
(c) Connect the cable to the negative (-) battery terminal. (d) Start the engine. After the engine has stopped on its own, turn the ignition switch off. HINT: DTC P0171/0174 (system too lean) may be set. (e) Crank the engine again, and then check that the engine does not start. (f) Loosen the fuel tank cap, and then discharge the pressure in the fuel tank completely. (g) Connect the fuel pump ECU connector (See page
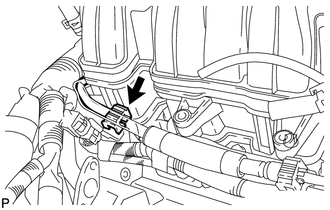
3. DISCONNECT CABLE FROM NEGATIVE BATTERY TERMINAL 4. REMOVE EGR VALVE BRACKET (See page 5. DISCONNECT NO. 2 FUEL TUBE SUB-ASSEMBLY
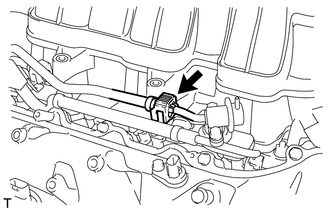
6. DISCONNECT FUEL TUBE SUB-ASSEMBLY
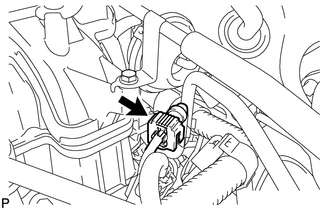
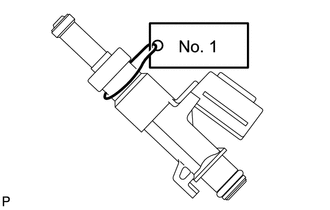
7. DISCONNECT NO. 1 FUEL PIPE SUB-ASSEMBLY
(b) Disconnect the No. 1 fuel pipe sub-assembly from the fuel delivery pipe sub-assembly LH (for Quick Type B) (See page
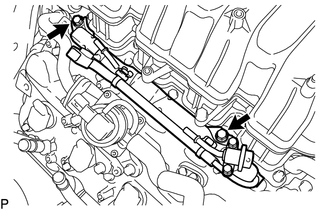
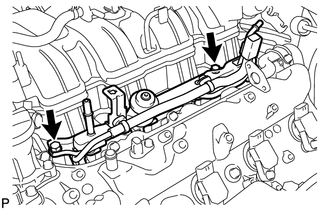
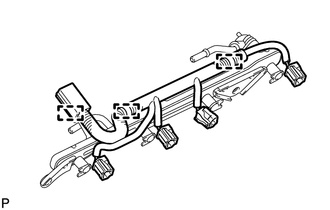
8. REMOVE FUEL DELIVERY PIPE SUB-ASSEMBLY RH (a) Disconnect the No. 6 wire harness connector.
(c) Remove the 2 delivery pipe spacers and 4 insulators from the cylinder head sub-assembly RH. 9. REMOVE FUEL DELIVERY PIPE SUB-ASSEMBLY LH (a) Disconnect the No. 7 wire harness connector.
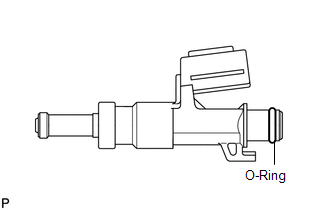
(c) Remove the 2 delivery pipe spacers and 4 insulators from the cylinder head sub-assembly LH. 10. REMOVE FUEL INJECTOR ASSEMBLY (a) Remove the fuel injector assembly from the fuel delivery pipe sub-assembly, and then disconnect the injector connector. 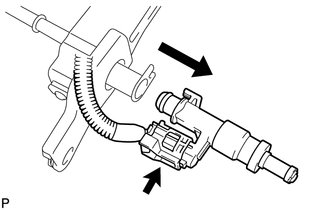
 NOTICE: For reinstallation, attach a tag or label to the injector shaft.
|
Toyota Tundra Service Manual > Audio / Video: Floor Speaker(for Crewmax)
ComponentsCOMPONENTS ILLUSTRATION InspectionINSPECTION PROCEDURE 1. INSPECT NO. 1 BOX SPEAKER ASSEMBLY (a) Measure the resistance according to the value(s) in the table below. Standard resistance: Tester Connection Condition Specified Condition 1 - 2 Always 1.6 to 2.4 Ω If the result is not as spe ...