REMOVAL PROCEDURE 1. PRECAUTION NOTICE: After
turning the ignition switch off, waiting time may be required before
disconnecting the cable from the battery terminal. Therefore, make sure
to read the disconnecting the cable from the battery terminal notice
before proceeding with work (See page 2. DISCONNECT CABLE FROM NEGATIVE BATTERY TERMINAL NOTICE: When disconnecting the cable, some systems need to be initialized after the cable is reconnected (See page
3. REMOVE NO. 1 ENGINE UNDER COVER 4. DRAIN AUTOMATIC TRANSMISSION FLUID 5. DRAIN ENGINE COOLANT
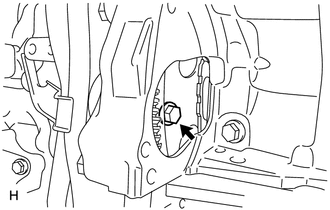
6. REMOVE PROPELLER SHAFT ASSEMBLY (See page 7. REMOVE FRONT EXHAUST PIPE ASSEMBLY (See page 8. DISCONNECT TRANSMISSION CONTROL CABLE ASSEMBLY 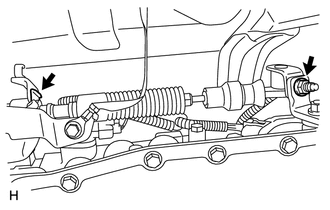 (a) Remove the nut and clip, and disconnect the transmission control cable. 9. REMOVE STARTER ASSEMBLY (See page 10. REMOVE DRIVE PLATE AND TORQUE CONVERTER CLUTCH SETTING BOLT 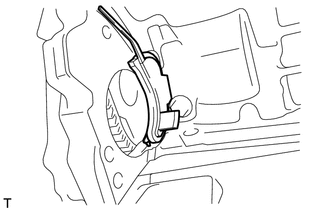 (a) Remove the flywheel housing side cover.
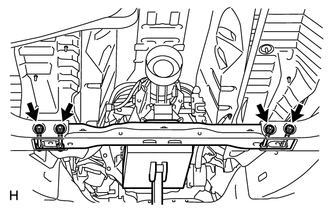
11. SUPPORT AUTOMATIC TRANSMISSION ASSEMBLY 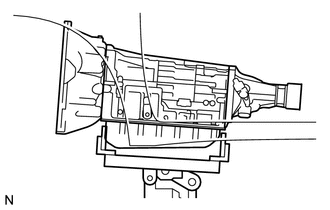 (a) Support the transmission with a transmission jack. Lift the transmission slightly from the crossmember. 12. REMOVE NO. 3 FRAME CROSSMEMBER SUB-ASSEMBLY 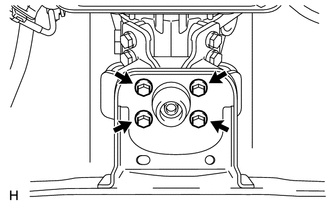 (a) Remove the 4 bolts of the rear engine mounting insulator.
13. REMOVE REAR NO. 1 ENGINE MOUNTING INSULATOR 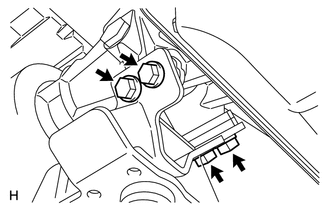 (a) Remove the 4 bolts and rear engine mounting insulator from the transmission. 14. DISCONNECT WIRE HARNESS AND CONNECTOR 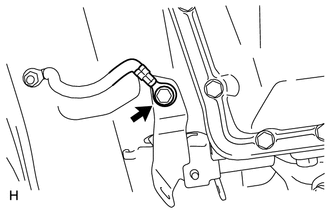 (a) Remove the bolt and disconnect the ground cable.
(c) Disconnect the park/neutral position switch connector, transmission wire connector and 2 speed sensor connectors. 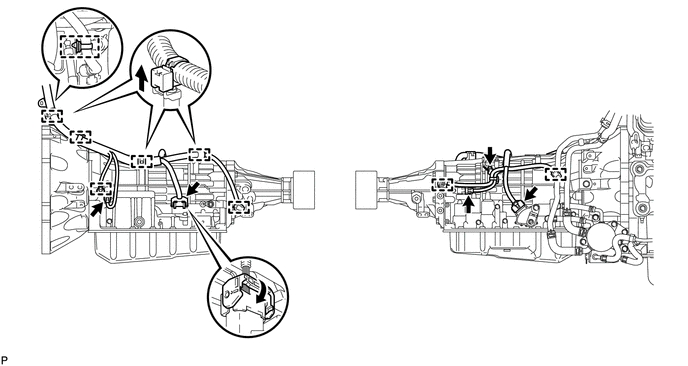 HINT: Detach the claw, press down the lever, and then disconnect the transmission wire connector. (d) Detach the 4 connector clamps and 5 harness clamps. (e) Remove the bolt, disconnect the harness clamp and wire harness. 15. DISCONNECT WATER BY-PASS PIPE 16. REMOVE TRANSMISSION OIL COOLER ASSEMBLY
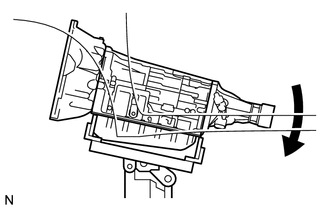
17. REMOVE AUTOMATIC TRANSMISSION ASSEMBLY 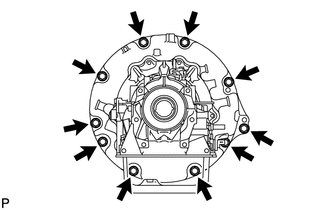 (a) Remove the 10 bolts and transmission. NOTICE: Do not use excess force when prying the transmission assembly. 18. REMOVE HARNESS CLAMP BRACKET 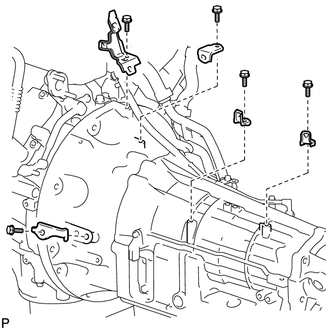 (a) Remove the 5 bolts and 5 brackets. 19. REMOVE TRANSMISSION CONTROL CABLE BRACKET 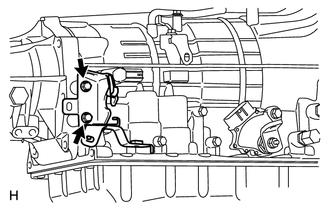 (a) Remove the 2 bolts and bracket. 20. REMOVE TORQUE CONVERTER ASSEMBLY (a) Remove the torque converter assembly from the automatic transmission assembly. NOTICE: Remove the torque converter assembly from the input shaft horizontally. 21. INSPECT TORQUE CONVERTER CLUTCH ASSEMBLY (See page
|
Toyota Tundra Service Manual > Maintenance: Outside Vehicle
General MaintenanceGENERAL MAINTENANCE CAUTION / NOTICE / HINT Performing the following maintenance checks on the vehicle is the owner's responsibility. The owner may perform the maintenance or take the vehicle to a service center. Check the parts of the vehicle described below on a daily basis. In ...