Customizable features
Your vehicle includes a variety of electronic features that can be
personalized to your preferences. Programming these preferences
requires specialized equipment and may be performed by
your Toyota dealer.
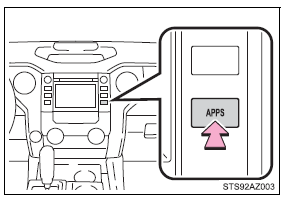
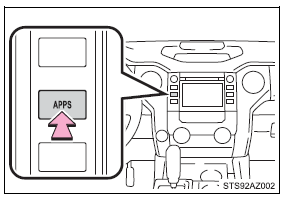
Customizing vehicle features ■ Changing by using the multimedia system 1. Press the "SETUP" or "APPS" button. Entune Audio
Entune Audio Plus
Entune Premium Audio
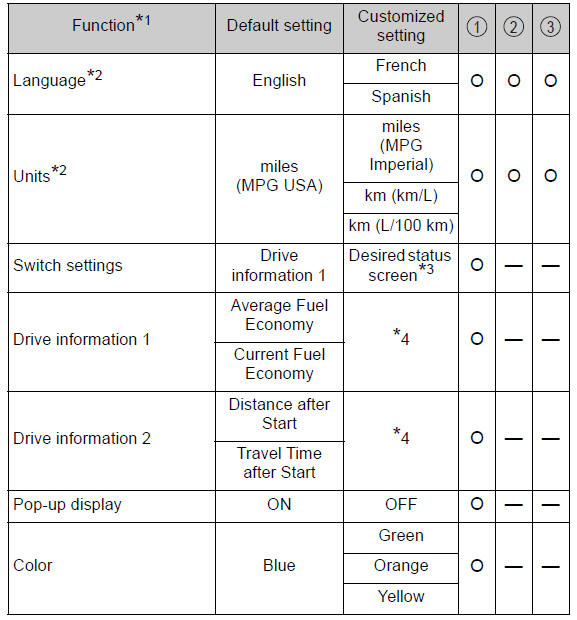
2. Entune Audio Plus or Entune Premium Audio: Select "Setup" on the "Apps" screen. 3. Select "Vehicle" on the "Setup" screen. 4. Select "Vehicle Customization" on the "Vehicle Settings" screen. "Vehicle Customization" screen will appear. 5. Choose a category displayed on the screen to display the settings. 6. Select the setting to be changed. Change each setting. For items that can be enabled/disabled, and for items with an operating time that can be changed, select "On" or "Off", or select the desired operating time. For items with sensor sensitivity that can be changed, select "+" or "-" to choose the desired level, then select "OK". 7. A message indicating that the settings are being saved will appear. Do not perform any other operations while this message is displayed. Customizable features Some function settings are changed simultaneously with other functions being customized. Contact your Toyota dealer for further details.
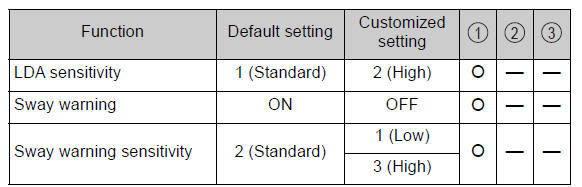
Definition of symbols: O = Available, - = Not available ■ Gauges, meters and multi-information display
*1: For details about each function ■ LDA (Lane Departure Alert)*
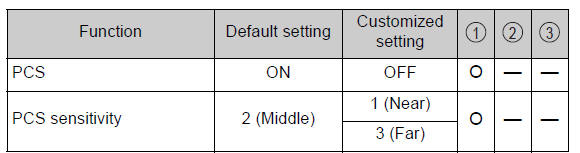
*: If equipped ■ PCS (Pre-Collision System)*
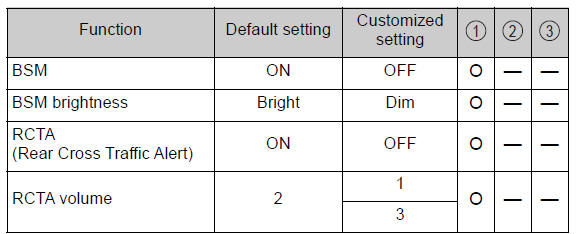
*: If equipped ■ BSM (Blind Spot Monitor)*
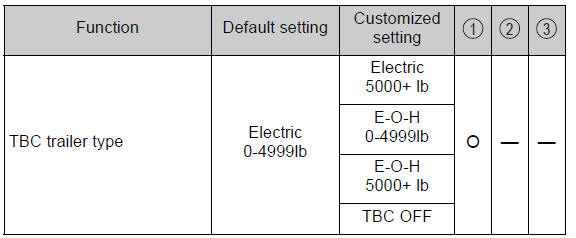
*: If equipped ■ Trailer brake controller*
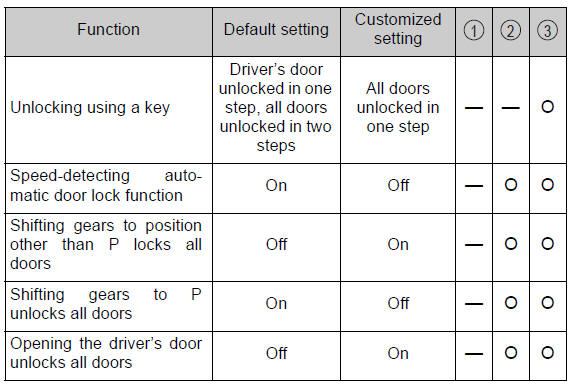
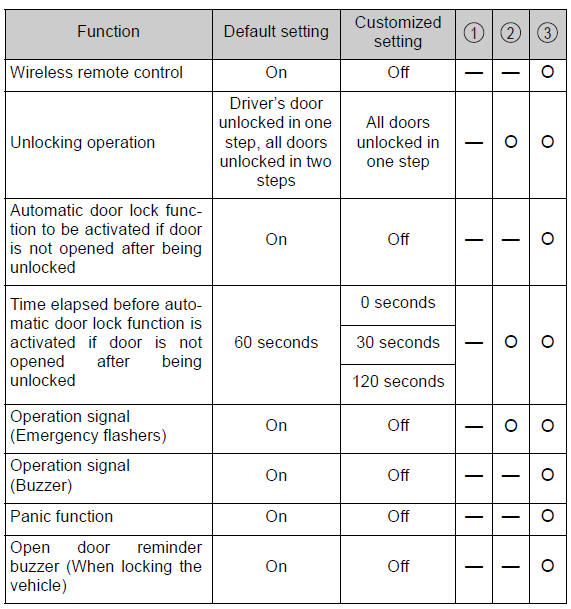
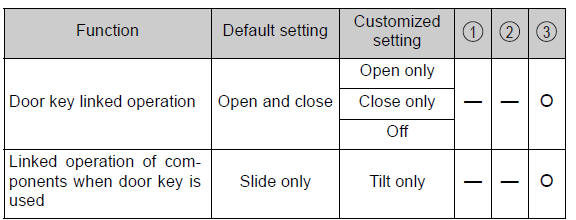
*: If equipped ■ Door lock*
*: If equipped ■ Wireless remote control*
*: If equipped ■ Moon roof*
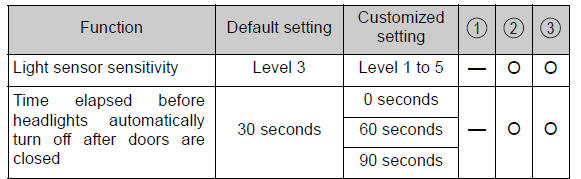
*: If equipped ■ Automatic light off system*
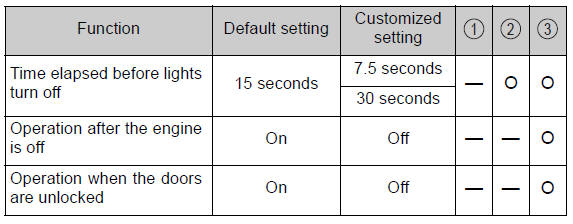
*: If equipped ■ Illumination
■ Seat Belt Reminder Buzzer
■Vehicle customization
Items to initialize
The following items must be initialized for normal system operation
after such cases as the battery being reconnected, or maintenance
being performed on the vehicle:
|
Toyota Tundra Service Manual > Radiator: On-vehicle Inspection
ON-VEHICLE INSPECTION PROCEDURE 1. INSPECT RADIATOR CAP SUB-ASSEMBLY CAUTION: To avoid the danger of being burned, do not remove the radiator cap while the engine and radiator are still hot, as fluid and steam can be blown out under pressure. (a) Measure the valve opening pressure. (1) If there are ...