Components COMPONENTS ILLUSTRATION 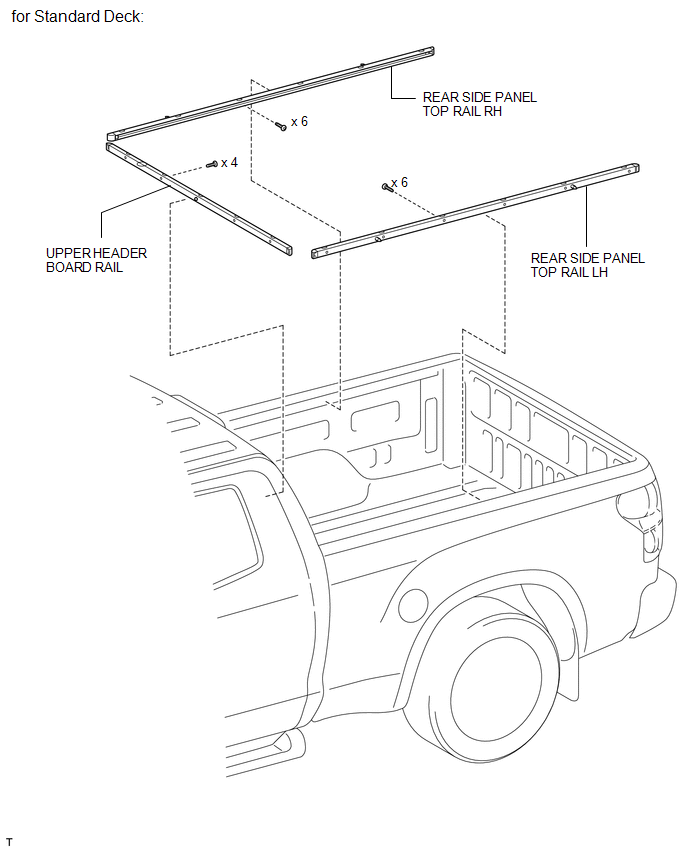
ILLUSTRATION 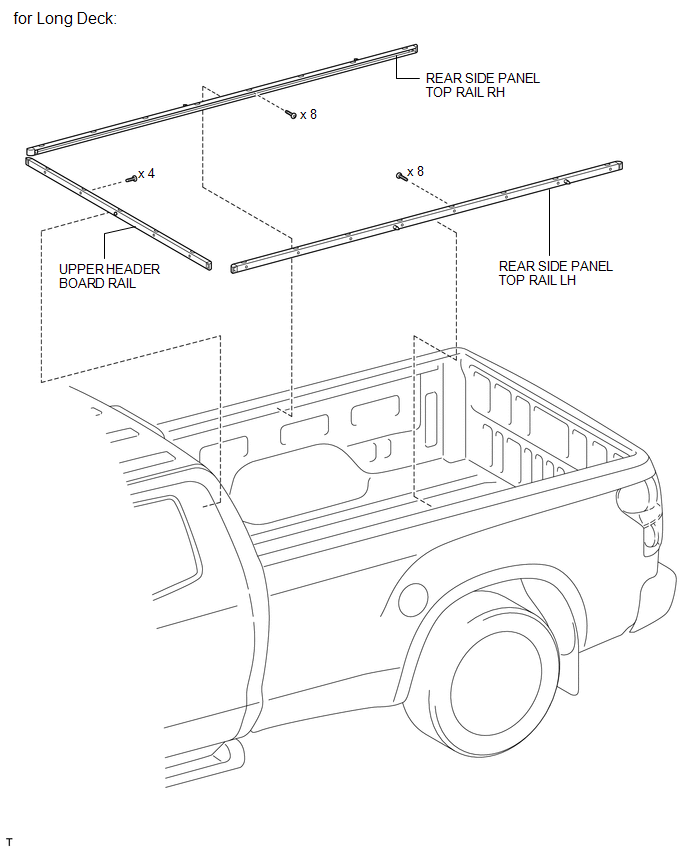
ILLUSTRATION 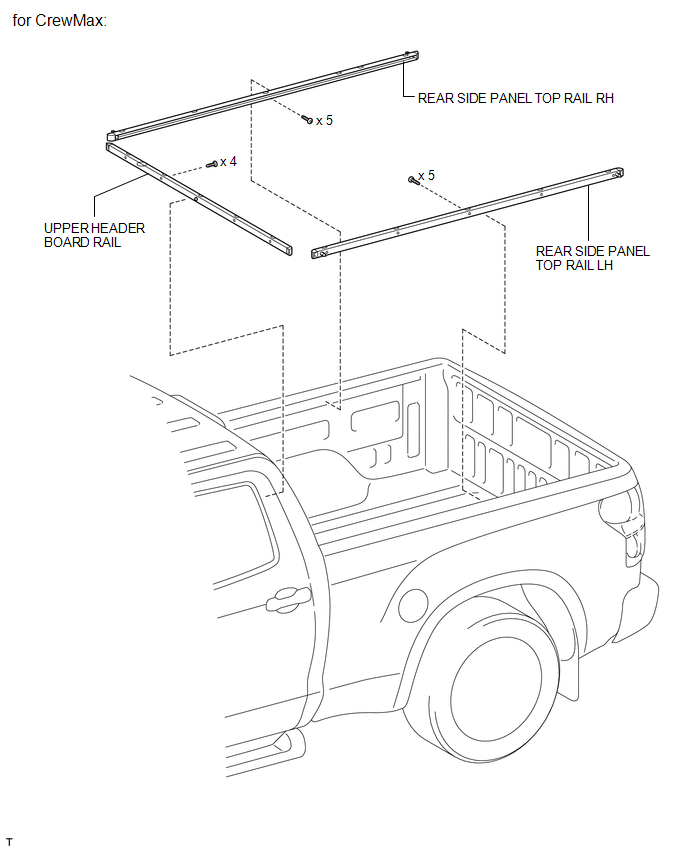
Installation INSTALLATION PROCEDURE 1. INSTALL UPPER HEADER BOARD RAIL 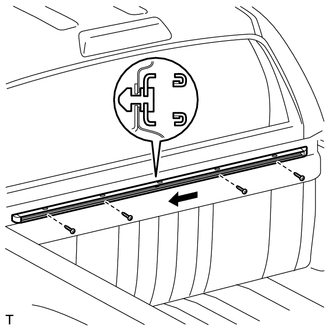
(a) Slide the rail in the direction shown in the illustration to install it. (b) Using a T30 "TORX" socket, install the 4 bolts. 2. INSTALL REAR SIDE PANEL TOP RAIL LH (a) for Standard Deck: Install the rear side panel top rail. (1) Attach the 2 clips to install the rail. (2) Using a T30 "TORX" socket, install the 6 bolts. 
(b) for Long Deck: Install the rear side panel top rail. (1) Attach the 2 clips to install the rail. (2) Using a T30 "TORX" socket, install the 8 bolts. 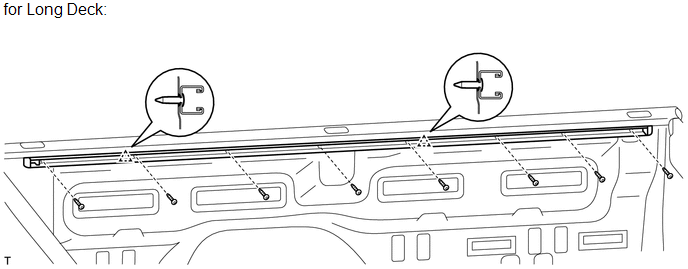
(c) for CrewMax: Install the rear side panel top rail. (1) Attach the 2 clips to install the rail. (2) Using a T30 "TORX" socket, install the 5 bolts. 
3. INSTALL REAR SIDE PANEL TOP RAIL RH HINT: Use the same procedures described for the LH side. Removal REMOVAL PROCEDURE 1. REMOVE REAR SIDE PANEL TOP RAIL LH (a) for Standard Deck: Remove the rear side panel top rail. (1) Using a T30 "TORX" socket, remove the 6 bolts. (2) Detach the 2 clips and remove the rail. 
(b) for Long Deck: Remove the rear side panel top rail. (1) Using a T30 "TORX" socket, remove the 8 bolts. (2) Detach the 2 clips and remove the rail. 
(c) for CrewMax: Remove the rear side panel top rail. (1) Using a T30 "TORX" socket, remove the 5 bolts. (2) Detach the 2 clips and remove the rail. 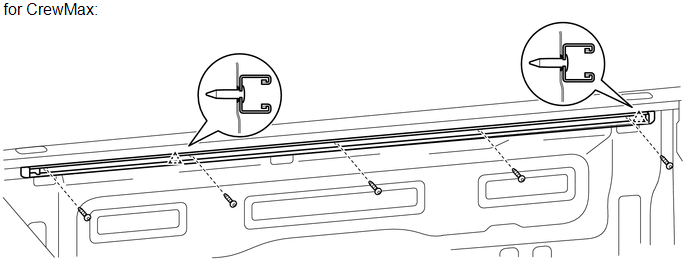
2. REMOVE REAR SIDE PANEL TOP RAIL RH HINT: Use the same procedures described for the LH side. 3. REMOVE UPPER HEADER BOARD RAIL 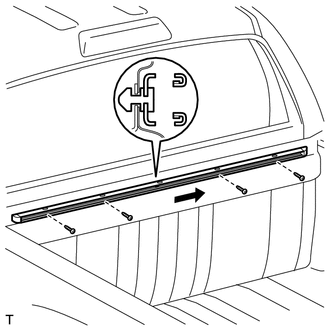
(a) Using a T30 "TORX" socket, remove the 4 bolts. (b) Slide the rail in the direction shown in the illustration to remove it. |
Toyota Tundra Service Manual > Heated Oxygen Sensor: Installation
INSTALLATION CAUTION / NOTICE / HINT HINT: Perform "Inspection After Repairs" after replacing the heated oxygen sensor (See page ). PROCEDURE 1. INSTALL HEATED OXYGEN SENSOR (for Bank 2 Sensor 2) HINT: Perform "Inspection After Repairs" after replacing the heated oxygen sensor (See page ). (a) Insta ...


