REMOVAL PROCEDURE 1. DISCHARGE FUEL SYSTEM PRESSURE 2. REMOVE EGR VALVE ASSEMBLY (See page
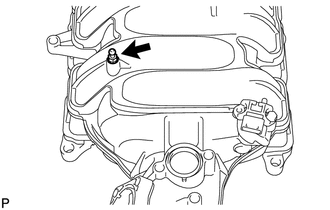
3. REMOVE FRONT WIPER MOTOR AND LINK ASSEMBLY (See page 4. REMOVE COWL TOP OUTER PANEL SUB-ASSEMBLY (a) Disconnect the washer hose and detach the 2 wire harness clamps. (b) Remove the 7 bolts and cowl top outer panel sub-assembly. 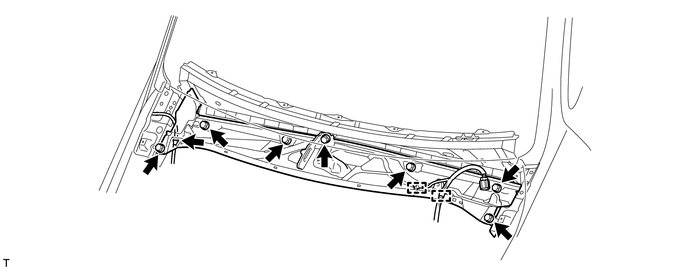 5. REMOVE VENTILATION HOSE ASSEMBLY
(b) Remove the bolt and ventilation hose assembly. 6. REMOVE AIR TUBE SUB-ASSEMBLY LH 7. REMOVE INTAKE MANIFOLD
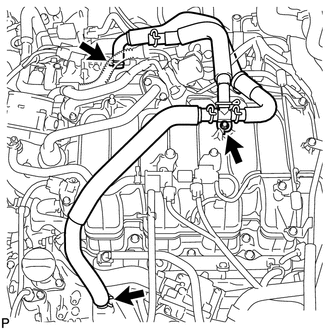
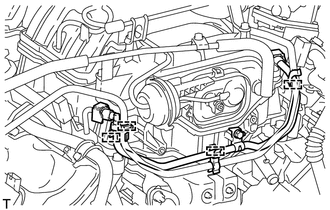
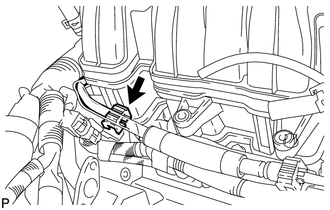
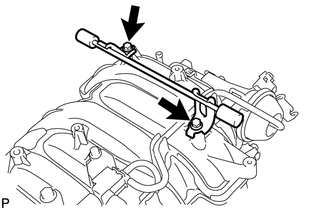
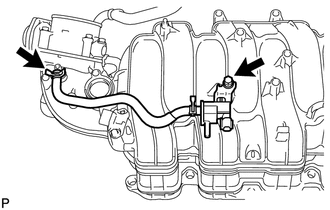
(b) Slide the clamp and disconnect the No. 4 water by-pass hose from the front water by-pass joint. (c) Slide the clamp and disconnect the ventilation hose from the intake manifold.
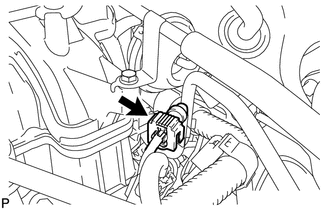
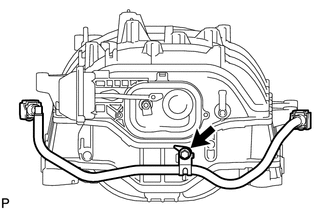
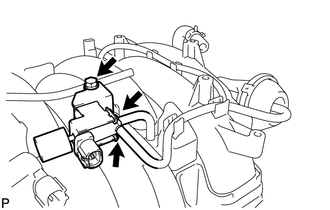
(e) Slide the clamp and disconnect the purge line hose from the purge VSV.
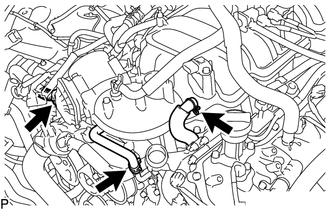
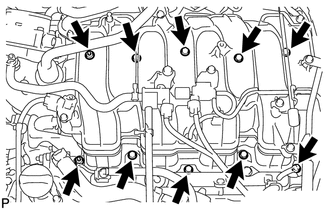
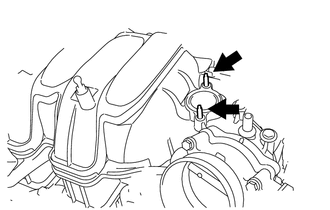
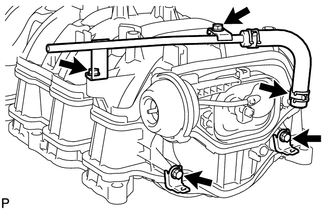
(h) Detach the 3 engine wire harness clamps from the 3 wire harness brackets.
8. REMOVE FUEL TUBE SUB-ASSEMBLY
9. REMOVE V-BANK COVER BRACKET
10. REMOVE V-BANK COVER BOLT
11. REMOVE STUD BOLT
12. REMOVE VACUUM SWITCHING VALVE ASSEMBLY (for ACIS)
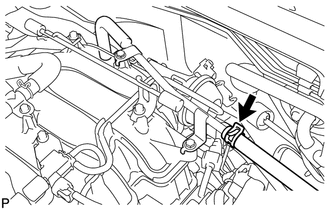
(b) Remove the bolt and vacuum switching valve assembly. 13. REMOVE PURGE VSV
(b) Remove the bolt and purge VSV. 14. REMOVE UNION TO CONNECTOR TUBE HOSE ASSEMBLY
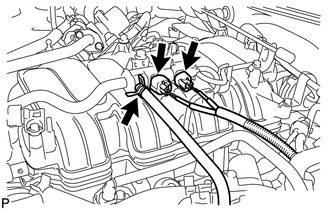
(b) Remove the 2 bolts and union to connector tube hose assembly. (c) Remove the 2 bolts and 2 wire harness brackets. 15. REMOVE MANIFOLD ABSOLUTE PRESSURE SENSOR
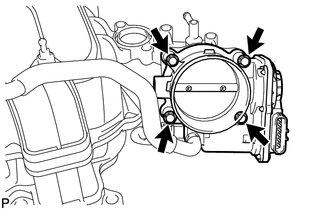
16. REMOVE THROTTLE BODY ASSEMBLY
|
Toyota Tundra Service Manual > Power Window Control System(w/ Jam Protection Function): Fail-safe Chart
FAIL-SAFE CHART 1. POWER WINDOW OPERATION IN FAIL-SAFE MODE HINT: If the pulse sensor built into the power window regulator motor malfunctions, the power window control system enters fail-safe mode. (a) The power window control system prohibits the following power window operation when the pulse sen ...