REASSEMBLY PROCEDURE 1. INSTALL SHIFT SOLENOID VALVE S3 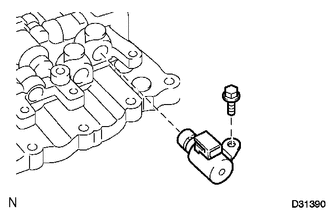 (a) Install the shift solenoid valve with the bolt. Torque: 10 N·m {102 kgf·cm, 7 ft·lbf} 2. INSTALL SHIFT SOLENOID VALVE S2 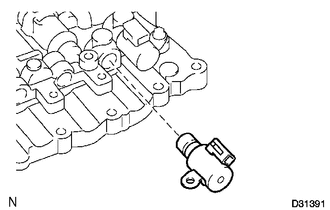 3. INSTALL SHIFT SOLENOID VALVE S4 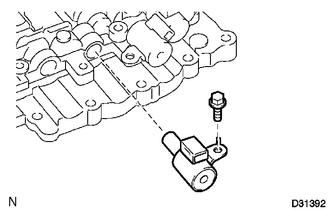 (a) Install the shift solenoid valve with the bolt. Torque: 10 N·m {102 kgf·cm, 7 ft·lbf} 4. INSTALL SHIFT SOLENOID VALVE S1 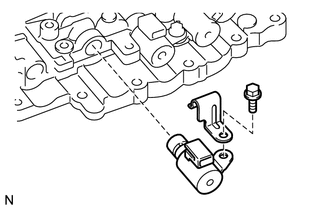 (a) Install the shift solenoid valve and valve body wire harness clamp with the bolt. Torque: 10 N·m {102 kgf·cm, 7 ft·lbf} 5. INSTALL SHIFT SOLENOID VALVE SR 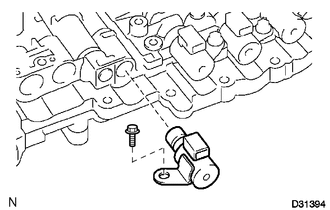 (a) Install the shift solenoid valve with the bolt. Torque: 10 N·m {102 kgf·cm, 7 ft·lbf} 6. INSTALL SHIFT SOLENOID VALVE SL1 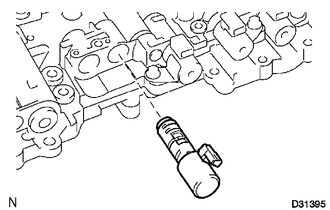 7. INSTALL SHIFT SOLENOID VALVE SLT 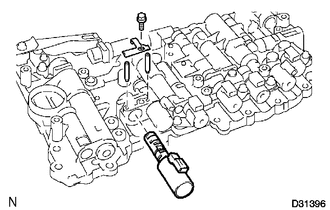 (a) Install the shift solenoid valve. (b) Install the 2 straight pins and lock plate with the bolt. Torque: 6.4 N·m {65 kgf·cm, 57 in·lbf} 8. INSTALL SHIFT SOLENOID VALVE SLU 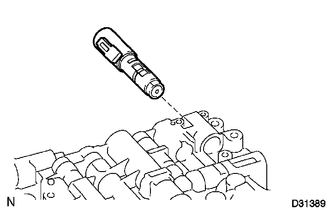 9. INSTALL SHIFT SOLENOID VALVE SL2 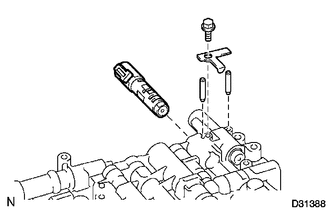 (a) Install the shift solenoid valve. (b) Install the 2 straight pins and lock plate with the bolt. Torque: 6.4 N·m {65 kgf·cm, 57 in·lbf} |
Toyota Tundra Service Manual > Exhaust Manifold: Installation
INSTALLATION CAUTION / NOTICE / HINT HINT: If an exhaust gas leak has been repaired, perform an inspection following the repair (See page ). PROCEDURE 1. INSTALL EXHAUST MANIFOLD SUB-ASSEMBLY RH (a) Install a new gasket to the cylinder head and a new gasket to the No. 3 air tube. HINT: Install the e ...


