You may replace the following bulbs by yourself. The difficulty
level of replacement varies depending on the bulb. If necessary
bulb replacement seems difficult to perform, contact your
Toyota dealer.
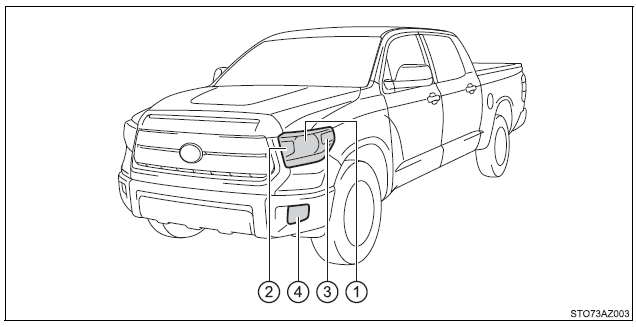
For more information about replacing other light bulbs, contact your Toyota dealer. Preparing for light bulb replacement Check the wattage of the light bulb to be replaced. Bulb locations ■ Front
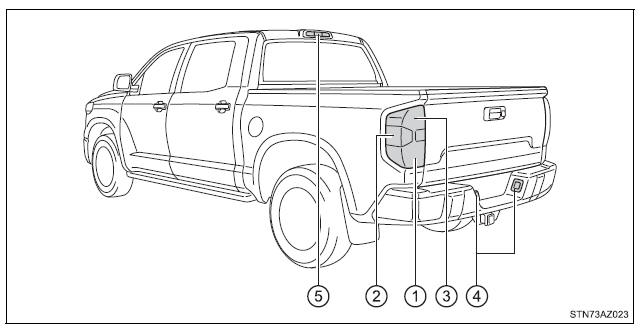
■ Rear
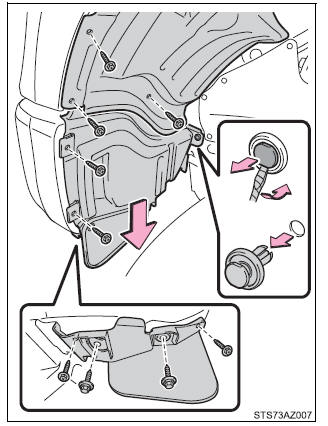
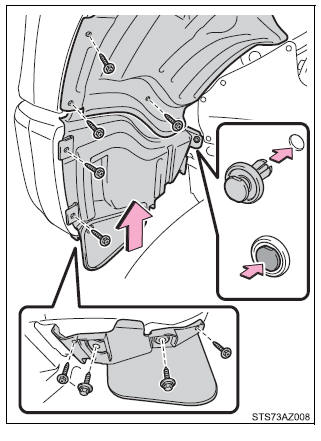
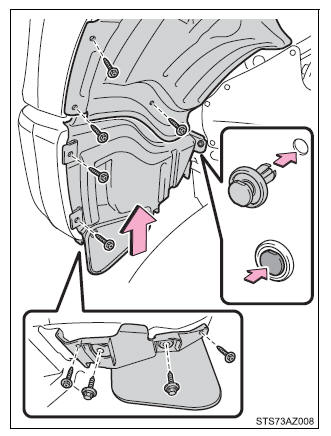
Replacing light bulbs ■ Headlights (bulb type) 1. To allow enough working space, turn the steering wheel to the opposite side of the bulb to be replaced. Remove the screws and fender liner clip, and remove the fender liner. Turn the steering wheel to the left when replacing the right side light bulb, and turn the steering wheel to the right when replacing the left side light bulb.
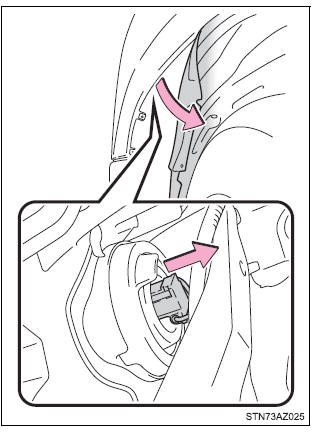
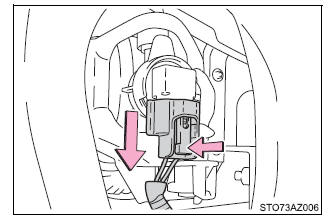
2. Open the fender liner and unplug the connector.
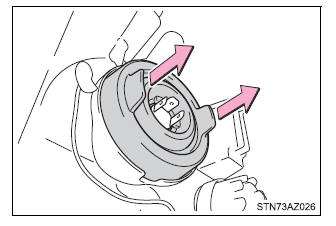
3. Remove the rubber cover.
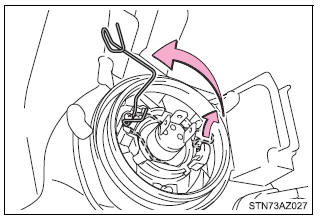
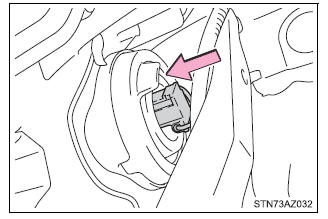
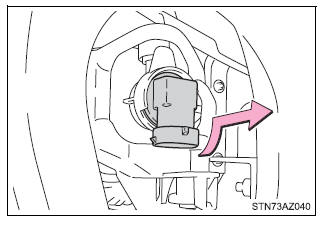
4. Release the bulb retaining spring.
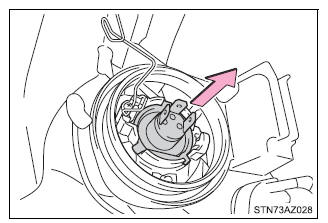
5. Remove the bulb.
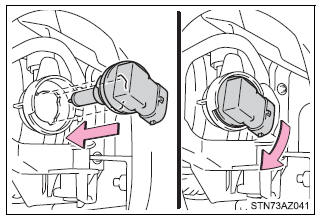
6. Set the new light bulb. To install a new bulb, align tabs of the bulb with the cutouts of the mounting hole.
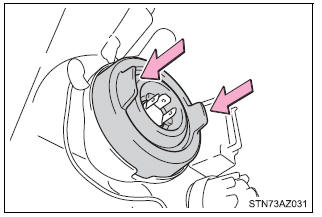
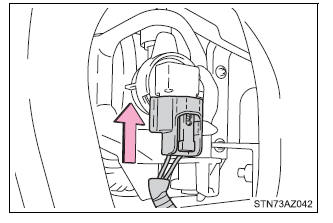
7. Install the bulb retaining spring.
8. Install the rubber cover. When installing the rubber cover
9. Install the connector.
10. Reinstall the fender liner and install the screws and clip.
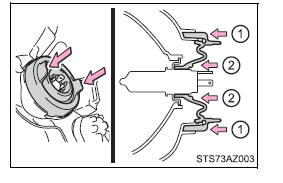
■ Front turn signal/parking lights (bulb type headlights) 1. Turn the bulb base counterclockwise.
2. Remove the light bulb.
■ Front turn signal lights (LED type headlights) 1. Turn the bulb base counterclockwise.
2. Remove the light bulb.
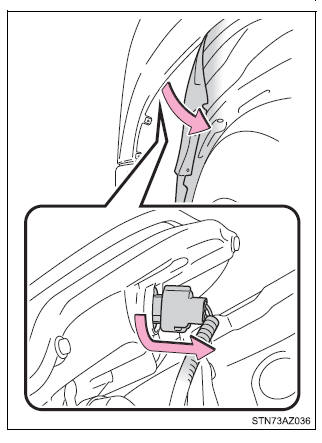
■ Front side marker lights 1. To allow enough working space, turn the steering wheel to the opposite side of the bulb to be replaced. Remove the screws and fender liner clip, and remove the fender liner. Turn the steering wheel to the left when replacing the right side light bulb, and turn the steering wheel to the right when replacing the left side light bulb.
2. Open the fender liner and turn the bulb base counterclockwise.
3. Remove the light bulb.
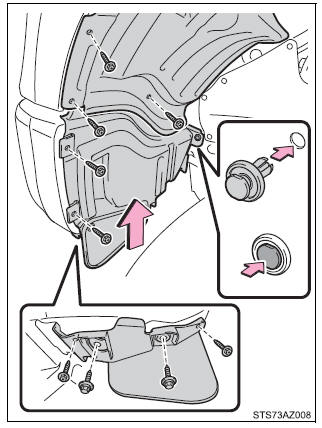
4. Reinstall the fender liner and install the screws and clip.
■ Front fog lights-bulb type (if equipped) 1. To allow enough working space, turn the steering wheel to the opposite side of the bulb to be replaced. Remove the screws and fender liner clip, and remove the fender liner. Turn the steering wheel to the left when replacing the right side light bulb, and turn the steering wheel to the right when replacing the left side light bulb.
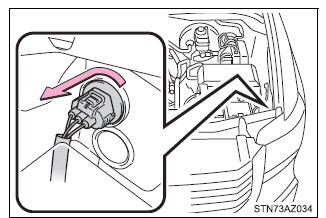
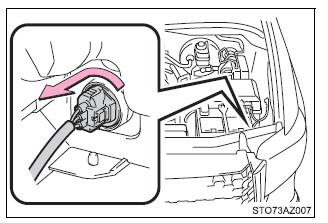
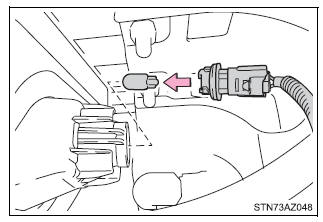
2. Unplug the connector while depressing the lock release.
3. Turn the bulb counterclockwise.
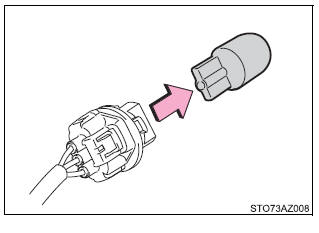
4. Set the new light bulb. Align the 3 tabs on the light bulb with the mounting, and insert. Turn it clockwise to set.
5. Install the connector. Shake the bulb base gently to check that it is not loose, turn the fog lights, on once and visually confirm that no light is leaking through the mounting.
6. Reinstall the fender liner and install the screws and clip.
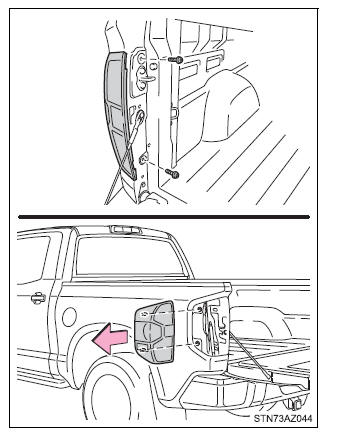
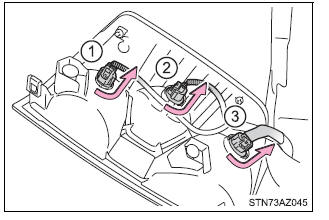
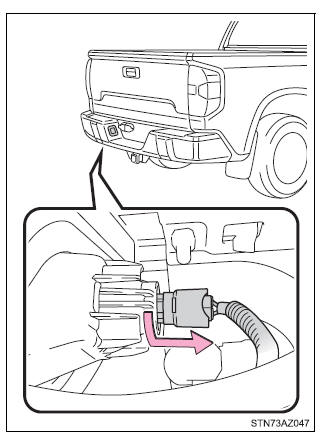
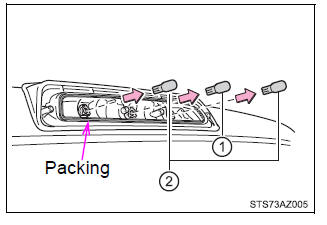
■ Stop/tail and rear side marker lights, back-up lights and rear turn signal lights 1. Remove the bolts and rear combination assembly.
2. Turn the bulb bases counterclockwise.
3. Remove the light bulb.
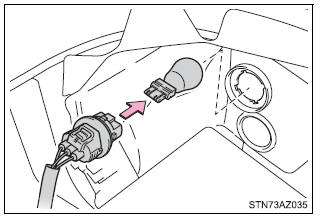
■ License plate lights 1. Turn the bulb base counterclockwise.
2. Remove the light bulb.
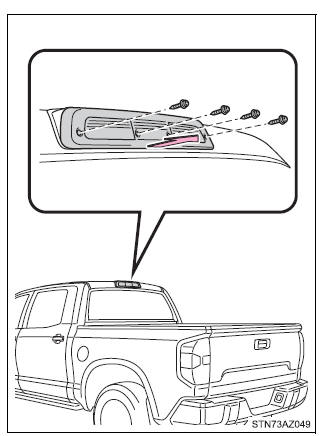
■ High mounted stoplight and cargo lamps 1. Remove the screws and cover.
2. Remove the light bulb.
When reinstalling the outer lens, confirm that the packing is properly seated in the groove on the housing.
■ Replacing the following bulbs If any of the lights listed below has burnt out, have it replaced by your Toyota dealer.
■When installing the rubber cover of the headlight Ensure the rubber cover is securely attached.
■When replacing the light bulbs Confirm that they are properly engaged with the bulb base and that there is no light leakage. ■LED Lights The headlights (LED type), front fog lights (LED type), parking lights (LED type), daytime running light and side turn signal lights consist of a number of LEDs. If any of the LEDs burn out, take your vehicle to your Toyota dealer to have the light replaced. ■Condensation build-up on the inside of the lens Temporary condensation build-up on the inside of the headlight lens does not indicate a malfunction. Contact your Toyota dealer for more information in the following situations:
|
Toyota Tundra Service Manual > Camshaft(for Bank 1): Removal
REMOVAL PROCEDURE 1. REMOVE TIMING CHAIN COVER SUB-ASSEMBLY (a) Remove the timing chain cover (See page ). 2. SET NO. 1 CYLINDER TO TDC / COMPRESSION 3. REMOVE NO. 1 CHAIN TENSIONER ASSEMBLY LH (a) Move the stopper plate upward to release the lock, and push the plunger deep into the tensioner. (b) M ...