Components COMPONENTS ILLUSTRATION 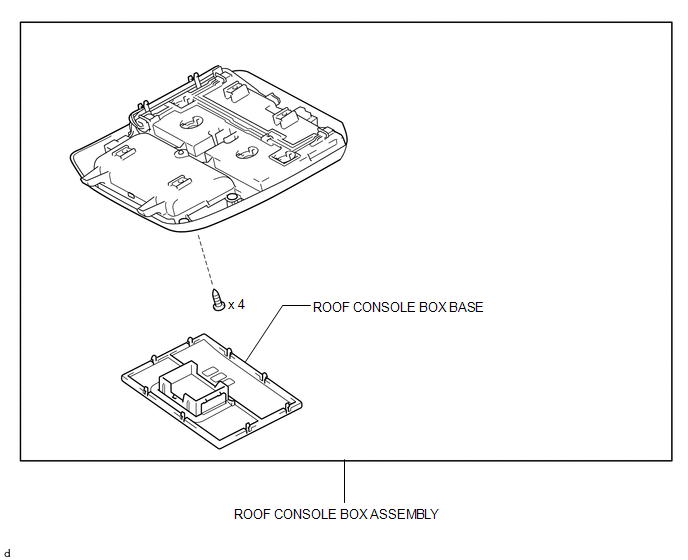
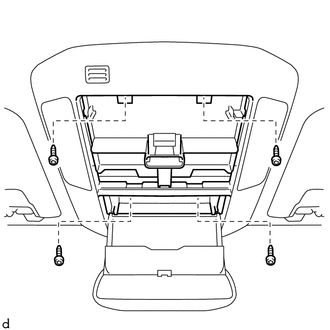
Installation INSTALLATION PROCEDURE 1. INSTALL ROOF CONSOLE BOX ASSEMBLY (a) Connect the connector. (b) Using a T20 "TORX" driver, install the roof console box assembly with the 4 "TORX" screws.
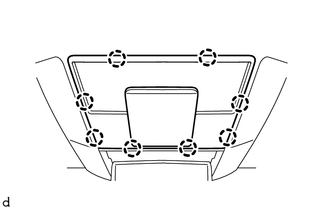
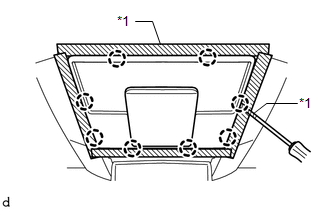
Removal REMOVAL PROCEDURE 1. REMOVE ROOF CONSOLE BOX ASSEMBLY
(b) Using a screwdriver, detach the 8 claws and remove the roof console box base. HINT: Tape the screwdriver tip before use.
(d) Disconnect the connector. |
Toyota Tundra Owners Manual > Adjusting the seats: Head restraints
Head restraints are provided for all seats. Front seats Up Pull the head restraints up. Down Push the head restraint down while pressing the lock release button. Rear seats ■ Center seat Up Pull the head restraints up. Down Push the head restraint down while pressing the lock release button. Doub ...