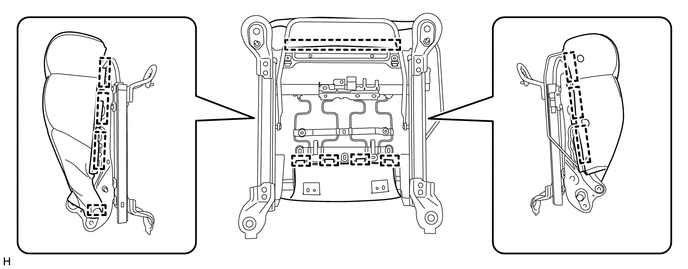
DISASSEMBLY CAUTION / NOTICE / HINT CAUTION: Wear protective gloves. Sharp areas on the parts may injure your hands. HINT:
PROCEDURE 1. REMOVE RECLINING ADJUSTER RELEASE HANDLE LH (a) Raise the reclining adjuster release handle LH to reveal the claw.
2. REMOVE FRONT SEAT CUSHION SHIELD LH
(c) Detach the guide, clip and 2 claws as indicated by the arrows in the order shown in the illustration to remove the front seat cushion shield LH. 3. REMOVE FRONT SEAT INNER BELT ASSEMBLY LH (for Driver Side)
4. REMOVE FRONT SEAT INNER BELT ASSEMBLY RH (for Front Passenger Side)
5. REMOVE SEAT POSITION AIRBAG SENSOR
6. REMOVE FRONT INNER NO. 1 SEAT CUSHION SHIELD LH
(b) Detach the guide in the direction indicated by the arrow shown in the illustration to remove the front inner No. 1 seat cushion shield LH. 7. REMOVE SEPARATE TYPE FRONT SEATBACK ASSEMBLY
8. REMOVE SEPARATE TYPE FRONT SEATBACK COVER
(e) Pull out the 4 straps of the separate type front seatback cover from the separate type front seatback pad.
(i) Remove the separate type front seatback cover from the separate type front seatback pad. 9. REMOVE SEPARATE TYPE FRONT SEATBACK PAD (a) Remove the separate type front seatback pad from the front seatback frame sub-assembly LH. 10. REMOVE FRONT SEAT AIRBAG ASSEMBLY LH
11. REMOVE RECLINING CONTROL LEVER LH
12. REMOVE FRONT SEATBACK SPRING ASSEMBLY
13. REMOVE FRONT SEATBACK HOOK (a) Remove the 2 front seatback hooks from the front seatback spring assembly. 14. REMOVE SEPARATE TYPE FRONT SEAT CUSHION COVER WITH PAD (a) Detach the 12 hooks and remove the separate type front seat cushion cover with pad. 
15. REMOVE SEPARATE TYPE FRONT SEAT CUSHION COVER (a) Detach the 2 fasteners.
16. REMOVE OCCUPANT CLASSIFICATION ECU (for Front Passenger Side)
17. REMOVE FRONT SEAT CUSHION WIRE RH (for Front Passenger Side)
(b) Detach the connector clamp and 5 wire harness clamps to remove the front seat cushion wire RH. Text in Illustration
18. REMOVE SEPARATE TYPE FRONT SEAT CUSHION SPRING ASSEMBLY
19. REMOVE FRONT LOWER SEAT CUSHION SHIELD LH
20. REMOVE FRONT LOWER SEAT CUSHION SHIELD RH HINT: Use the same procedure described for the LH side. 21. REMOVE UPPER SEAT TRACK COVER
22. REMOVE UPPER NO. 4 SEAT TRACK COVER
23. REMOVE UPPER NO. 3 SEAT TRACK COVER HINT: Use the same procedure described for the upper No. 4 seat track cover. 24. REMOVE FRONT SEAT CUSHION SHIELD WIRE LH
25. REMOVE FRONT SEAT CUSHION SHIELD WIRE RH (for Front Passenger Side) HINT: Use the same procedure described for the LH side. |
Toyota Tundra Service Manual > Oil Pump: Disassembly
DISASSEMBLY PROCEDURE 1. REMOVE OIL PUMP COVER (a) Remove the 13 bolts, oil pump cover, drive rotor and driven rotor. 2. REMOVE OIL PUMP RELIEF VALVE (a) Remove the relief valve plug. (b) Remove the valve spring and oil pump relief valve. ...