REASSEMBLY CAUTION / NOTICE / HINT CAUTION: Wear protective gloves. Sharp areas on the seat frame and adjuster may injure your hands. HINT:
PROCEDURE 1. INSTALL FRONT SEAT CUSHION SHIELD WIRE LH (a) Install the front seat cushion shield wire LH with the 2 screws. 2. INSTALL FRONT SEAT CUSHION SHIELD WIRE RH (for Front Passenger Side) HINT: Use the same procedure described for the LH side. 3. INSTALL UPPER NO. 4 SEAT TRACK COVER (a) Attach the 2 claws to install the upper No. 4 seat track cover. 4. INSTALL UPPER NO. 3 SEAT TRACK COVER HINT: Use the same procedure described for the upper No. 4 seat track cover. 5. INSTALL UPPER SEAT TRACK COVER (a) Attach the 2 claws to install the upper seat track cover. HINT: Use the same procedure for all upper seat track covers. 6. INSTALL FRONT LOWER SEAT CUSHION SHIELD LH (a) Attach the 2 claws to install the front lower seat cushion shield LH. 7. INSTALL FRONT LOWER SEAT CUSHION SHIELD RH HINT: Use the same procedure described for the LH side. 8. INSTALL SEPARATE TYPE FRONT SEAT CUSHION SPRING ASSEMBLY (a) Attach the 4 hooks of the rear side to install the separate type front seat cushion spring assembly. (b) Attach the hook of the front side. 9. INSTALL FRONT SEAT CUSHION WIRE RH (for Front Passenger Side)
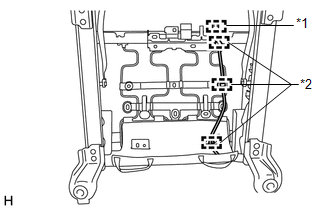
(b) Connect the 4 connectors. 10. INSTALL OCCUPANT CLASSIFICATION ECU (for Front Passenger Side)
11. INSTALL SEPARATE TYPE FRONT SEAT CUSHION COVER (a) Set the separate type front seat cushion cover in place.
(c) Attach the 2 fasteners. Text in Illustration
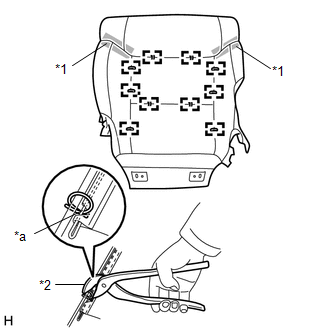
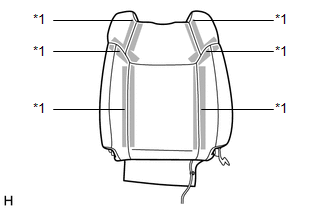
12. INSTALL SEPARATE TYPE FRONT SEAT CUSHION COVER WITH PAD (a) Attach the 12 hooks to install the separate type front seat cushion cover with pad. 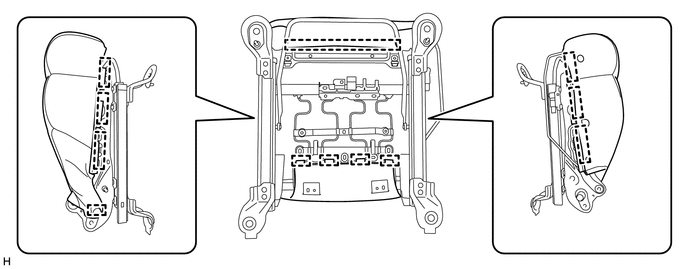
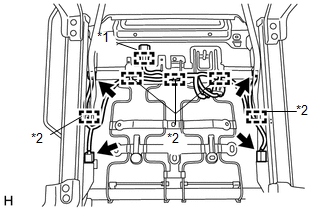
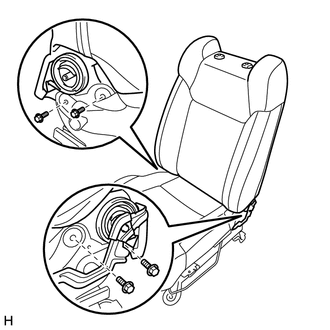
13. INSTALL FRONT SEATBACK HOOK (a) Install the 2 front seatback hooks to the front seatback spring assembly. 14. INSTALL FRONT SEATBACK SPRING ASSEMBLY (a) Attach the 2 guides and 2 clips to install the front seatback spring assembly. 15. INSTALL RECLINING CONTROL LEVER LH (a) Install the reclining control lever LH with the bolt. 16. INSTALL FRONT SEAT AIRBAG ASSEMBLY LH
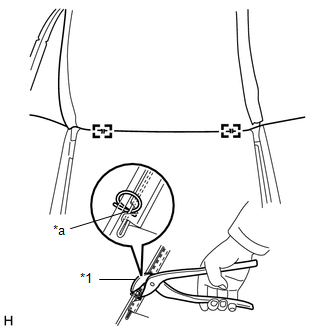
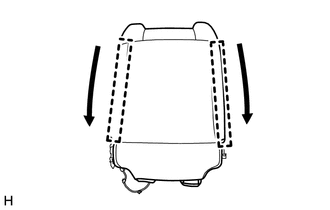
17. INSTALL SEPARATE TYPE FRONT SEATBACK PAD (a) Install the separate type front seatback pad to the front seatback frame sub-assembly LH. 18. INSTALL SEPARATE TYPE FRONT SEATBACK COVER (a) Set the separate type front seatback cover in place. (b) Attach the 4 claws to install the 2 front seat headrest supports.
(e) Pass the 4 straps of the separate type front seatback cover through the separate type front seatback pad. (f) Attach the 2 hooks. CAUTION:
(1) Slide each hook to attach them. (2) Install the 4 clips.
(h) Pass the wire harness through the separate type front seatback cover. (i) Attach the hook. 19. INSTALL SEPARATE TYPE FRONT SEATBACK ASSEMBLY (a) When reusing a bolt: (1) Clean the threads of the bolt with non-residue solvent. (2) Apply adhesive to the threads of the bolt. Adhesive: Toyota Genuine Adhesive 1324, Three Bond 1324 or equivalent.
20. INSTALL FRONT INNER NO. 1 SEAT CUSHION SHIELD LH
(b) Install the 2 screws. 21. INSTALL SEAT POSITION AIRBAG SENSOR
22. INSTALL FRONT SEAT INNER BELT ASSEMBLY LH (for Driver Side)
23. INSTALL FRONT SEAT INNER BELT ASSEMBLY RH (for Front Passenger Side)
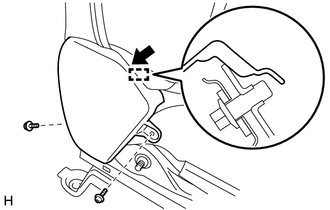
24. INSTALL FRONT SEAT CUSHION SHIELD LH
(b) Install the 3 screws. (c) Connect the 2 rubber bands. 25. INSTALL RECLINING ADJUSTER RELEASE HANDLE LH (a) Attach the claw to install the reclining adjuster release handle LH. |
Toyota Tundra Service Manual > Front Seat Side Airbag Assembly(for Manual Seat): Installation
INSTALLATION CAUTION / NOTICE / HINT CAUTION: Wear protective gloves. Sharp areas on the seat frame and adjuster may injure your hands. PROCEDURE 1. INSTALL FRONT SEAT AIRBAG ASSEMBLY LH CAUTION: The nuts must not be reused. Make sure that the front seat back main frame sub-assembly is not deformed. ...