REMOVAL PROCEDURE 1. DRAIN AUTOMATIC TRANSMISSION FLUID (a) Remove the drain plug and gasket, and drain the ATF. (b) Install a new gasket and the drain plug. Torque: 20 N·m {204 kgf·cm, 15 ft·lbf} 2. REMOVE AUTOMATIC TRANSMISSION OIL PAN SUB-ASSEMBLY 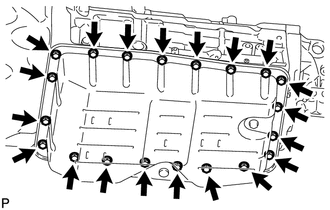 (a) Remove the 20 bolts, oil pan and gasket from the transmission. NOTICE: Some fluid will remain in the oil pan. Remove all the pan bolts, and carefully remove the oil pan assembly.
3. REMOVE VALVE BODY OIL STRAINER ASSEMBLY 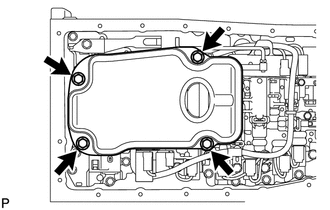 (a) Remove the 4 bolts and oil strainer. NOTICE: Be careful as some fluid may leak out of the oil strainer. (b) Remove the O-ring from the oil strainer. 4. DISCONNECT TRANSMISSION WIRE 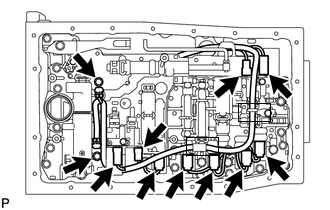 (a) Remove the 2 bolts and 2 temperature sensor clamps. (b) Disconnect the 2 ATF temperature sensors.
(d) Disconnect the 9 solenoid valve connectors. (e) Detach the wire harness from the 2 clamps. 5. REMOVE TRANSMISSION WIRE 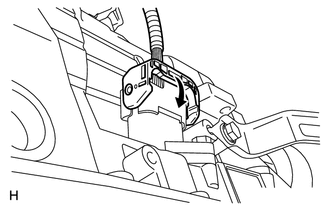 (a) Disconnect the wire connector. (1) Detach the claw, press down the lever, and then disconnect the transmission wire connector.
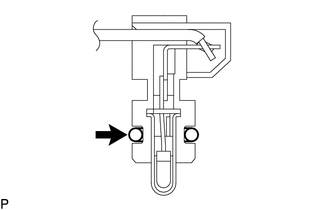
(c) Remove the O-ring from the transmission wire connector. |
Toyota Tundra Owners Manual > Adjusting the steering
wheel and mirrors: Steering wheel
Adjustment procedure (manually adjustable type) 1. Hold the steering wheel and push the lever down. Vehicles with front bench type seat 2. Adjust to the ideal position by moving the steering wheel. After adjustment, pull the lever up to secure the steering wheel. Vehicles with front separate type se ...