REMOVAL CAUTION / NOTICE / HINT HINT:
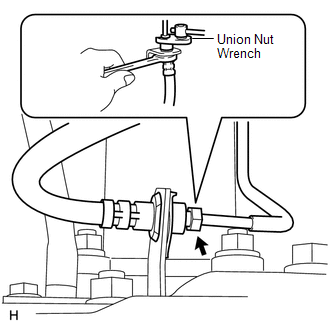
PROCEDURE 1. REMOVE REAR WHEEL LH 2. DRAIN BRAKE FLUID 3. DISCONNECT REAR BRAKE FLEXIBLE HOSE
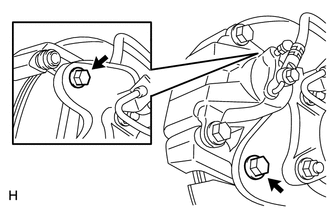
(b) Remove the clip. 4. DISCONNECT REAR DISC BRAKE CYLINDER ASSEMBLY LH
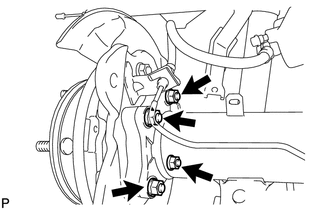
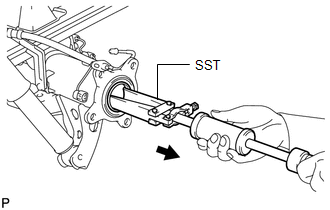
5. REMOVE REAR DISC LH 6. REMOVE PARKING BRAKE SHOE RETURN TENSION SPRING LH 7. REMOVE NO. 1 PARKING BRAKE SHOE ASSEMBLY LH 8. REMOVE NO. 2 PARKING BRAKE SHOE ASSEMBLY LH 9. REMOVE PARKING BRAKE SHOE LEVER SUB-ASSEMBLY LH 10. DISCONNECT NO. 3 PARKING BRAKE CABLE ASSEMBLY 11. DISCONNECT REAR SPEED SENSOR LH 12. REMOVE REAR AXLE SHAFT
(b) Remove the O-ring. 13. REMOVE REAR AXLE SHAFT OIL SEAL
|
Toyota Tundra Service Manual > Differential Carrier Assembly(for 3ur-fe, 3ur-fbe): Disassembly
DISASSEMBLY PROCEDURE 1. INSPECT RUNOUT OF REAR DRIVE PINION COMPANION FLANGE SUB-ASSEMBLY (a) Using a dial indicator, measure the runout of the companion flange vertically and laterally. Text in Illustration *a 72 mm (2.83 in.) Maximum runout: Runout Standard Condition Vertical runout 0.10 mm (0.00 ...