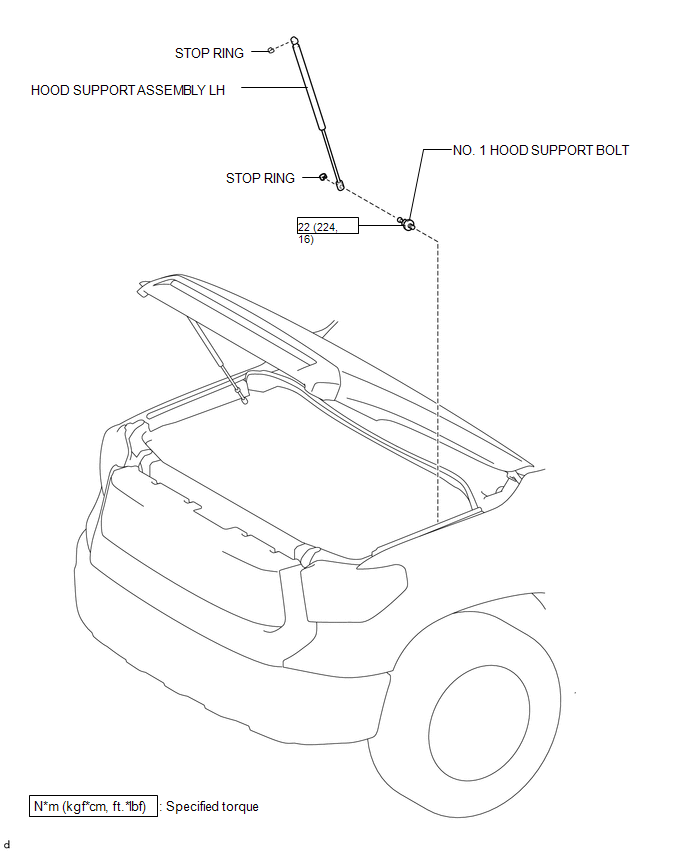
Components COMPONENTS ILLUSTRATION 
Disposal DISPOSAL CAUTION / NOTICE / HINT HINT:
PROCEDURE 1. DISPOSE OF HOOD SUPPORT ASSEMBLY LH
(b) Using a metal saw, gradually cut anywhere in the area labeled A to release the gas. Standard
CAUTION: As metal debris may be blown outward by the gas, you must:
NOTICE: The gas inside the hood support assembly LH is colorless, odorless and harmless. As there is a possibility that metal debris could scatter, cover the hood support assembly LH with a piece of cloth or other material. Installation INSTALLATION CAUTION / NOTICE / HINT CAUTION: Install the hood support assembly LH while holding the hood. NOTICE:
HINT:
PROCEDURE 1. INSTALL NO. 1 HOOD SUPPORT BOLT
2. INSTALL HOOD SUPPORT ASSEMBLY LH 
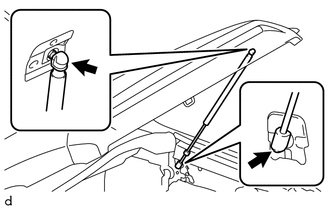
(a) Install the 2 stop rings to the hood support assembly LH. (b) Attach the 2 ball joints to install the hood support assembly LH. (c) Check that the hood support assembly LH is connected to the ball joint and cannot be pulled off. CAUTION: Install the hood support assembly LH while holding the hood. NOTICE: Check that the hood support assembly LH is engaged in the ball joint and it cannot be pulled out. Removal REMOVAL CAUTION / NOTICE / HINT CAUTION: Remove the hood support assembly LH while holding the hood. NOTICE:
HINT:
PROCEDURE 1. REMOVE HOOD SUPPORT ASSEMBLY LH
(b) Detach the 2 ball joints and then remove the hood support assembly LH. 2. REMOVE NO. 1 HOOD SUPPORT BOLT
|
Toyota Tundra Service Manual > Sfi System: Camshaft Position "B" - Timing Over-Advanced or System Performance (Bank 1) (P0014,P0015,P0024,P0025)
DESCRIPTION HINT: If DTC P0014, P0015, P0024 or P0025 is present, check the VVT (Variable Valve Timing) system. The Variable Valve Timing (VVT) system includes the ECM, OCV and VVT controller. The ECM sends a target duty-cycle control signal to the OCV. This control signal regulates the oil pressure ...