REASSEMBLY CAUTION / NOTICE / HINT HINT:
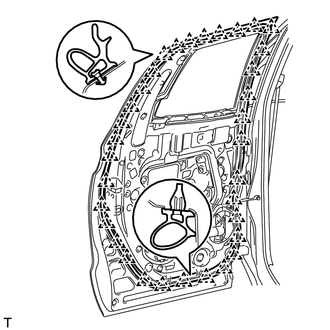
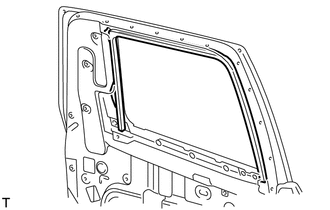
PROCEDURE 1. INSTALL REAR DOOR WEATHERSTRIP LH
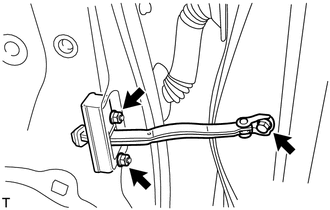
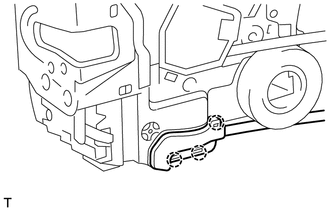
2. INSTALL REAR DOOR CHECK ASSEMBLY LH
(b) Install the door check to the door panel with the 2 nuts. Torque: 8.5 N·m {87 kgf·cm, 75 in·lbf} (c) Apply adhesive to the threads of the bolt. Adhesive: Toyota Genuine Adhesive 1324, Three Bond 1324 or equivalent (d) Install the bolt. Torque: 29 N·m {296 kgf·cm, 21 ft·lbf} 3. INSTALL REAR NO. 2 DOOR WEATHERSTRIP LH
4. INSTALL REAR DOOR OUTSIDE HANDLE ASSEMBLY LH
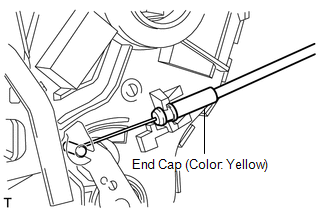
(b) Install the 2 hole plugs. 5. INSTALL REAR DOOR LOCK OPEN ROD LH 6. INSTALL REAR DOOR LOCK CHILD PROTECTION COVER LH 7. INSTALL REAR DOOR INSIDE LOCKING CABLE ASSEMBLY LH
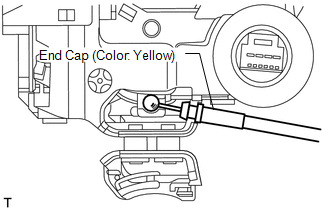
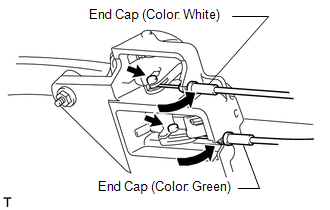
8. INSTALL REAR DOOR LOCK REMOTE CONTROL CABLE ASSEMBLY LH
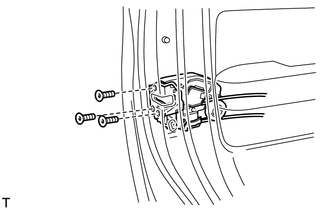
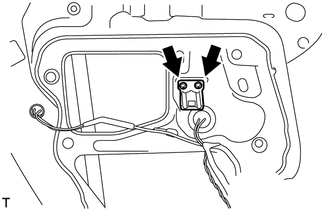
9. INSTALL REAR DOOR LOCK ASSEMBLY LH (a) Apply MP grease to the sliding and rotating parts of the front door lock. (b) Install a new door lock wire harness packing to the door lock. NOTICE:
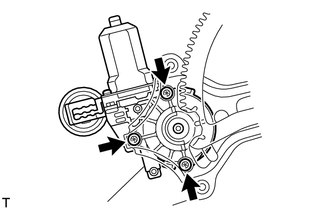
(d) Connect the connector. 10. INSTALL POWER WINDOW REGULATOR MOTOR ASSEMBLY LH (a) Apply MP grease to the sliding and rotating areas of the regulator motor.
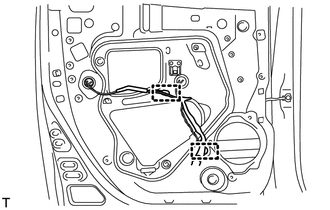
11. INSTALL REAR DOOR WINDOW REGULATOR SUB-ASSEMBLY LH (a) Apply MP grease to the rear door power window regulator.
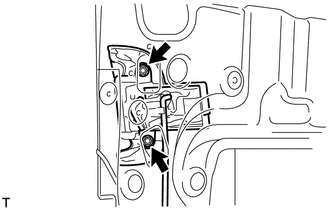
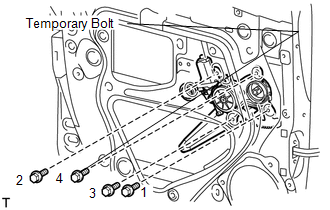
(c) Insert the window regulator into the door panel. Use the temporary bolt to hang the window regulator on the door panel. (d) Temporarily install the window regulator with the 3 bolts, and tighten the temporary bolt so that it contacts the door panel. (e) Tighten the 4 bolts in the order shown in the illustration. Torque: 8.0 N·m {82 kgf·cm, 71 in·lbf} 12. INSTALL REAR OUTER DOOR GLASS WEATHERSTRIP
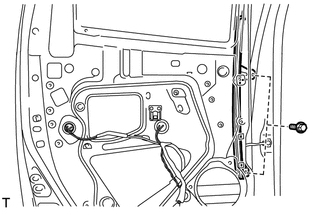
13. INSTALL REAR NO. 2 DOOR GLASS RUN LH (a) Install the rear door glass run to the rear door window front lower guide. 14. INSTALL REAR DOOR FRONT WINDOW GUIDE SUB-ASSEMBLY LH
15. INSTALL REAR DOOR GLASS SUB-ASSEMBLY LH
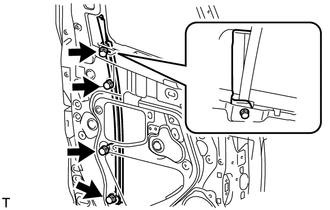
16. INSTALL REAR NO. 2 DOOR GLASS RUN LH (a) Install the rear door glass run to the rear door window rear lower frame. 17. INSTALL REAR DOOR REAR LOWER WINDOW FRAME SUB-ASSEMBLY LH
18. INSTALL REAR DOOR GLASS RUN LH
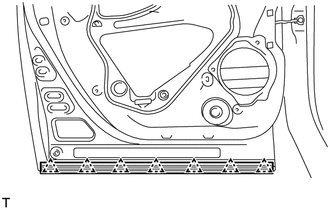
19. INSTALL REAR DOOR SERVICE HOLE COVER LH
20. INSTALL REAR SPEAKER ASSEMBLY
21. INSTALL REAR NO. 2 DOOR TRIM BRACKET
22. INSTALL REAR INNER DOOR GLASS WEATHERSTRIP LH 23. INSTALL REAR DOOR TRIM BOARD SUB-ASSEMBLY LH
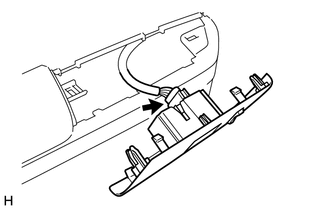
(b) Attach the inside handle's knob to the door trim board.
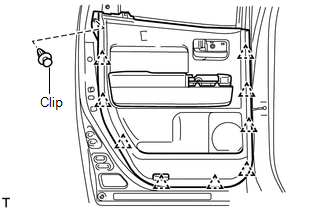
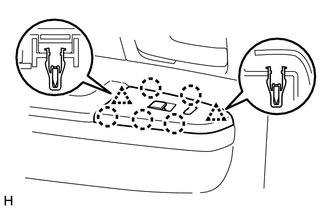
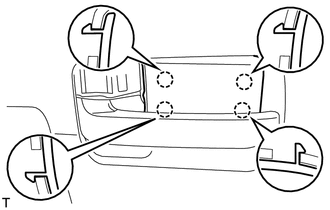
(d) Install the inside handle and door trim board to the door trim panel with the screw. (e) Install the door trim board to the door panel with the screw (f) Attach the clip. 24. INSTALL REAR DOOR ARMREST COVER LH 25. INSTALL REAR DOOR FRAME GARNISH LH
26. INSTALL REAR POWER WINDOW REGULATOR SWITCH ASSEMBLY
27. INSTALL REAR UPPER DOOR ARMREST BASE PANEL LH
28. INSTALL REAR DOOR INSIDE HANDLE BEZEL PLUG LH
29. CONNECT CABLE TO NEGATIVE BATTERY TERMINAL |
Toyota Tundra Service Manual > Audio And Visual System: Disc cannot be Ejected
PROCEDURE 1. PRESS "EJECT" AND CHECK OPERATION (a) Press the disc eject switch of the radio and display receiver assembly for 2 seconds or more and check that the disc is ejected. OK: Disc is ejected. Result Result Proceed to OK A NG (for Column Shift Type) B NG (for Floor Shift Type) C B REPLACE RA ...

 ).
).