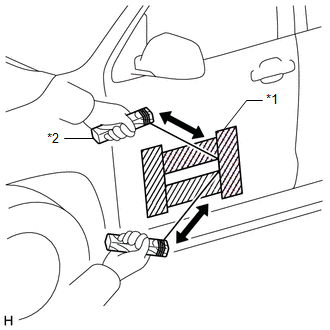
REMOVAL PROCEDURE 1. REMOVE FRONT FENDER PLATE LH HINT: When removing the front fender plate LH, heat the vehicle body and front fender plate LH using a heat light. Standard:
NOTICE: Do not heat the vehicle body or front fender plate LH excessively.
(b) Using a heat light, heat the vehicle body and front fender plate LH. (c) Insert piano wire between the vehicle body and front fender plate LH. (d) Tie objects that can serve as handles (for example, wooden blocks) to the piano wire ends. (e) Pull the piano wire and scrape off the double-sided tape that holds the front fender plate LH to the vehicle body. NOTICE: Be careful not to damage the vehicle body. (f) Remove the front fender plate LH. Text in Illustration
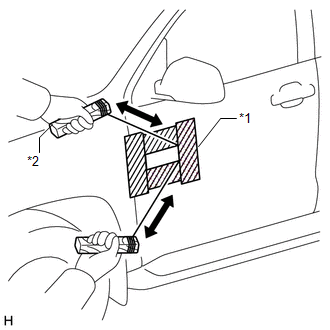
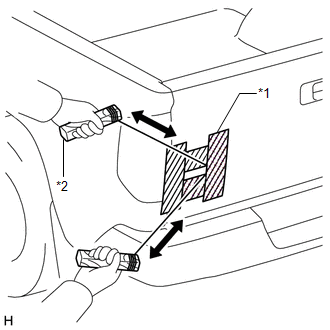
2. REMOVE FRONT FENDER PLATE RH HINT: Use the same procedure described for the LH side. 3. REMOVE DOOR NAME PLATE LH HINT: When removing the door name plate LH, heat the vehicle body and door name plate LH using a heat light. Standard:
NOTICE: Do not heat the vehicle body or door name plate LH excessively.
(b) Using a heat light, heat the vehicle body and door name plate LH. (c) Insert piano wire between the vehicle body and door name plate LH. (d) Tie objects that can serve as handles (for example, wooden blocks) to the piano wire ends. (e) Pull the piano wire and scrape off the double-sided tape that holds the door name plate LH to the vehicle body. NOTICE: Be careful not to damage the vehicle body. (f) Remove the door name plate LH. Text in Illustration
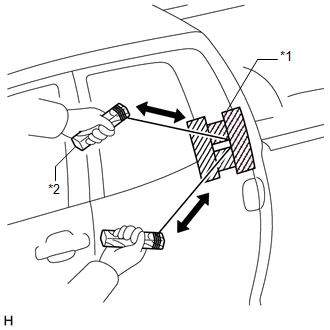
4. REMOVE DOOR NAME PLATE RH HINT: Use the same procedure described for the LH side. 5. REMOVE ROOF SIDE NO. 1 MARK LH HINT: When removing the roof side No. 1 mark LH, heat the vehicle body and roof side No. 1 mark LH using a heat light. Standard:
NOTICE: Do not heat the vehicle body or roof side No. 1 mark LH excessively. (a) for Double Cab:
(2) Using a heat light, heat the vehicle body and roof side No. 1 mark LH. (3) Insert piano wire between the vehicle body and roof side No. 1 mark LH. (4) Tie objects that can serve as handles (for example, wooden blocks) to the piano wire ends. (5) Pull the piano wire and scrape off the double-sided tape that holds the roof side No. 1 mark LH to the vehicle body. NOTICE: Be careful not to damage the vehicle body. (6) Remove the roof side No. 1 mark LH. Text in Illustration
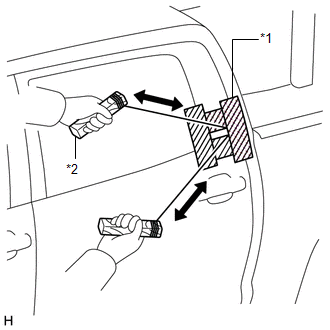
(b) for CrewMax:
(2) Using a heat light, heat the vehicle body and roof side No. 1 mark LH. (3) Insert piano wire between the vehicle body and roof side No. 1 mark LH. (4) Tie objects that can serve as handles (for example, wooden blocks) to the piano wire ends. (5) Pull the piano wire and scrape off the double-sided tape that holds the roof side No. 1 mark LH to the vehicle body. NOTICE: Be careful not to damage the vehicle body. (6) Remove the roof side No. 1 mark LH. Text in Illustration
6. REMOVE ROOF SIDE NO. 1 MARK RH HINT: Use the same procedure described for the LH side. 7. REMOVE REAR BODY NO. 3 NAME PLATE (for 4WD) HINT: When removing the rear body No. 3 name plate, heat the vehicle body and rear body No. 3 name plate using a heat light. Standard:
NOTICE: Do not heat the vehicle body or rear body No. 3 name plate excessively.
(b) Using a heat light, heat the vehicle body and rear body No. 3 name plate. (c) Insert piano wire between the vehicle body and rear body No. 3 name plate. HINT: Be careful of the boss positions. (d) Tie objects that can serve as handles (for example, wooden blocks) to the piano wire ends. (e) Pull the piano wire and scrape off the double-sided tape that holds the rear body No. 3 name plate to the vehicle body. NOTICE: Be careful not to damage the vehicle body. (f) Remove the rear body No. 3 name plate. Text in Illustration
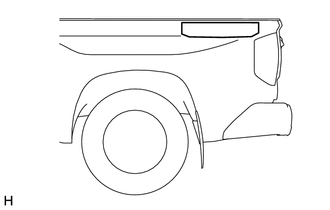
8. REMOVE REAR BODY STRIPE LH HINT: When removing the rear body stripe LH, heat the vehicle body and rear body stripe LH using a heat light. Standard:
NOTICE: Do not heat the vehicle body or rear body stripe LH excessively. (a) Using a heat light, heat the vehicle body and rear body stripe LH.
9. REMOVE REAR BODY STRIPE RH HINT: Use the same procedure described for the LH side. |
Toyota Tundra Service Manual > Garage Door Opener System: On-vehicle Inspection
ON-VEHICLE INSPECTION PROCEDURE 1. INSPECT GARAGE DOOR OPENER (a) Press each garage door opener ("HomeLink") switch and check that the ("HomeLink") indicator light turns on. If one or more of the garage door opener ("HomeLink") switches does not turn on the ("HomeLink") indicator light, check the co ...