Components COMPONENTS ILLUSTRATION 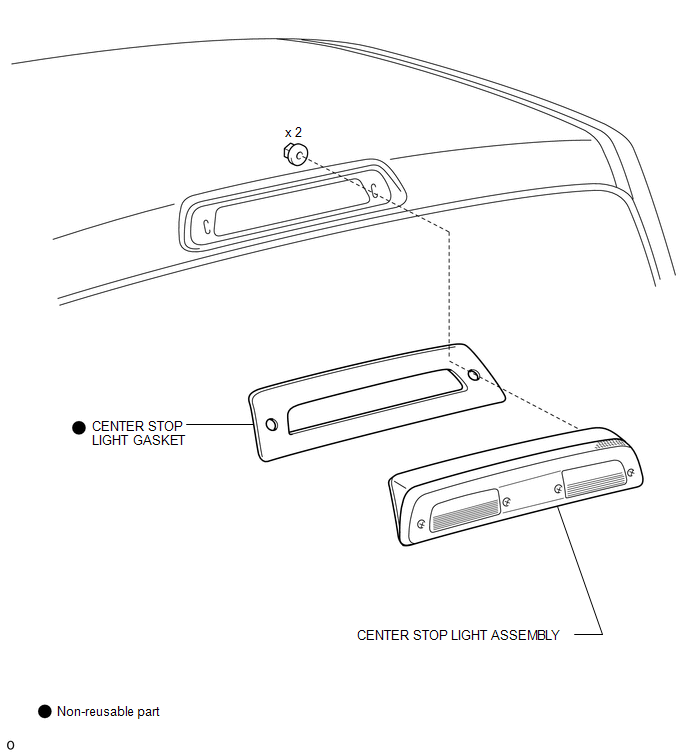
ILLUSTRATION 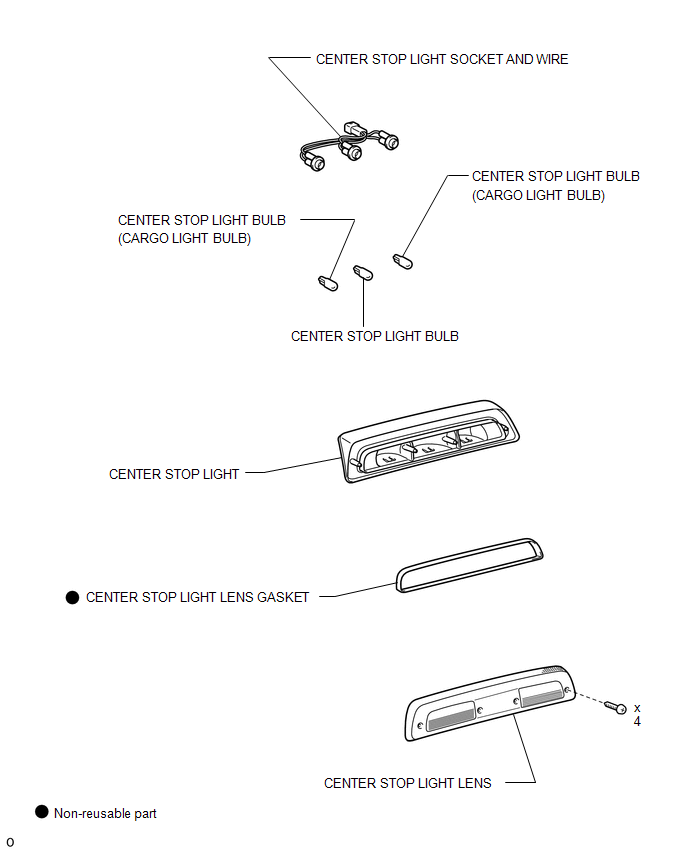
Disassembly DISASSEMBLY PROCEDURE 1. REMOVE CENTER STOP LIGHT BULB 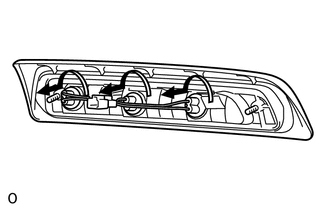
(a) Turn the center stop light bulb sockets with the center stop light bulb in the direction indicated by the arrow to remove them as a unit. (b) Remove the center stop light bulb from the center stop light bulb socket. 2. REMOVE CENTER STOP LIGHT SOCKET AND WIRE (a) Remove the center stop light socket and wire from the center stop light. 3. REMOVE CENTER STOP LIGHT LENS 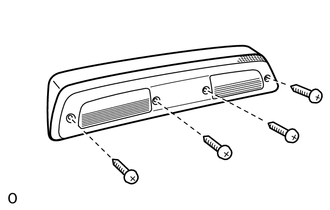
(a) Remove the 4 screws and center stop light lens. (b) Remove the center stop light lens gasket. Installation INSTALLATION CAUTION / NOTICE / HINT HINT: A bolt without a torque specification is shown in the standard bolt chart (See
page PROCEDURE 1. INSTALL CENTER STOP LIGHT GASKET (a) Install a new center stop light gasket. 2. INSTALL CENTER STOP LIGHT ASSEMBLY (a) Connect the connector and attach the clamp. (b) Install the center stop light assembly with the 2 nuts. 3. INSTALL ROOF HEADLINING ASSEMBLY for Double Cab: (See page for CrewMax: (See page Reassembly REASSEMBLY PROCEDURE 1. INSTALL CENTER STOP LIGHT LENS (a) Install a new center stop light lens gasket. (b) Install the center stop light lens with the 4 screws. 2. INSTALL CENTER STOP LIGHT SOCKET AND WIRE (a) Install the center stop light socket and wire to the center stop light. 3. INSTALL CENTER STOP LIGHT BULB (a) Install the center stop light bulb to the center stop light bulb socket.
Removal REMOVAL PROCEDURE 1. REMOVE ROOF HEADLINING ASSEMBLY for Double Cab: (See page for CrewMax: (See page 2. REMOVE CENTER STOP LIGHT ASSEMBLY 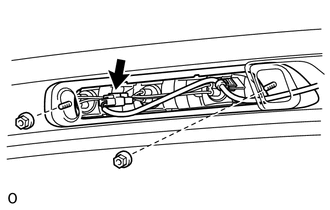
(a) Remove the 2 nuts. (b) Disconnect the connector and detach the clamp and remove the center stop light assembly. 3. REMOVE CENTER STOP LIGHT GASKET (a) Remove the center stop light gasket. |
Toyota Tundra Service Manual > Wiper / Washer: Washer Nozzle
Adjustment ADJUSTMENT PROCEDURE 1. ADJUST WASHER NOZZLE SUB-ASSEMBLY (a) Using a screwdriver, detach the 2 claws and separate the washer nozzle. NOTICE: Be careful not to damage the windshield. (b) Remove the washer nozzle from the washer hose. NOTICE: Washer nozzles cannot be reused. (c) Select a w ...