
REMOVAL CAUTION / NOTICE / HINT HINT:
PROCEDURE 1. REMOVE REAR COMBINATION LIGHT ASSEMBLY LH (a) Put protective tape around the rear combination light assembly LH. (b) Using a T30 "TORX" socket wrench, remove the 2 screws. (c) Detach the 2 clips. (d) Disconnect each connector and remove the rear combination light assembly LH. 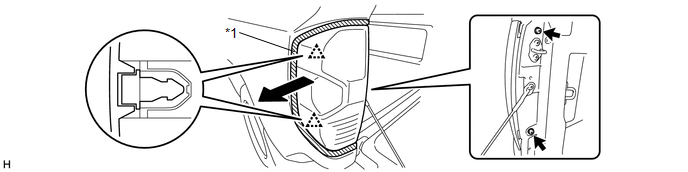 Text in Illustration Text in Illustration
2. REMOVE REAR COMBINATION LIGHT GUIDE 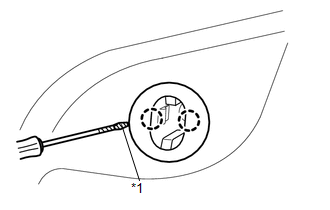
HINT:
(a) Using a screwdriver, detach the 2 claws and remove the rear combination light guide. HINT: Tape the screwdriver tip before use. Text in Illustration
|
Toyota Tundra Service Manual > Shift Lever Assembly(for Floor Shift Type): Inspection
INSPECTION PROCEDURE 1. INSPECT TRANSMISSION CONTROL SWITCH (a) Disconnect the transmission control switch connector. (b) Measure the resistance according to the value(s) in the table below. Standard Resistance: Tester Connection Condition Specified Condition 3 (IG) - 7 (S) Shift lever position S, " ...


