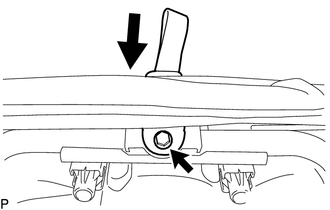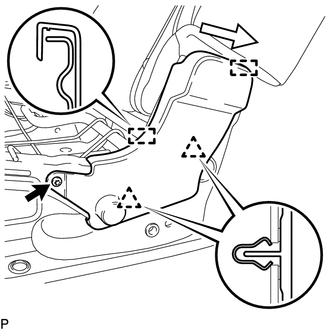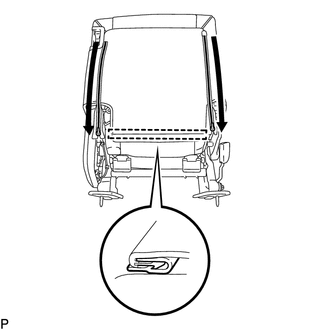
REASSEMBLY CAUTION / NOTICE / HINT CAUTION: Wear protective gloves. Sharp areas on the parts may injure your hands. PROCEDURE 1. INSTALL REAR SEATBACK FRAME SUB-ASSEMBLY RH (a) Install the rear seatback frame sub-assembly RH with the 4 bolts. Torque: 45 N·m {459 kgf·cm, 33 ft·lbf} 2. INSTALL REAR SEAT TURN LOCK SUB-ASSEMBLY (a) Install the rear seat turn lock sub-assembly with the 2 nuts. Torque: 28 N·m {280 kgf·cm, 20 ft·lbf} 3. INSTALL REAR SEAT CUSHION FRAME SUB-ASSEMBLY RH (a) Using a T40 "TORX" socket wrench, install the rear seat cushion frame sub-assembly RH with the 2 bolts. Torque: 25 N·m {255 kgf·cm, 18 ft·lbf} 4. INSTALL NO. 1 RECLINING ADJUSTER RELEASE HANDLE RH
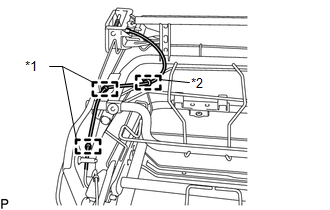
(b) Install the No. 1 reclining adjuster release handle RH with the 4 screws.
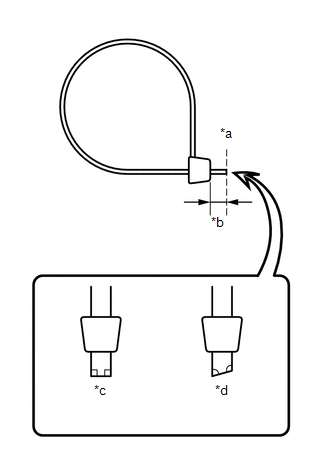
(d) Install a new cable tie.
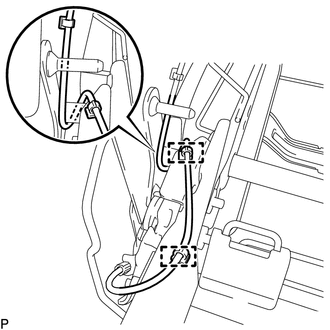
(g) Connect the cable end of the No. 1 reclining adjuster release handle RH as shown in the illustration and attach the clamp. 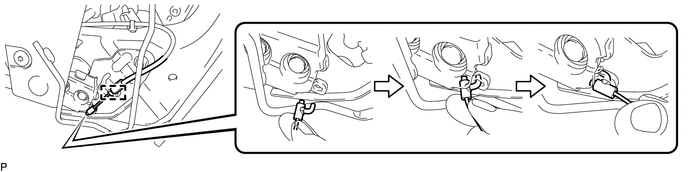
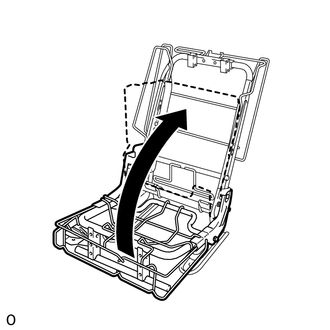
(h) Pull the No. 1 reclining adjuster release handle LH and fold down the rear seat cushion frame sub-assembly RH. 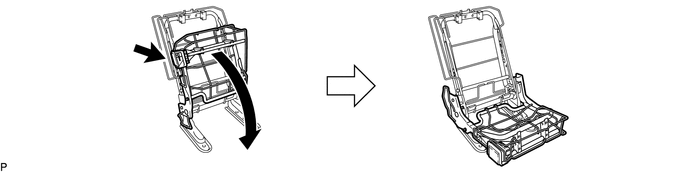
HINT: Make sure that the rear seat cushion frame sub-assembly RH is securely locked in the upright and retracted positions. 5. INSTALL SEPARATE TYPE REAR SEATBACK COVER (a) Set the separate type rear seatback cover in place. (b) Using hog ring pliers, install the separate type rear seatback cover to the separate type rear seatback pad with 9 new hog rings as shown in the illustration. 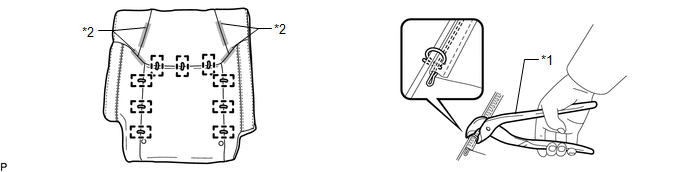 Text in Illustration Text in Illustration
NOTICE:
(c) Attach the 4 fasteners. 6. INSTALL SEPARATE TYPE REAR SEATBACK COVER WITH PAD (a) Attach the 8 hooks to install the separate type rear seatback cover with pad. 7. INSTALL REAR SEAT HEADREST SUPPORT (a) Attach the 4 claws to install the 2 rear seat headrest supports. 8. INSTALL TETHER ANCHOR BRACKET SUB-ASSEMBLY
9. INSTALL REAR NO. 1 SEAT INNER BELT ASSEMBLY RH (a) Attach the guide. (b) Tighten the bolt to install the rear No. 1 seat inner belt assembly RH. Torque: 42 N·m {428 kgf·cm, 31 ft·lbf} 10. INSTALL REAR SEAT INNER RECLINING COVER RH
(b) Attach the 2 clips. (c) Using a T25 "TORX" socket wrench, install the rear seat inner reclining cover RH with the screw. 11. INSTALL REAR SEAT RECLINING COVER RH (a) Attach the guide and claw. (b) Using a T25 "TORX" socket wrench, install the rear seat reclining cover RH with the 2 screws. 12. INSTALL SEPARATE TYPE REAR SEAT CUSHION COVER (a) Set the separate type rear seat cushion cover in place. (b) Using hog ring pliers, install the separate type rear seat cushion cover to the separate type rear seat cushion pad with 12 new hog rings as shown in the illustration. 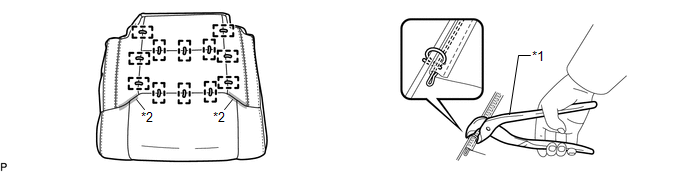 Text in Illustration Text in Illustration
NOTICE:
(c) Attach the 2 fasteners. 13. INSTALL SEPARATE TYPE REAR SEAT CUSHION COVER WITH PAD (a) Attach the 5 hooks to install the separate type rear seat cushion cover with pad. 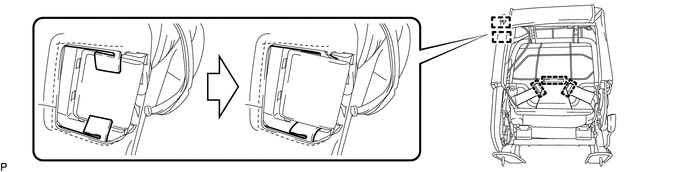
14. INSTALL REAR SEATBACK LOCK CONTROL BEZEL (a) Attach the 4 claws to install the rear seatback lock control bezel.
(c) Fold in the 2 fasteners. 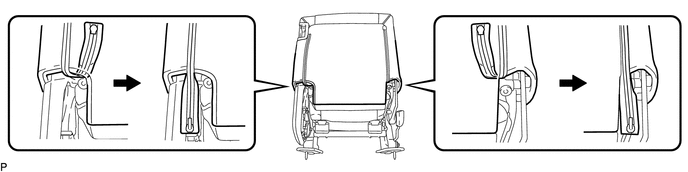
15. INSTALL REAR SEAT HEADREST ASSEMBLY (a) Push the 2 lock release buttons to release the lock, and then install the rear seat headrest assembly. |
Toyota Tundra Service Manual > Differential Carrier Oil Seal(for 3ur-fe, 3ur-fbe): Replacement
REPLACEMENT PROCEDURE 1. DRAIN DIFFERENTIAL OIL 2. REMOVE PROPELLER SHAFT ASSEMBLY (a) Remove the propeller shaft for 2WD (see page ). (b) Remove the propeller shaft for 4WD (see page ). 3. REMOVE REAR DRIVE PINION NUT (a) Using SST and a hammer, loosen the staked part of the nut. SST: 09930-00010 ( ...