INSTALLATION CAUTION / NOTICE / HINT HINT: Perform
"Inspection After Repairs" after replacing the No. 1 or No. 2 camshaft
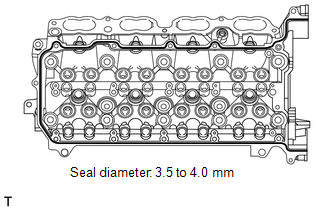
sub-assembly or camshaft timing gear RH or camshaft timing exhaust gear
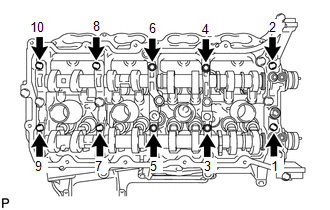
RH (See page PROCEDURE 1. INSTALL CAMSHAFT BEARING CAP RH HINT: Perform "Inspection After Repairs" after replacing the No. 1 or No. 2 camshaft sub-assembly (See page
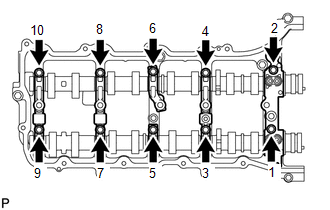
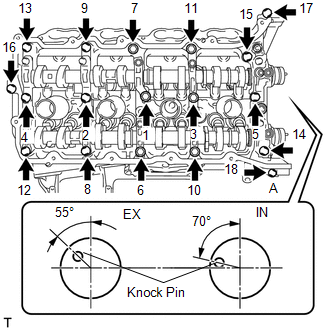
(b) Install the No. 1 and No. 2 camshafts to the camshaft housing. (c) Confirm the marks and numbers on the camshaft bearing caps and place them in their proper positions and directions.
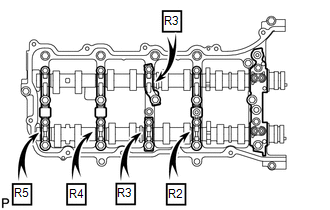
2. INSTALL CAMSHAFT HOUSING SUB-ASSEMBLY RH 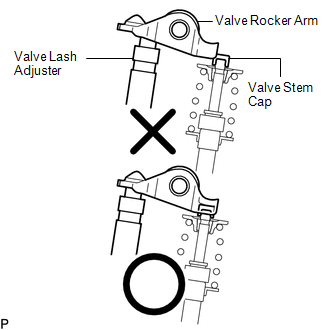 (a) Make sure that the valve rocker arms are installed as shown in the illustration.
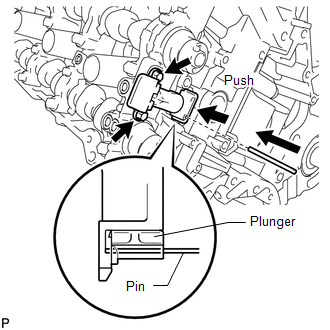
3. INSTALL NO. 2 CHAIN TENSIONER ASSEMBLY
(b) While raising up the No. 2 chain tensioner, insert a pin of φ1.0 mm (0.0394 in.) into the hole to fix it in place. 4. INSTALL NO. 1 CHAIN SUB-ASSEMBLY RH HINT: Perform
"Inspection After Repairs" after replacing the No. 1 or No. 2 camshaft
sub-assembly or camshaft timing gear RH or camshaft timing exhaust gear
RH (See page
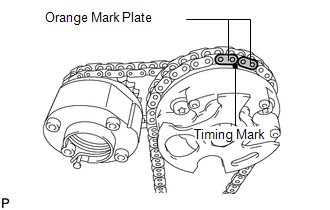
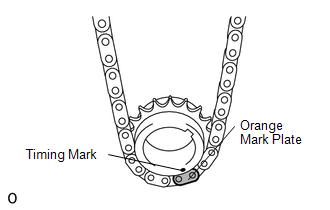
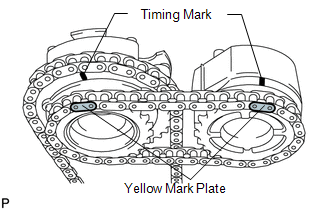
(d) Install the crankshaft timing sprocket to the crankshaft. (e) Align and attach the knock pin of the No. 1 camshaft with the pin hole of the camshaft timing gear. (f) Using the hexagonal portion of the No. 2 camshaft, align and attach the knock pin of the No. 2 camshaft with the pin hole of the camshaft timing exhaust gear. (g) Remove the pin from the No. 2 chain tensioner. 5. INSTALL NO. 1 CHAIN VIBRATION DAMPER RH
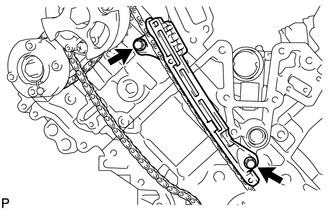
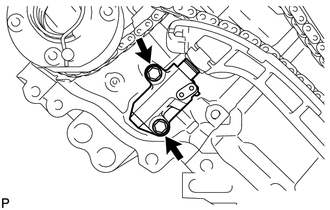
6. INSTALL NO. 1 CHAIN TENSIONER SLIPPER RH 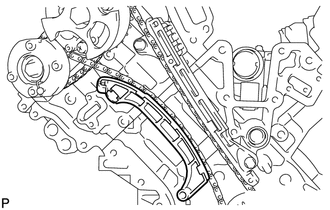 HINT: If you cannot install the chain tensioner slipper due to the tension of the chain, use the hexagonal portion of the camshaft to loosen the chain, and then install the chain tensioner slipper. 7. INSTALL NO. 1 CHAIN TENSIONER ASSEMBLY RH
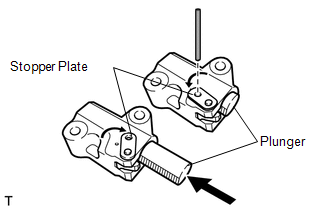
(b) Move the stopper plate downward to set the lock, and insert a hexagon wrench into the hole of the stopper plate.
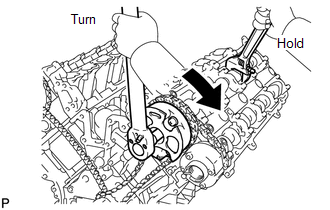
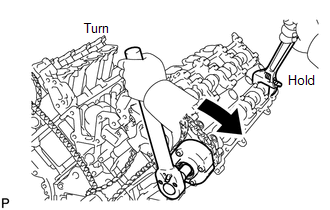
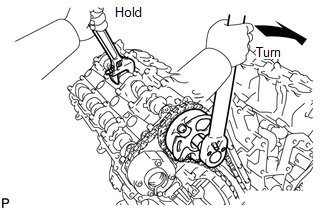
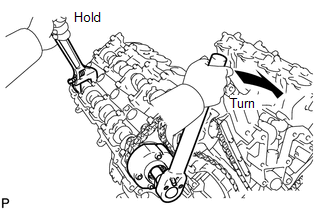
(d) Remove the hexagon wrench from the chain tensioner. 8. INSTALL NO. 1 CHAIN SUB-ASSEMBLY LH 9. INSTALL NO. 1 CHAIN TENSIONER SLIPPER LH 10. INSTALL NO. 1 CHAIN TENSIONER ASSEMBLY LH 11. INSTALL NO. 1 CHAIN VIBRATION DAMPER LH 12. TIGHTEN CAMSHAFT TIMING GEAR (a) LH:
(b) RH:
13. CHECK NO. 1 CYLINDER TO TDC / COMPRESSION
14. INSTALL TIMING CHAIN COVER SUB-ASSEMBLY (a) Install the timing chain cover (See page 15. INSPECT IGNITION TIMING 16. INSPECT ENGINE IDLE SPEED |
Toyota Tundra Service Manual > Vehicle Stability Control System: How To Proceed With Troubleshooting
CAUTION / NOTICE / HINT HINT: *: Use the Techstream. PROCEDURE 1. VEHICLE BROUGHT TO WORKSHOP NEXT 2. CUSTOMER PROBLEM ANALYSIS (a) Interview the customer and confirm the problem. Click here NEXT 3. CHECK DTC AND FREEZE FRAME DATA* (a) Check and record DTCs and Freeze Frame Data. for DTC Check / Cle ...

 ).
).