INSTALLATION CAUTION / NOTICE / HINT HINT:
PROCEDURE 1. TEMPORARILY INSTALL FRONT SHOCK ABSORBER WITH COIL SPRING 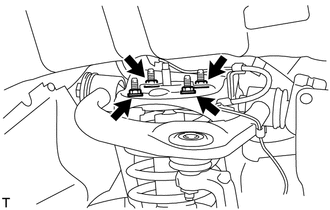 (a) Temporarily install the upper side of the shock absorber to the chassis frame with the 4 nuts.
2. STABILIZE SUSPENSION (a) Lower the vehicle. (b) Press down on the vehicle several times to stabilize the suspension. 3. TIGHTEN FRONT SHOCK ABSORBER WITH COIL SPRING  (a) Tighten the nut. Torque: 195 N·m {1988 kgf·cm, 144 ft·lbf}
(c) Check that the first nut that was tightened is at the torque specification. 4. INSTALL FRONT WHEEL Torque: for Aluminum Wheel : 131 N·m {1336 kgf·cm, 97 ft·lbf} for Steel Wheel : 209 N·m {2131 kgf·cm, 154 ft·lbf} |
Toyota Tundra Service Manual > Side Airbag Sensor(for Crewmax): Installation
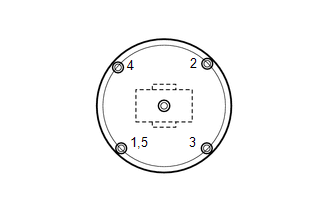
INSTALLATION PROCEDURE 1. INSTALL FRONT SIDE AIRBAG SENSOR (a) Check that the ignition switch is OFF. (b) Check that the cable is disconnected from the battery negative (-) terminal. CAUTION: Wait at least 90 seconds after disconnecting the cable from the negative (-) battery terminal to prevent air ...

 ).
).