Components COMPONENTS ILLUSTRATION 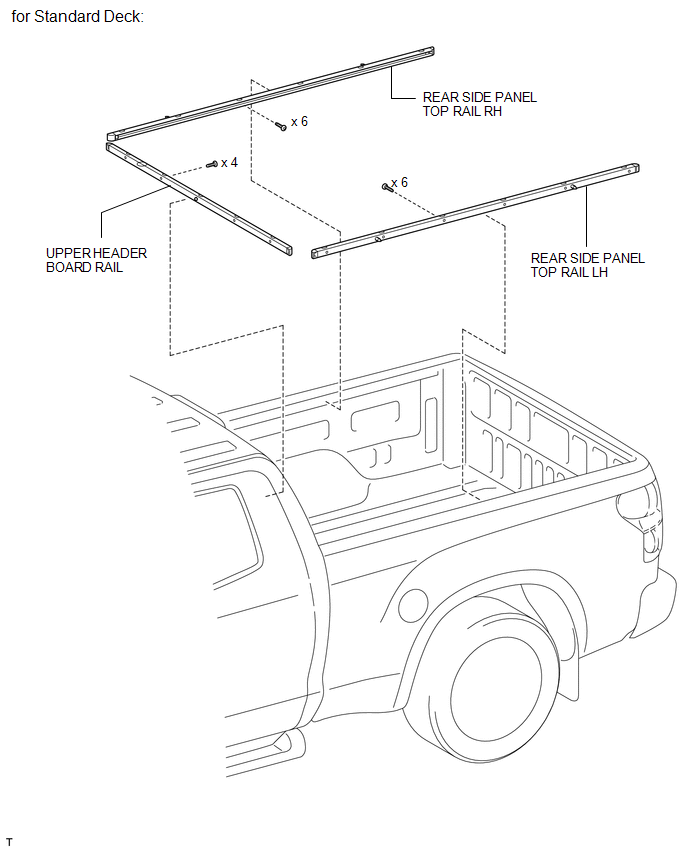
ILLUSTRATION 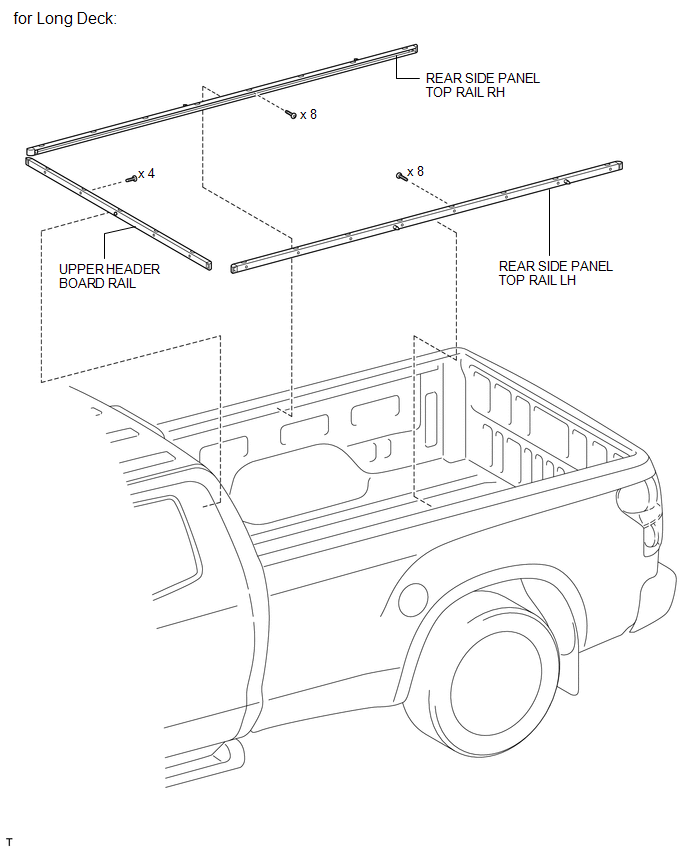
ILLUSTRATION 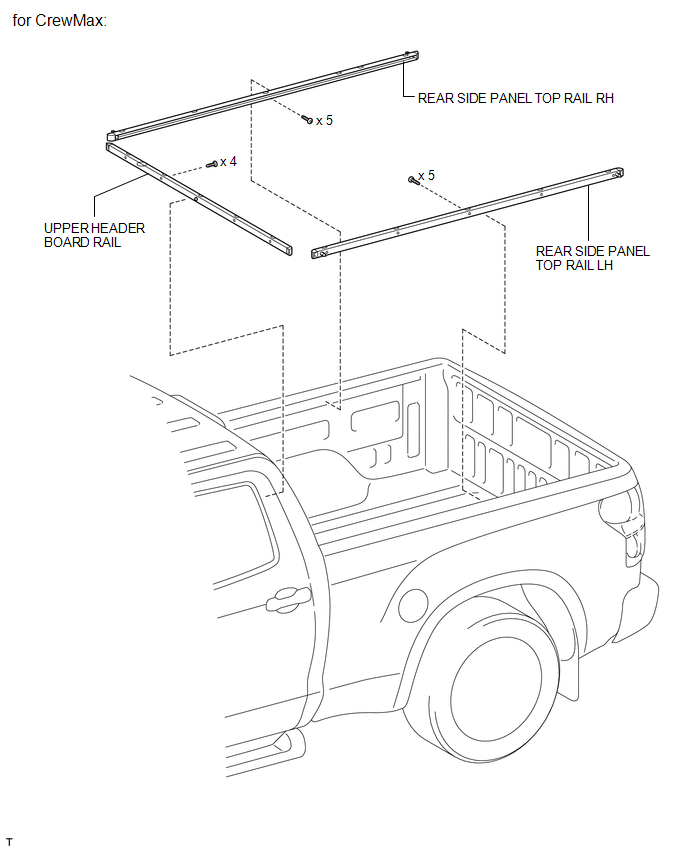
Installation INSTALLATION PROCEDURE 1. INSTALL UPPER HEADER BOARD RAIL 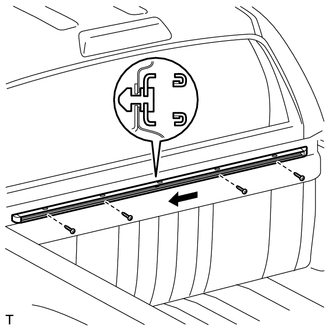
(a) Slide the rail in the direction shown in the illustration to install it. (b) Using a T30 "TORX" socket, install the 4 bolts. 2. INSTALL REAR SIDE PANEL TOP RAIL LH (a) for Standard Deck: Install the rear side panel top rail. (1) Attach the 2 clips to install the rail. (2) Using a T30 "TORX" socket, install the 6 bolts. 
(b) for Long Deck: Install the rear side panel top rail. (1) Attach the 2 clips to install the rail. (2) Using a T30 "TORX" socket, install the 8 bolts. 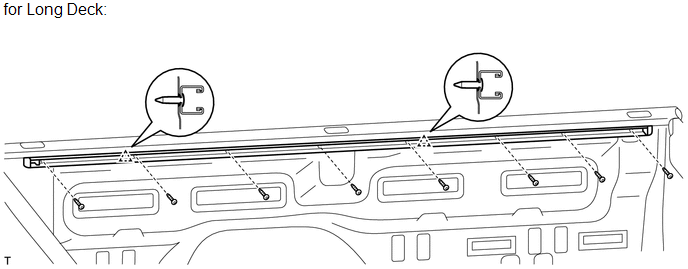
(c) for CrewMax: Install the rear side panel top rail. (1) Attach the 2 clips to install the rail. (2) Using a T30 "TORX" socket, install the 5 bolts. 
3. INSTALL REAR SIDE PANEL TOP RAIL RH HINT: Use the same procedures described for the LH side. Removal REMOVAL PROCEDURE 1. REMOVE REAR SIDE PANEL TOP RAIL LH (a) for Standard Deck: Remove the rear side panel top rail. (1) Using a T30 "TORX" socket, remove the 6 bolts. (2) Detach the 2 clips and remove the rail. 
(b) for Long Deck: Remove the rear side panel top rail. (1) Using a T30 "TORX" socket, remove the 8 bolts. (2) Detach the 2 clips and remove the rail. 
(c) for CrewMax: Remove the rear side panel top rail. (1) Using a T30 "TORX" socket, remove the 5 bolts. (2) Detach the 2 clips and remove the rail. 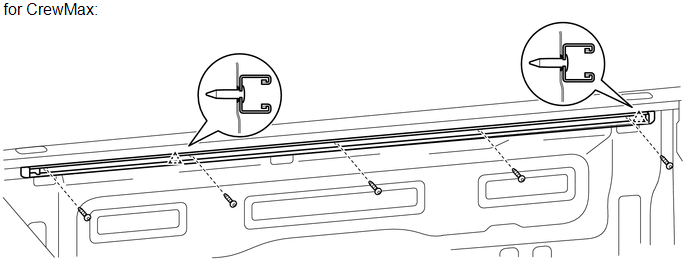
2. REMOVE REAR SIDE PANEL TOP RAIL RH HINT: Use the same procedures described for the LH side. 3. REMOVE UPPER HEADER BOARD RAIL 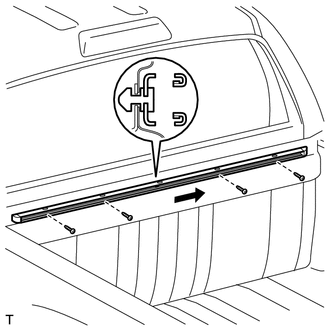
(a) Using a T30 "TORX" socket, remove the 4 bolts. (b) Slide the rail in the direction shown in the illustration to remove it. |
Toyota Tundra Service Manual > Engine Immobiliser: Transponder Key Ecu
Components COMPONENTS ILLUSTRATION Installation INSTALLATION PROCEDURE 1. INSTALL TRANSPONDER KEY ECU (a) Hook the upper part of the transponder key ECU, and then hook the lower part to install the transponder key ECU as shown in the illustration. 2. INSTALL AIR CONDITIONING UNIT (See page ) 3. CONN ...


