REASSEMBLY CAUTION / NOTICE / HINT HINT: A bolt without a torque specification is shown in the standard bolt chart. Click here PROCEDURE 1. INSTALL LOWER NO. 1 RADIATOR GRILLE (a) Attach the 17 claws to install the lower No. 1 radiator grille to the front valance panel. 2. INSTALL FRONT BUMPER EXTENSION LH (a) Install the front bumper extension LH with the 4 nuts. Torque: 5.4 N·m {55 kgf·cm, 48 in·lbf} 3. INSTALL FRONT BUMPER EXTENSION RH HINT: Use the same procedure described for the LH side. 4. INSTALL FRONT LICENSE PLATE BRACKET SUB-ASSEMBLY (a) Install the front license plate bracket sub-assembly with the 2 screws. 5. INSTALL FRONT BUMPER HOLE COVER LH (w/o Fog Light) (a) Attach the 2 claws to install the front bumper hole cover LH. 6. INSTALL FRONT BUMPER HOLE COVER RH (w/o Fog Light) HINT: Use the same procedure described for the LH side. 7. INSTALL FRONT BUMPER HOLE COVER LH (w/ Fog Light) (a) for Steel Type Bumper: (1) Attach the 2 claws to install the front bumper hole cover LH.
8. INSTALL FRONT BUMPER HOLE COVER RH (w/ Fog Light) HINT: Use the same procedure described for the LH side. 9. INSTALL FRONT BUMPER EXTENSION MOUNTING BRACKET (a) Install the front bumper extension mounting bracket with the 6 bolts. Torque: 5.4 N·m {55 kgf·cm, 48 in·lbf} 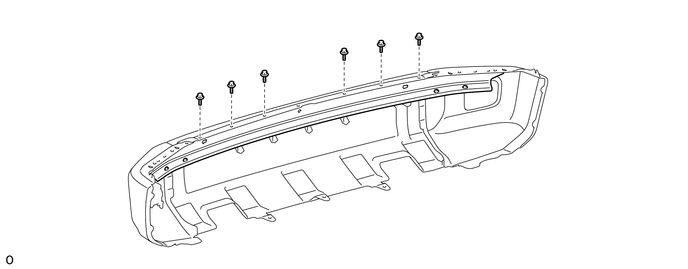
(b) Install the 4 bots and 3 clips. 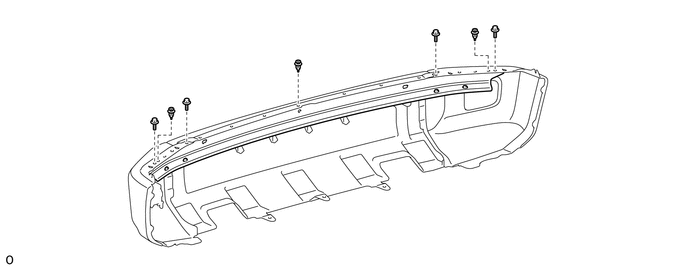
10. INSTALL NO. 1 ULTRASONIC SENSOR (w/ Intuitive Parking Assist System) (a) for Steel Type Bumper: Click here (b) for Resin Type Bumper: Click here 11. INSTALL NO. 1 ULTRASONIC SENSOR RETAINER (w/ Intuitive Parking Assist System) Click here 12. INSTALL FOG LIGHT ASSEMBLY LH (w/ Fog Light) (a) for Halogen Fog Light: Click here (b) for LED Fog Light: Click here 13. INSTALL FOG LIGHT ASSEMBLY RH (w/ Fog Light) HINT: Use the same procedure described for the LH side. |
Toyota Tundra Service Manual > Lighting: Door Mirror Foot Light
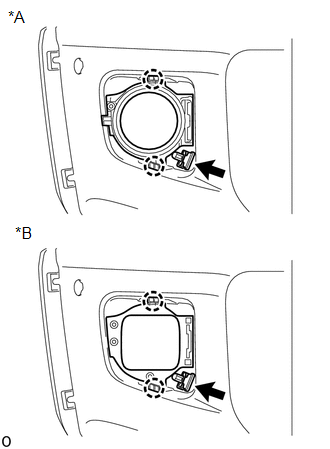
Components COMPONENTS ILLUSTRATION Installation INSTALLATION CAUTION / NOTICE / HINT HINT: Use the same procedure for the RH and LH sides. The procedure listed below is for the LH side. PROCEDURE 1. INSTALL OUTER MIRROR LIGHT ASSEMBLY LH (a) Attach the 2 claws to install the outer mirror light assem ...