REMOVAL PROCEDURE 1. REMOVE RADIATOR GRILLE SUB-ASSEMBLY Click here 2. REMOVE FRONT END PANEL LH 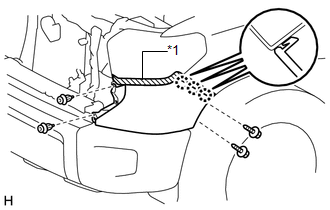
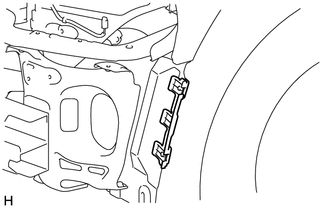
(a) Put protective tape around the front end panel LH. Text in Illustration
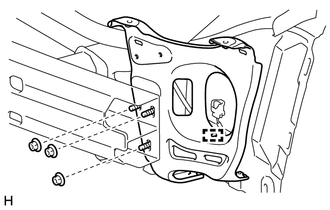
(b) Remove the 2 screws and 2 clips. (c) Detach the 3 claws and remove the front end panel LH. 3. REMOVE FRONT END PANEL RH HINT: Use the same procedure described for the LH side. 4. REMOVE FRONT BUMPER COVER
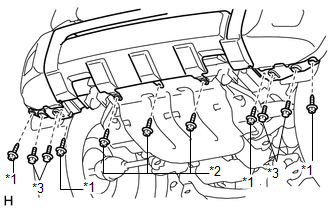
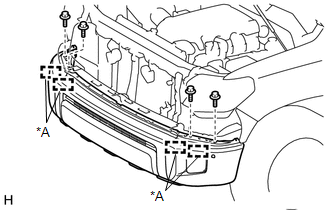
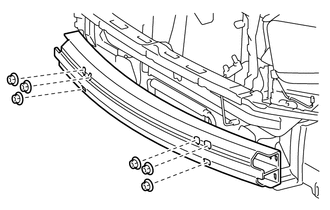
(d) Remove the 4 screws labeled A and 3 screws labeled B.
(f) w/ Fog Light: (1) Disconnect the fog light connectors and remove the front bumper cover. (g) w/ Intuitive Parking Assist System: (1) Detach the 4 clamps and disconnect the wire harness. (2) Disconnect the ultrasonic sensor connectors and remove the front bumper cover. 5. REMOVE FRONT FENDER MAIN SEAL LH
6. REMOVE FRONT FENDER MAIN SEAL RH HINT: Use the same procedure described for the LH side. 7. REMOVE FRONT BUMPER ARM LH
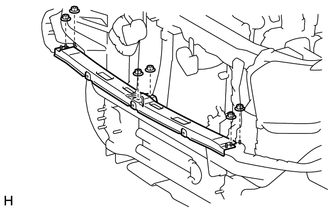
(b) Remove the 3 nuts and front bumper arm LH. 8. REMOVE FRONT BUMPER ARM RH HINT: Use the same procedure described for the LH side. 9. REMOVE FRONT BUMPER REINFORCEMENT
10. REMOVE FRONT BUMPER NO. 2 EXTENSION SUB-ASSEMBLY LH 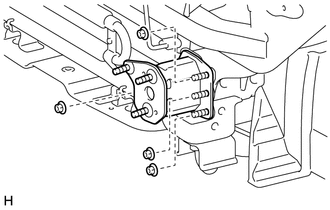
(a) Remove the 4 nuts and front bumper No. 2 extension sub-assembly LH. 11. REMOVE FRONT BUMPER NO. 2 EXTENSION SUB-ASSEMBLY RH HINT: Use the same procedure described for the LH side. 12. REMOVE FRONT BUMPER SIDE SUPPORT LH 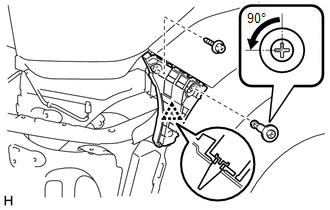
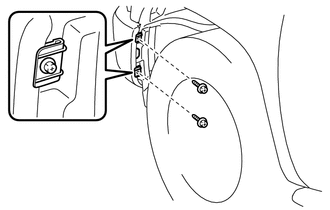
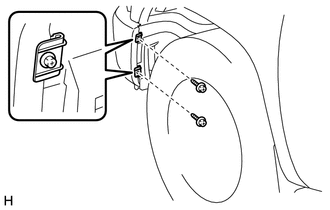
(a) Remove the screw. (b) Using a screwdriver, turn the clip 90° and remove the clip. (c) Detach the clip and remove the front bumper side support LH. 13. REMOVE FRONT BUMPER SIDE SUPPORT RH HINT: Use the same procedure described for the LH side. 14. REMOVE FRONT BUMPER CENTER UPPER RETAINER
15. REMOVE FRONT BUMPER END RETAINER LH 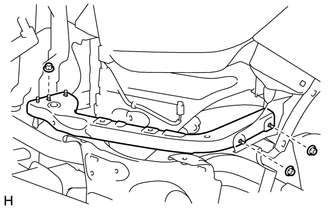
(a) Remove the 3 nuts and front bumper end retainer LH. 16. REMOVE FRONT BUMPER END RETAINER RH HINT: Use the same procedure described for the LH side. |
Toyota Tundra Service Manual > Cruise Control System: Precaution
PRECAUTION HANDLING PRECAUTION FOR CRUISE CONTROL SYSTEM (a) Turn the cruise control system off using the cruise control main switch (ON-OFF button) when not using the cruise control system. (b) Be careful as the vehicle speed increases when driving downhill with the cruise control system controllin ...