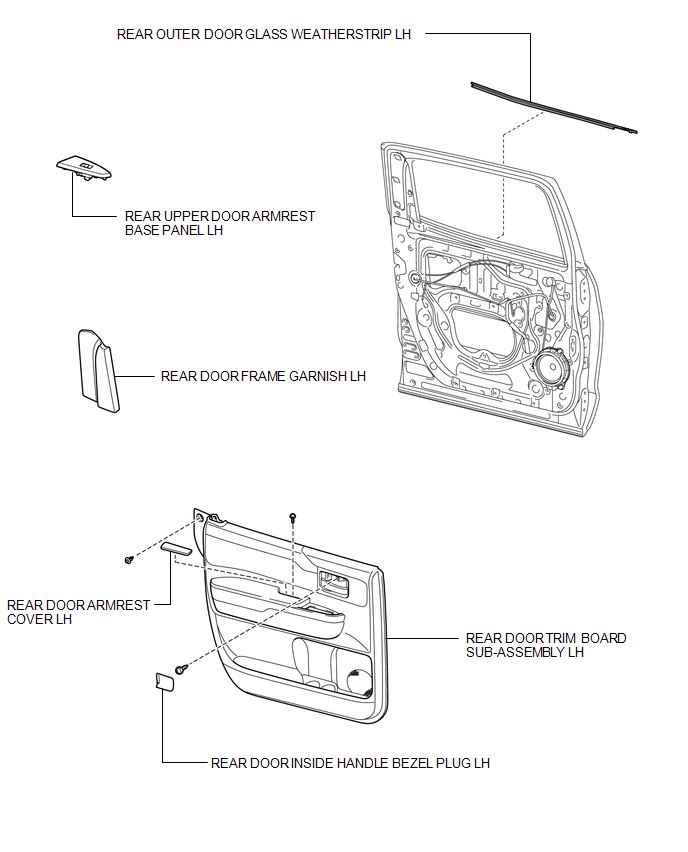
Components COMPONENTS ILLUSTRATION 
Installation INSTALLATION CAUTION / NOTICE / HINT HINT:
PROCEDURE 1. INSTALL REAR OUTER DOOR GLASS WEATHERSTRIP LH 
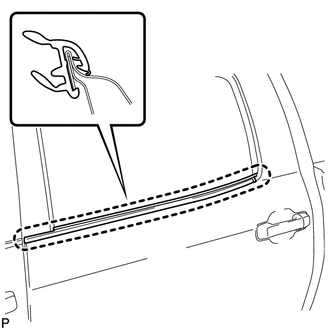
(a) Attach the claw to install the weatherstrip. 2. INSTALL REAR DOOR TRIM BOARD SUB-ASSEMBLY LH
3. INSTALL REAR DOOR ARMREST COVER LH 4. INSTALL REAR DOOR FRAME GARNISH LH
5. INSTALL REAR UPPER DOOR ARMREST BASE PANEL LH
6. INSTALL REAR DOOR INSIDE HANDLE BEZEL PLUG LH
Removal REMOVAL CAUTION / NOTICE / HINT HINT:
PROCEDURE 1. REMOVE REAR DOOR INSIDE HANDLE BEZEL PLUG LH
2. REMOVE REAR UPPER DOOR ARMREST BASE PANEL LH
3. REMOVE REAR DOOR FRAME GARNISH LH
4. REMOVE REAR DOOR ARMREST COVER LH 5. REMOVE REAR DOOR TRIM BOARD SUB-ASSEMBLY LH
6. REMOVE REAR OUTER DOOR GLASS WEATHERSTRIP LH 
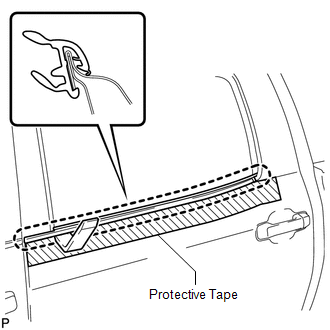
(a) Put protective tape around the weatherstrip outer. (b) Using a moulding remover, detach the claw and remove the weatherstrip. |
Toyota Tundra Service Manual > Differential System: Precaution
PRECAUTION 1. Before disassembly, clean the outside of the front and rear differential assembly and remove any sand or mud to prevent it from entering the assembly during disassembly and installation. 2. When removing connected parts made of a light alloy, such as front and rear differential carrier ...