REMOVAL PROCEDURE 1. REMOVE FRONT SEAT ASSEMBLY (for Manual Seat) (a) Remove the front seat (see page 2. REMOVE FRONT SEAT ASSEMBLY (for Power Seat) (a) Remove the front seat (see page 3. REMOVE CENTER FRONT SEAT ASSEMBLY (a) Remove the front seat (see page 4. REMOVE CENTER SEAT CUSHION SHIELD LH
5. REMOVE CENTER SEAT CUSHION SHIELD RH
6. DISCONNECT CENTER FRONT SEAT BELT ASSEMBLY RH 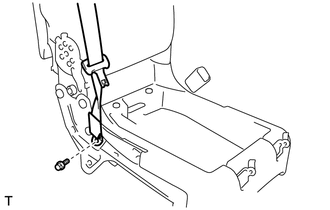
(a) Remove the bolt and seat belt anchor. 7. REMOVE CENTER SEATBACK ASSEMBLY
8. REMOVE FRONT SEAT HEADREST ASSEMBLY 9. REMOVE FRONT SEAT SHOULDER BELT COVER
10. REMOVE UPPER REAR SEATBACK LOCK BEZEL
11. REMOVE LOWER FRONT SEAT SHOULDER BELT COVER
12. REMOVE RECLINING REMOTE CONTROL BEZEL
13. REMOVE FRONT SEAT TRAY
14. REMOVE CENTER FRONT SEAT ARMREST COVER
15. REMOVE SEAT FASTENER COVER
16. REMOVE FRONT SEATBACK BOARD SUB-ASSEMBLY
17. REMOVE FRONT SEAT HEADREST SUPPORT
18. REMOVE CENTER FRONT SEAT BELT ASSEMBLY RH 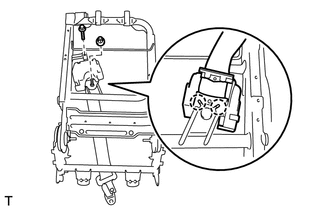
(a) Remove the nut and bolt, and then detach the 2 claws and remove the seat belt. |
Toyota Tundra Service Manual > Refrigerant(for Hfc-134a(r134a)): On-vehicle Inspection
ON-VEHICLE INSPECTION PROCEDURE 1. INSPECT REFRIGERANT PRESSURE WITH MANIFOLD GAUGE SET (a) This method uses a manifold gauge set to locate problem areas. Read the manifold gauge pressure when these conditions are established. Test conditions: Temperature at the air inlet is 30 to 35°C (86 to 95°F ...

 ).
).
