REMOVAL CAUTION / NOTICE / HINT CAUTION: Wear protective gloves. Sharp areas on the parts may injure your hands. PROCEDURE 1. REMOVE REAR SEAT ASSEMBLY RH
2. REMOVE REAR SEAT INNER BELT ASSEMBLY
3. REMOVE REAR SEAT ASSEMBLY LH
4. REMOVE REAR SEAT HEADREST ASSEMBLY
5. REMOVE REAR CENTER SEAT HEADREST ASSEMBLY
6. REMOVE REAR SEATBACK LOCK CONTROL BEZEL
7. REMOVE SEPARATE TYPE REAR SEAT CUSHION COVER WITH PAD
8. REMOVE REAR SEAT RECLINING COVER LH
9. REMOVE REAR SEAT INNER RECLINING COVER LH
10. REMOVE REAR SEAT ARMREST ASSEMBLY
11. REMOVE TETHER ANCHOR BRACKET SUB-ASSEMBLY
12. REMOVE REAR SEAT HEADREST SUPPORT
13. REMOVE REAR NO. 1 SEAT HEADREST SUPPORT ASSEMBLY
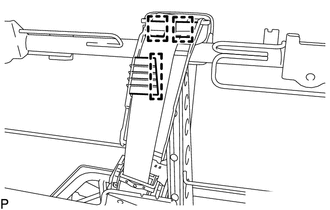
14. REMOVE SEPARATE TYPE REAR SEATBACK COVER WITH PAD
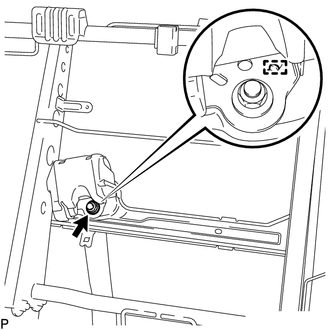
15. REMOVE REAR CENTER SEAT OUTER BELT ASSEMBLY
(c) Detach the guide and remove the rear center seat outer belt assembly. |
Toyota Tundra Service Manual > Egr Valve: Inspection
INSPECTION PROCEDURE 1. INSPECT EGR VALVE ASSEMBLY (a) Check the resistance of the EGR valve. (1) Measure the resistance according to the value(s) in the table below. Standard Resistance: Tester Connection Condition Specified Condition 1 - 2 20°C (68°F) 18 to 22 Ω 2 - 3 4 - 5 5 - 6 If the result ...