Components COMPONENTS ILLUSTRATION 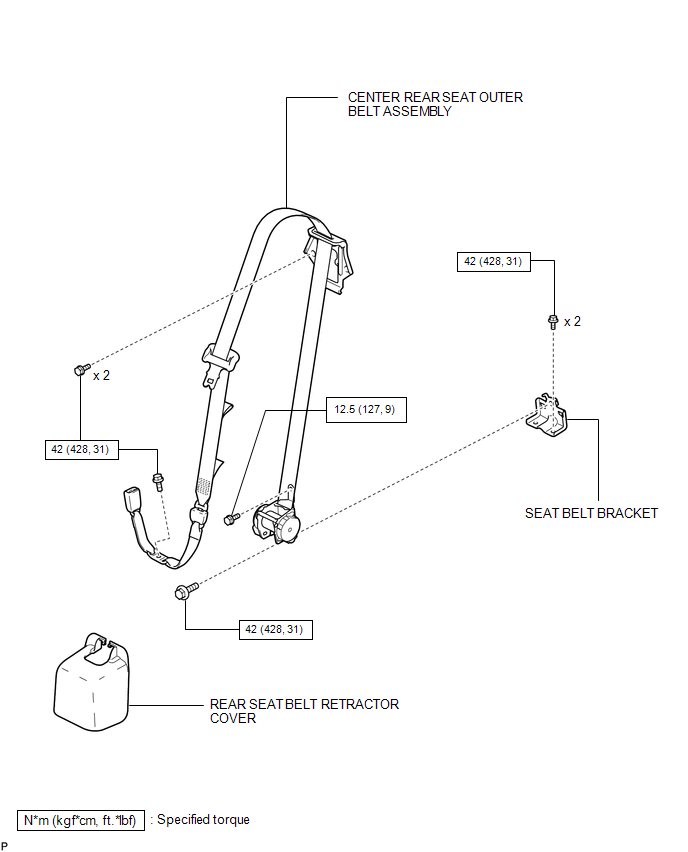
Inspection INSPECTION PROCEDURE 1. INSPECT CENTER REAR SEAT OUTER BELT ASSEMBLY
(b) Check the fastening function of the child restraint system. NOTICE: The check should be performed with the outer belt installed. (1) When the belt is pulled out fully, the belt should automatically start to retract. (2) After the belt has fully retracted, the belt should be able to be pulled out and retracted again. If the operation is not as specified, replace the belt assembly. Installation INSTALLATION PROCEDURE 1. INSTALL SEAT BELT BRACKET 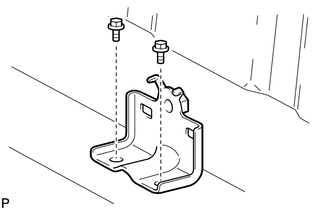
(a) Install the bracket with the 2 bolts. Torque: 42 N·m {428 kgf·cm, 31 ft·lbf} 2. INSTALL CENTER REAR SEAT OUTER BELT ASSEMBLY 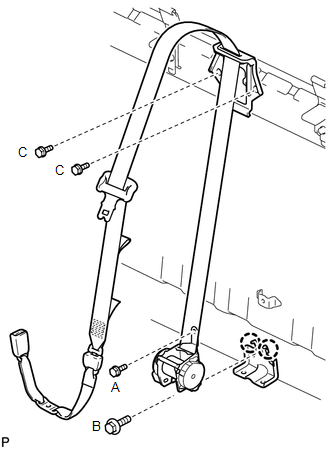
(a) Align the vehicle's claws with the seat belt retractor positioning holes. (b) Install the retractor with the 2 bolts. HINT: First install bolt A, and then install bolt B. Torque: for bolt A : 12.5 N·m {127 kgf·cm, 9 ft·lbf} for bolt B : 42 N·m {428 kgf·cm, 31 ft·lbf} (c) Install the seat belt with the 2 bolts. Torque: for bolt C : 42 N·m {428 kgf·cm, 31 ft·lbf} 3. INSTALL REAR SEAT BELT RETRACTOR COVER 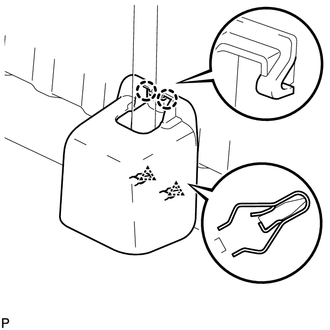
(a) Attach the 2 claws and 2 clips to install the cover. 4. INSTALL REAR SEAT ASSEMBLY (a) Install the rear seat assembly (see page 5. INSTALL REAR SEAT OUTER BELT ASSEMBLY
Removal REMOVAL PROCEDURE 1. DISCONNECT CENTER REAR SEAT OUTER BELT ASSEMBLY
2. REMOVE REAR SEAT ASSEMBLY (a) Remove the rear seat assembly (see page 3. REMOVE REAR SEAT BELT RETRACTOR COVER 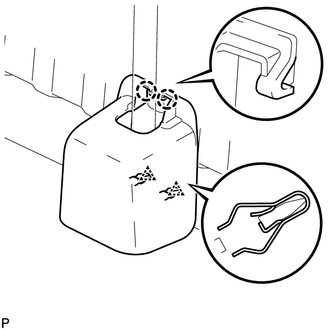
(a) Detach the 2 claws and 2 clips, and remove the cover. 4. REMOVE CENTER REAR SEAT OUTER BELT ASSEMBLY 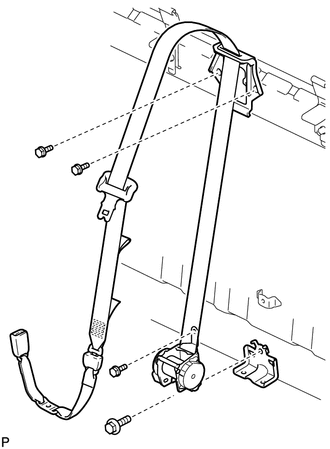
(a) Remove the 4 bolts and outer belt. 5. REMOVE SEAT BELT BRACKET 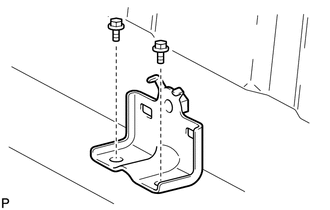
(a) Remove the 2 bolts and bracket. |
Toyota Tundra Service Manual > Windshield Deicer System: Data List / Active Test
DATA LIST / ACTIVE TEST 1. ACTIVE TEST HINT: Using the Techstream to perform the Active Tests allows relays, VSVs and actuators and other items to be operated without removing any parts. This non-intrusive functional inspection can be very useful because intermittent operation may be discovered befo ...