DISASSEMBLY CAUTION / NOTICE / HINT CAUTION: Wear protective gloves. Sharp areas on the parts may injure your hands. PROCEDURE 1. REMOVE CENTER SEATBACK PANEL
2. REMOVE REAR POWER OUTLET SOCKET ASSEMBLY (for Double Cab)
3. REMOVE REAR POWER OUTLET SOCKET COVER (for Double Cab)
4. REMOVE NO. 2 CONSOLE BOX REGISTER ASSEMBLY (for CrewMax)
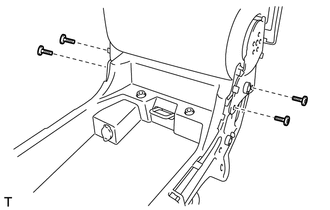
5. REMOVE NO. 1 CONSOLE BOX REGISTER ASSEMBLY (for CrewMax) 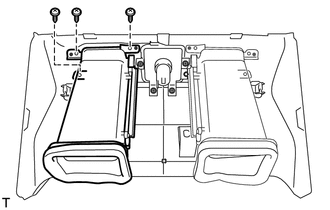
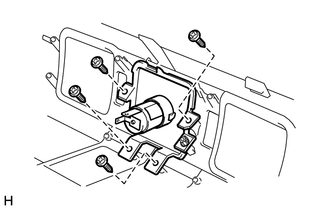
(a) Remove the 3 screws and No. 1 console box register assembly. 6. REMOVE NO. 2 SEATBACK LOCK CONTROL BEZEL (for CrewMax)
7. REMOVE REAR POWER OUTLET SOCKET (for CrewMax)
8. REMOVE REAR POWER OUTLET SOCKET COVER (for CrewMax)
9. REMOVE CENTER SEAT CUSHION SHIELD LH 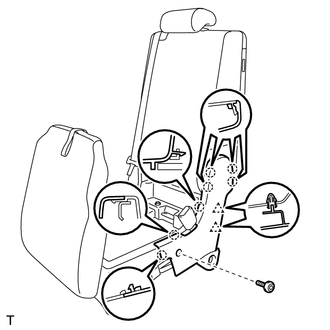
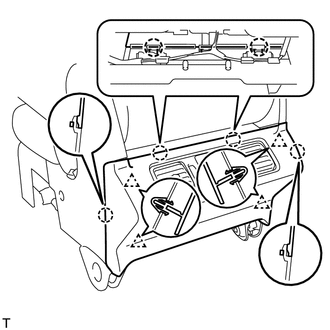
(a) Using a T30 "TORX" socket wrench, remove the bolt. (b) Detach the 7 claws and 2 clips and remove the center seat cushion shield LH. 10. REMOVE CENTER SEAT CUSHION SHIELD RH 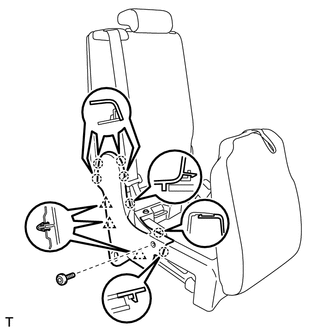
(a) Using a T30 "TORX" socket wrench, remove the bolt. (b) Detach the 7 claws and 3 clips and remove the center seat cushion shield RH. 11. REMOVE CENTER FRONT SEAT CUSHION COVER 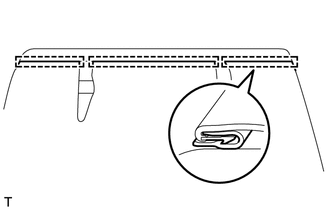
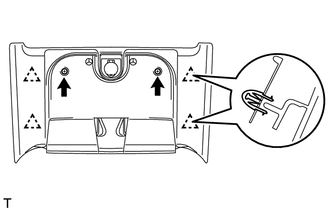
(a) Detach the 3 hooks and remove the center front seat cushion cover. 12. REMOVE CENTER FRONT SEAT CUSHION ASSEMBLY
13. REMOVE REAR SEAT LOCK LATCH
14. REMOVE CENTER FRONT SEAT CUSHION PAD 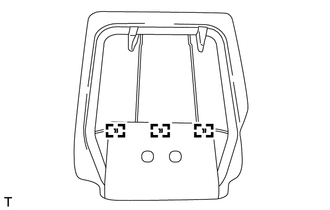
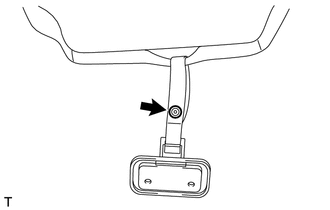
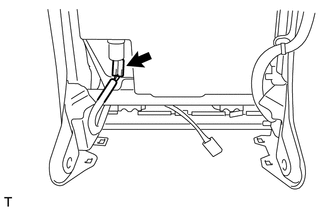
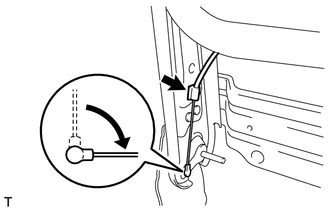
(a) Remove the 3 hog rings and center front seat cushion pad. 15. REMOVE CENTER FRONT SEAT INNER BELT ASSEMBLY 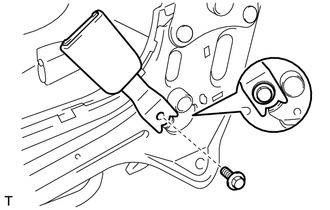
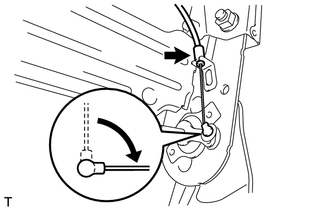
(a) Remove the bolt and center front seat inner belt assembly. 16. DISCONNECT CENTER FRONT SEAT BELT ASSEMBLY RH 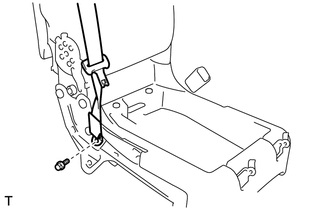
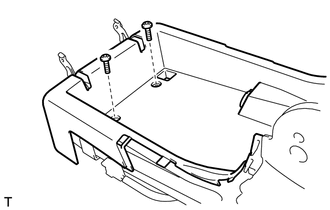
(a) Remove the bolt and disconnect the center front seat belt assembly RH. 17. REMOVE CENTER SEATBACK ASSEMBLY
(c) RH Side: Using a T55 "TORX" socket wrench, remove the 2 bolts. (d) Remove the center seatback assembly. 18. REMOVE FOLD SEAT STOPPER CUSHION 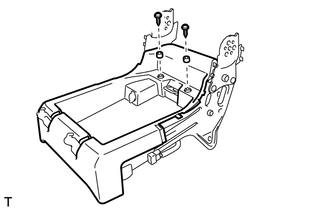
(a) Using a T20 "TORX" socket wrench, remove the 2 screws and 2 fold seat stopper cushions. 19. REMOVE FRONT SEAT UNDER TRAY
20. REMOVE POWER OUTLET SOCKET ASSEMBLY
21. REMOVE CENTER POWER OUTLET SOCKET COVER
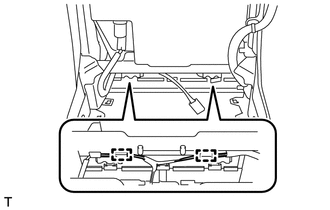
22. REMOVE CONSOLE BOX WIRE 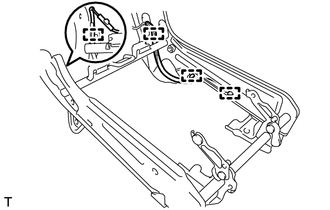
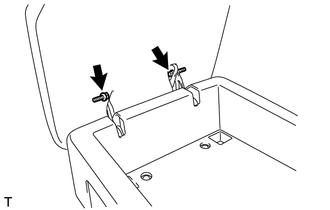
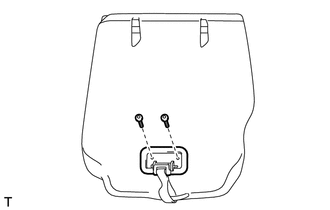
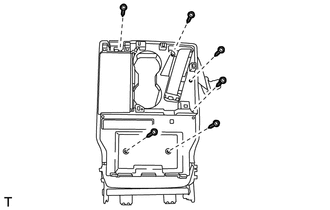
(a) Detach the 4 clamps and remove the console box wire. 23. REMOVE FRONT SEAT HEADREST ASSEMBLY (a) Remove the front seat headrest assembly. 24. REMOVE FRONT SEAT SHOULDER BELT COVER 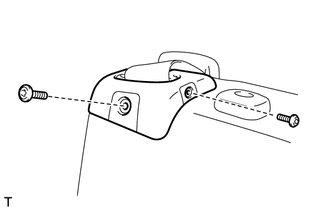
(a) Using a T10 "TORX" socket wrench, remove the 2 screws and front seat shoulder belt cover. 25. REMOVE UPPER REAR SEATBACK LOCK BEZEL 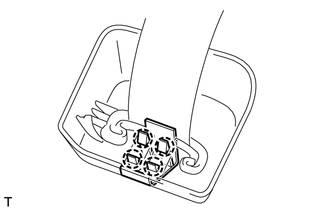
(a) Detach the 4 claws and remove the upper rear seatback lock bezel. (b) Disconnect the center front seat belt assembly from the front seat shoulder belt cover. 26. REMOVE LOWER FRONT SEAT SHOULDER BELT COVER 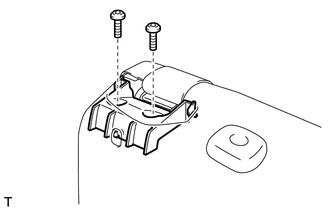
(a) Using a T30 "TORX" socket wrench, remove the 2 bolts and lower front seat shoulder belt cover. 27. REMOVE RECLINING REMOTE CONTROL BEZEL 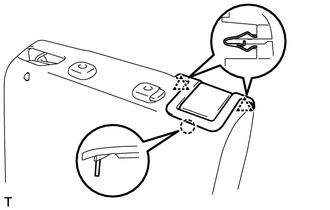
(a) Detach the 2 clips and claw, and then remove the reclining remote control bezel. 28. REMOVE FRONT SEAT TRAY 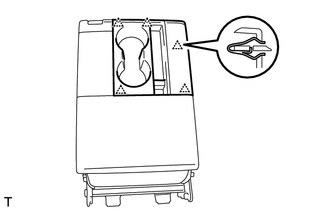
(a) Detach the 5 clips and remove the front seat tray. 29. REMOVE CENTER FRONT SEAT ARMREST COVER 
(a) Remove the 2 screws and center front seat armrest cover. 30. REMOVE SEAT FASTENER COVER 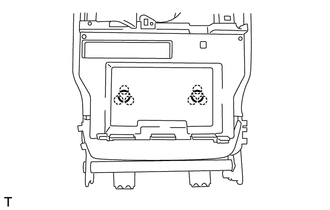
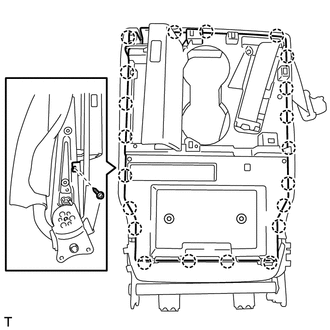
(a) Detach the 6 claws and remove the 2 seat fastener covers. 31. REMOVE FRONT SEATBACK BOARD SUB-ASSEMBLY
(e) Remove the front seatback board sub-assembly. 32. REMOVE FRONT SEAT HEADREST SUPPORT 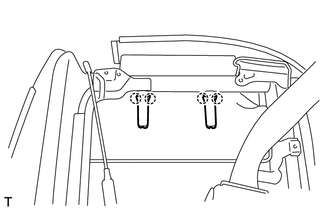
(a) Detach the 4 claws and remove the 2 front seat headrest supports. 33. REMOVE CENTER FRONT SEATBACK COVER (a) Remove the center front seatback cover. 34. REMOVE CENTER SEATBACK PAD (a) Remove the center seatback pad. 35. REMOVE CENTER SEAT RECLINING ADJUSTER INSIDE COVER LH 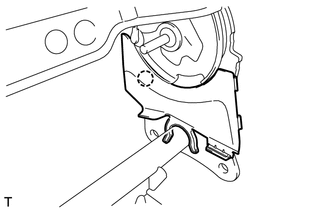
(a) Detach the claw and remove the center seat reclining adjuster inside cover LH. 36. REMOVE CENTER SEAT RECLINING ADJUSTER INSIDE COVER RH (a) Detach the claw and remove the center seat reclining adjuster inside cover RH. 37. REMOVE CENTER FRONT SEAT BELT ASSEMBLY 
(a) Remove the nut and bolt. (b) Detach the 2 claws and remove the center front seat belt assembly. |
Toyota Tundra Owners Manual > Adjusting the steering
wheel and mirrors: Outside rear view
mirrors
Adjustment procedure Manually adjustable type Adjust the mirror up and down, in or out by pushing the mirror surface. Power-adjustable type (type A) 1. To select a mirror to adjust, press the switch. Left Right 2. To adjust the mirror, press the switch. Up Right Down Left Power-adjustable type (type ...