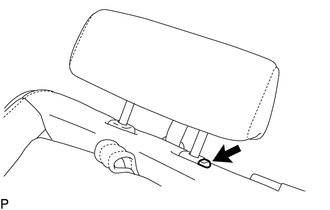
DISASSEMBLY CAUTION / NOTICE / HINT CAUTION: Wear protective gloves. Sharp areas on the parts may injure your hands. PROCEDURE 1. REMOVE REAR SEAT HEADREST ASSEMBLY
2. REMOVE REAR CENTER SEAT HEADREST ASSEMBLY
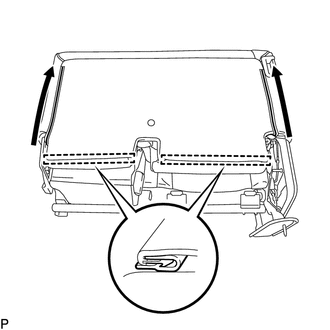
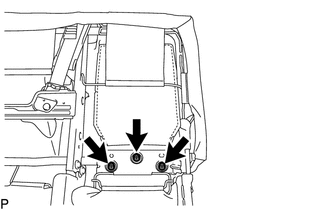
3. REMOVE REAR SEATBACK LOCK CONTROL BEZEL (a) Pull out the 2 fasteners. 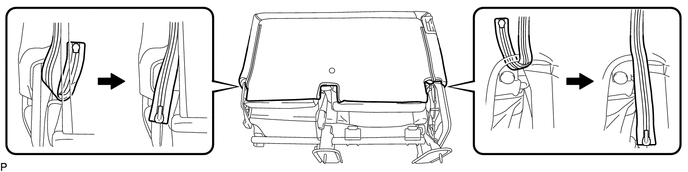
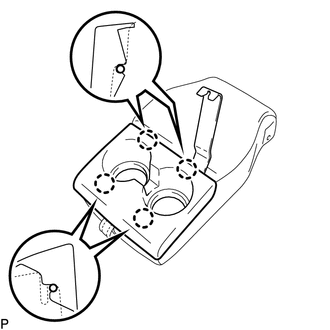
(c) Detach the 4 claws on the backside of the rear seatback lock control bezel and remove the rear seatback lock control bezel. 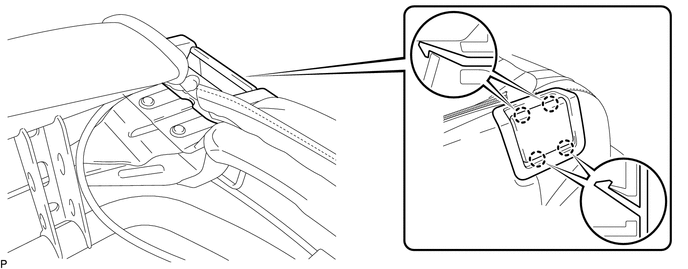
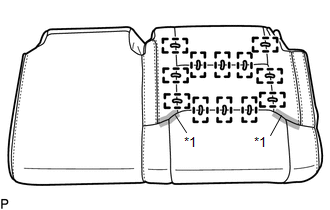
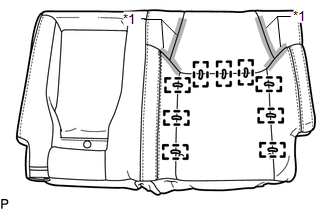
4. REMOVE SEPARATE TYPE REAR SEAT CUSHION COVER WITH PAD (a) Detach the 6 hooks and remove the separate type rear seat cushion cover with pad. 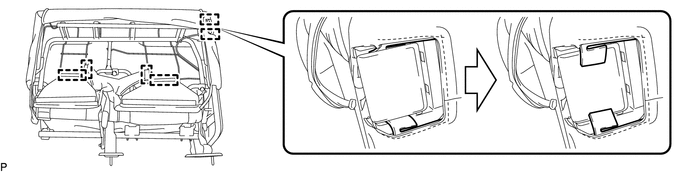
5. REMOVE SEPARATE TYPE REAR SEAT CUSHION COVER
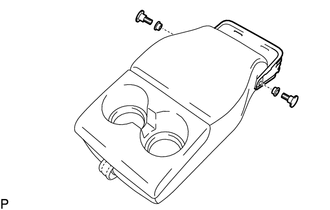
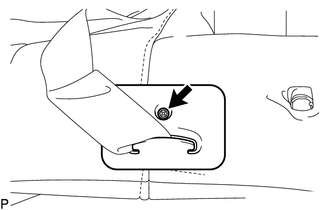
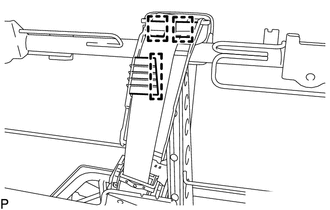
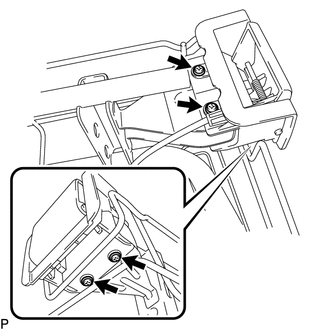
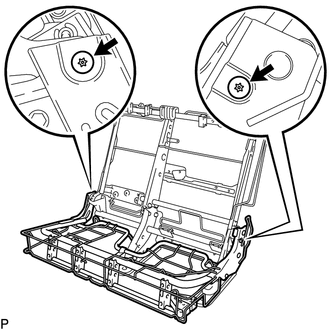
6. REMOVE REAR SEAT RECLINING COVER LH (a) Using a T25 "TORX" socket wrench, remove the 2 screws. 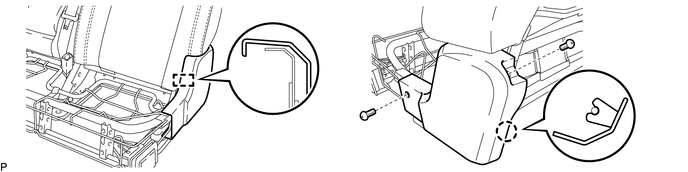
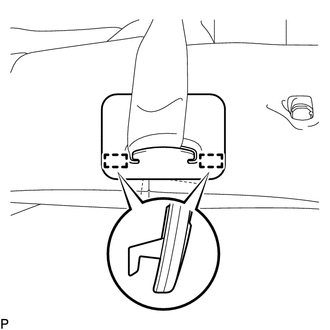
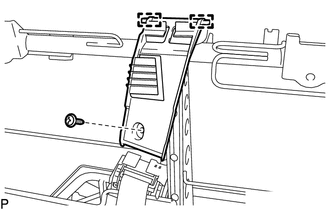
(b) Detach the guide and claw, and then remove the rear seat reclining cover LH. 7. REMOVE REAR SEAT INNER RECLINING COVER LH 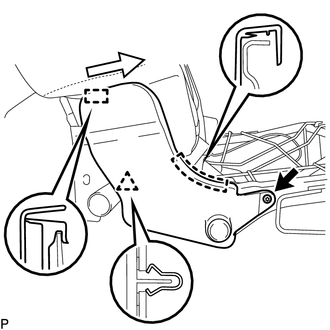
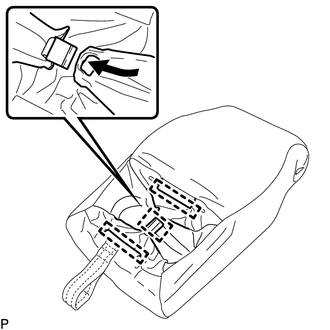
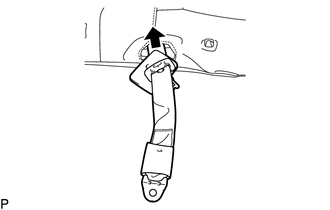
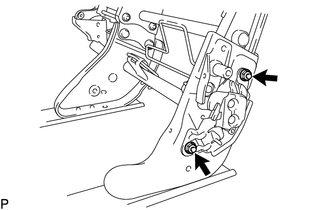
(a) Using a T25 "TORX" socket wrench, remove the screw. (b) Detach the clip. (c) Detach the 2 guides in the direction indicated by the arrow shown in the illustration, and then remove the rear seat inner reclining cover LH. 8. REMOVE REAR NO. 1 SEAT INNER BELT ASSEMBLY LH
(b) Detach the guide and remove the rear No. 1 seat inner belt assembly LH. 9. REMOVE REAR SEAT CENTER ARMREST ASSEMBLY
(c) Remove the rear seat armrest bracket from the rear seat center armrest assembly. 10. REMOVE CUP HOLDER ASSEMBLY
11. REMOVE REAR NO. 1 SEAT CENTER ARMREST COVER
12. REMOVE TETHER ANCHOR BRACKET SUB-ASSEMBLY
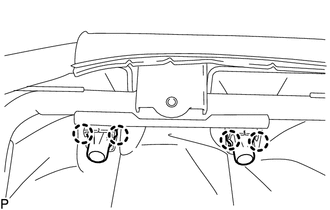
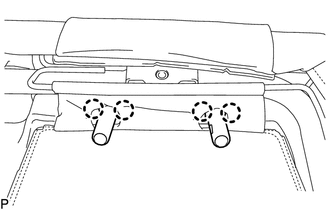
13. REMOVE REAR SEAT HEADREST SUPPORT
14. REMOVE REAR NO. 1 SEAT HEADREST SUPPORT ASSEMBLY
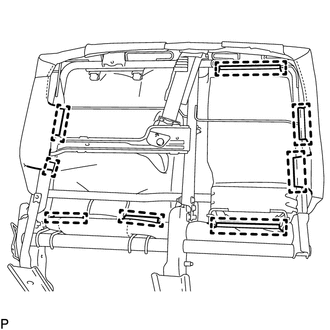
15. REMOVE SEPARATE TYPE REAR SEATBACK COVER WITH PAD
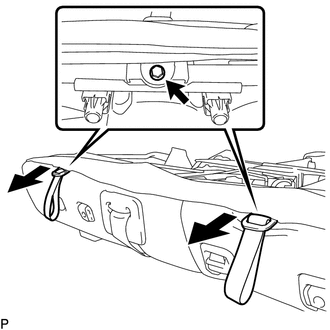
(b) Pass the rear center seat outer belt assembly through the rubber band of the separate type rear seatback cover and disconnect the floor anchor of the rear center seat outer belt assembly. Text in Illustration
16. REMOVE SEPARATE TYPE REAR SEATBACK COVER
17. REMOVE REAR SEAT SHOULDER BELT HOLE COVER
(c) Detach the 2 guides and remove the rear seat shoulder belt hole cover. 18. REMOVE REAR CENTER SEAT OUTER BELT ASSEMBLY
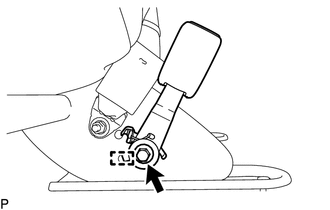
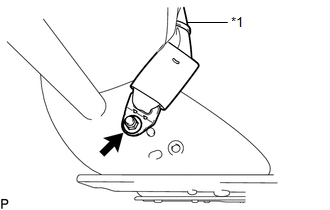
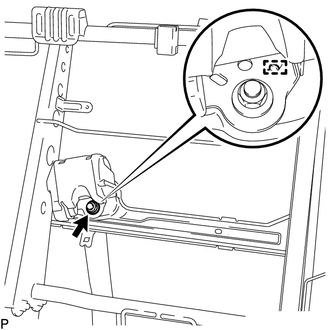
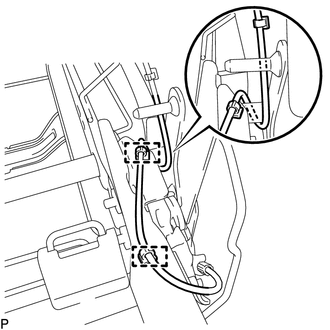
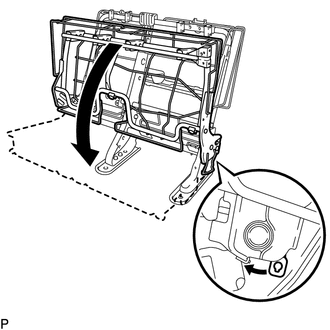
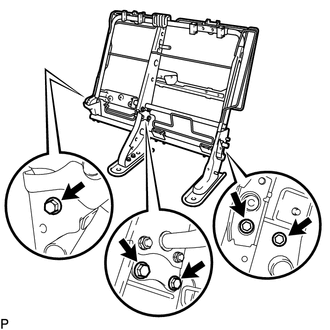
(b) Detach the guide and remove the rear center seat outer belt assembly. 19. REMOVE NO. 1 RECLINING ADJUSTER RELEASE HANDLE LH (a) Pull the No. 1 reclining adjuster release handle LH and fold up the rear seat cushion frame sub-assembly LH. 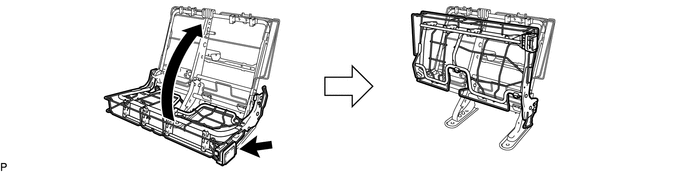
HINT: Make sure that the rear seat cushion frame sub-assembly LH is locked. (b) Detach the clamp and disconnect the cable end of the No. 1 reclining adjuster release handle LH as shown in the illustration. 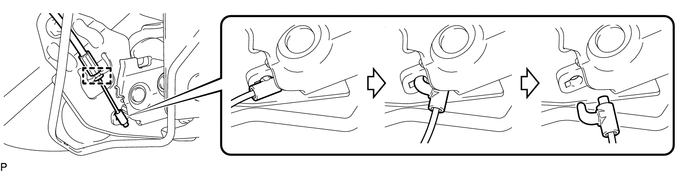
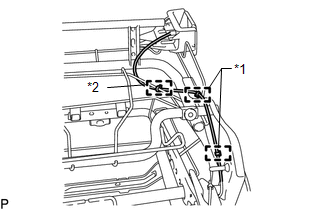
(e) Cut off the cable tie.
20. REMOVE REAR SEAT CUSHION FRAME SUB-ASSEMBLY LH
21. REMOVE REAR SEAT TURN LOCK SUB-ASSEMBLY
22. REMOVE REAR SEATBACK FRAME SUB-ASSEMBLY LH
|
Toyota Tundra Service Manual > Steering Column Assembly(for Manual Tilt And Manual Telescopic Steering Column): Removal
REMOVAL CAUTION / NOTICE / HINT CAUTION: Some of these service operations affect the SRS airbag system. Read the precautionary notices concerning the SRS airbag system before servicing the steering column (See page ). PROCEDURE 1. PRECAUTION NOTICE: After turning the ignition switch off, waiting tim ...