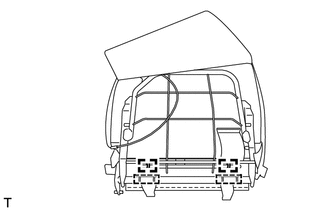
REASSEMBLY CAUTION / NOTICE / HINT CAUTION: Wear protective gloves. Sharp areas on the parts may injure your hands. PROCEDURE 1. INSTALL SEPARATE TYPE REAR SEATBACK COVER RH (a) Set the separate type rear seatback cover RH in place.
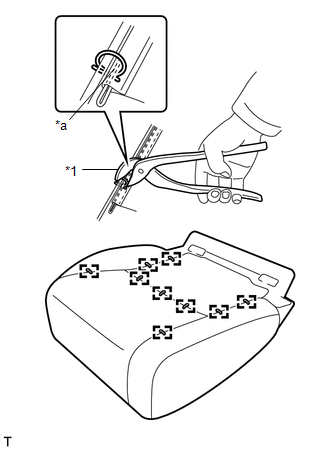
2. INSTALL REAR SEATBACK COVER WITH PAD RH 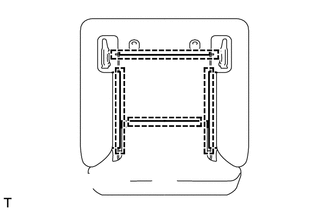
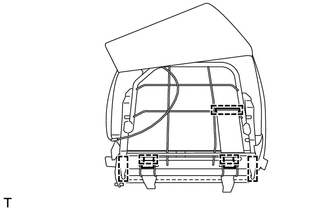
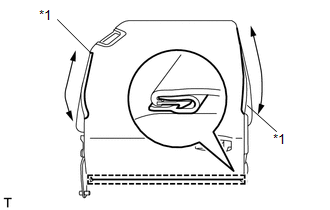
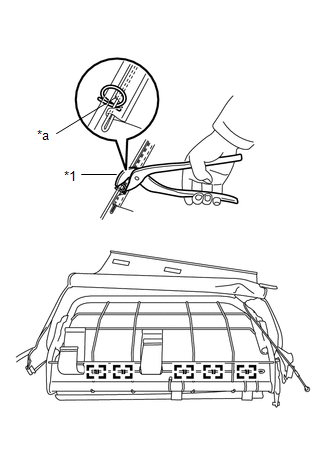
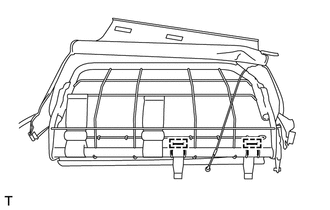
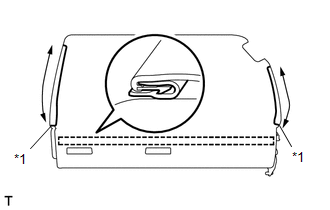
(a) Install the rear seatback cover with pad RH to the rear seatback frame sub-assembly RH, and then attach the 4 hooks. 3. INSTALL REAR SEAT HEADREST SUPPORT RH (a) Attach 4 claws to install the 2 rear seat headrest supports. 4. INSTALL REAR SEAT HEADREST ASSEMBLY RH (a) Install the rear seat headrest assembly RH. 5. INSTALL REAR SEAT TURN LOCK SUB-ASSEMBLY RH 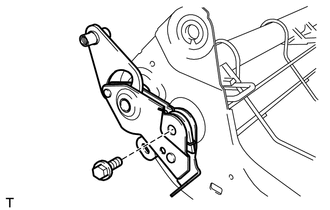
(a) Install the rear seat turn lock sub-assembly RH with the bolt. Torque: 45 N·m {459 kgf·cm, 33 ft·lbf} 6. INSTALL REAR SEAT HINGE COVER RH 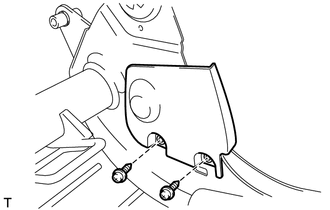
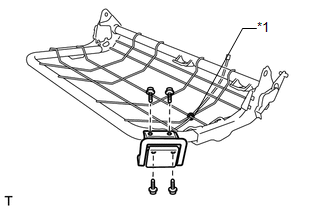
(a) Install the rear seat hinge cover RH with the 2 screws. 7. INSTALL REAR SEAT HINGE COVER LH (a) Install the rear seat hinge cover LH with the 2 screws. 8. INSTALL NO. 1 RECLINING ADJUSTER RELEASE HANDLE RH 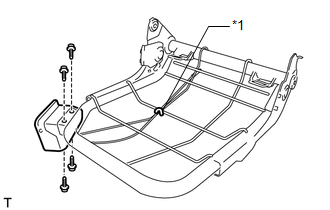
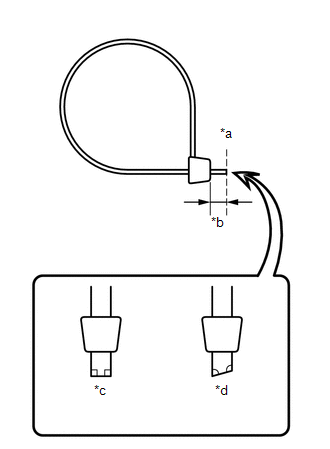
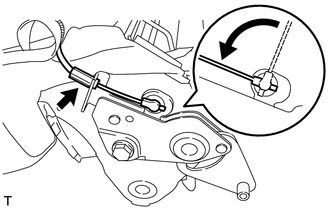
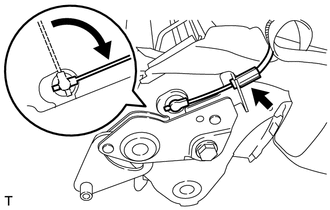
(a) Install the No. 1 reclining adjuster release handle RH with the 4 screws. (b) Connect the cable and install a new cable tie. Text in Illustration
9. INSTALL SEPARATE TYPE REAR SEAT CUSHION COVER RH (a) Set the separate type rear seat cushion cover RH in place.
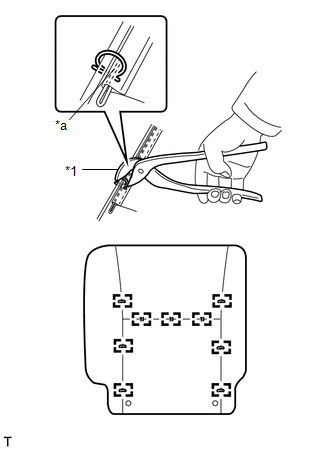
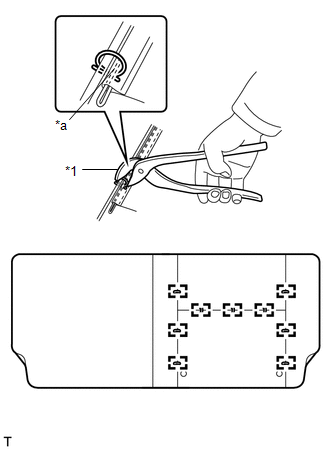
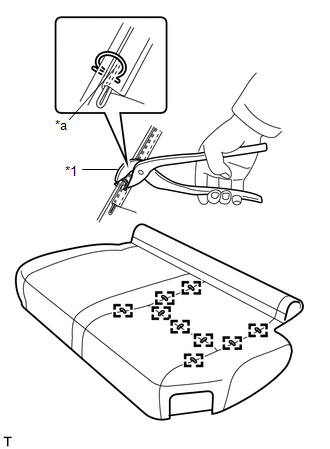
10. INSTALL REAR SEAT CUSHION COVER WITH PAD RH
(b) Attach the 2 hooks.
11. INSTALL REAR SEATBACK LOCK CONTROL BEZEL RH 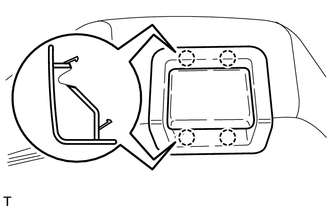
(a) Attach the 4 claws to install the rear seatback lock control bezel RH. 12. INSTALL REAR SEAT CUSHION ASSEMBLY RH 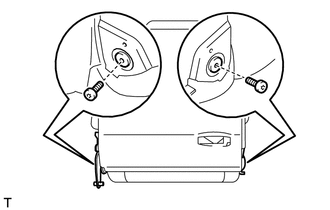
(a) Using a T40 "TORX" socket wrench, install the rear seat cushion assembly RH with the 2 bolts. Torque: 23 N·m {235 kgf·cm, 17 ft·lbf} 13. INSTALL OUTER REAR SEAT LOCK COVER RH 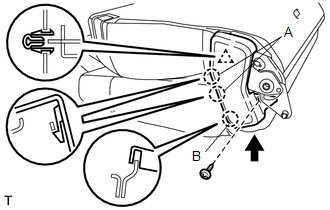
(a) Attach the claw labeled B in the direction indicated by the arrow in the illustration, and then attach the clip and 2 claws labeled A to install the outer rear seat lock cover RH. (b) Install the screw. 14. INSTALL INNER REAR SEAT LOCK COVER RH 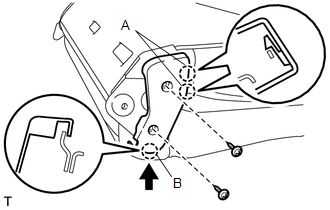
(a) Attach the claw labeled B in the direction indicated by the arrow in the illustration, and then attach the 2 claws labeled A to install the inner rear seat lock cover RH. (b) Install the 2 screws. 15. INSTALL NO. 1 SEAT LEG SUB-ASSEMBLY 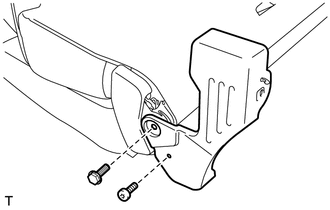
(a) Install the No. 1 seat leg sub-assembly with the bolt. Torque: 60 N·m {612 kgf·cm, 44 ft·lbf} (b) Using a T45 "TORX" socket wrench, install the bolt. Torque: 30 N·m {306 kgf·cm, 22 ft·lbf} 16. INSTALL SEAT LEG SUB-ASSEMBLY LH 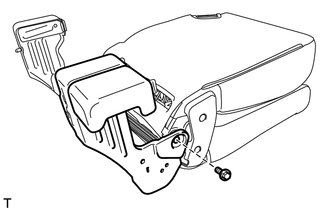
(a) Install the seat leg sub-assembly LH with the bolt. Torque: 60 N·m {612 kgf·cm, 44 ft·lbf} 17. INSTALL SEPARATE TYPE REAR SEATBACK COVER LH (a) Set the separate type rear seatback cover LH in place.
18. INSTALL REAR SEATBACK COVER WITH PAD LH 
(a) Install the rear seatback cover with pad to the rear seatback frame sub-assembly LH, and then attach the 6 hooks. 19. INSTALL REAR NO. 1 SEAT HEADREST SUPPORT ASSEMBLY (a) Attach the 4 claws to install the 2 rear No. 1 seat headrest support assemblies. 20. INSTALL REAR SEAT HEADREST SUPPORT LH (a) Attach the 4 claws to install the 2 rear seat headrest supports. 21. INSTALL CENTER REAR SEAT HEADREST ASSEMBLY (a) Install the center rear seat headrest assembly. 22. INSTALL REAR SEAT HEADREST ASSEMBLY LH (a) Install the rear seat headrest assembly LH. 23. INSTALL REAR SEAT TURN LOCK SUB-ASSEMBLY LH 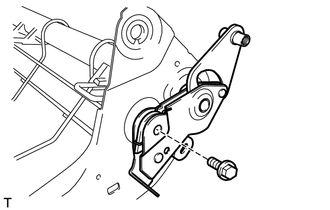
(a) Install the rear seat turn lock sub-assembly LH with the bolt. Torque: 45 N·m {459 kgf·cm, 33 ft·lbf} 24. INSTALL REAR SEAT HINGE COVER RH
(a) Install the rear seat hinge cover RH with the 2 screws. 25. INSTALL REAR SEAT HINGE COVER LH (a) Install the rear seat hinge cover LH with the 2 screws. 26. INSTALL NO. 1 RECLINING ADJUSTER RELEASE HANDLE LH
(b) Connect the cable and install a new cable tie. Text in Illustration
27. INSTALL SEPARATE TYPE REAR SEAT CUSHION COVER LH (a) Set the separate type rear seat cushion cover LH in place.
28. INSTALL REAR SEAT CUSHION COVER WITH PAD LH
29. INSTALL REAR SEATBACK LOCK CONTROL BEZEL LH 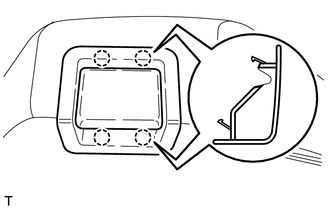
(a) Attach the 4 claws to install the rear seatback lock control bezel LH. 30. INSTALL REAR SEAT CUSHION ASSEMBLY LH 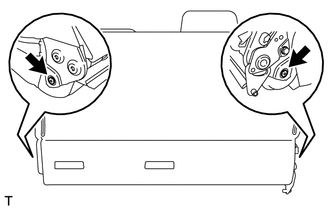
(a) Using a T40 "TORX" socket wrench, install the rear seat cushion assembly LH with the 2 bolts. Torque: 23 N·m {235 kgf·cm, 17 ft·lbf} 31. INSTALL INNER REAR SEAT LOCK COVER LH 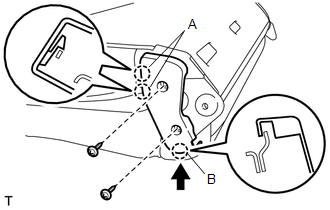
(a) Attach the claw labeled B in the direction indicated by the arrow in the illustration, and then attach the 2 claws labeled A to install the inner rear seat lock cover LH. (b) Install the 2 screws. 32. INSTALL OUTER REAR SEAT LOCK COVER LH 
(a) Attach the claw labeled B in the direction indicated by the arrow in the illustration, and then attach the clip and 2 claws labeled A to install the outer rear seat lock cover LH. (b) Install the screw. 33. INSTALL NO. 1 SEAT LEG SUB-ASSEMBLY RH 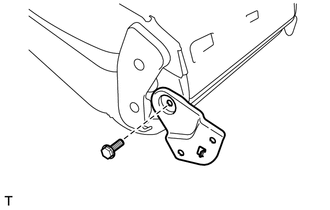
(a) Install the No. 1 seat leg sub-assembly RH with the bolt. Torque: 60 N·m {612 kgf·cm, 44 ft·lbf} 34. INSTALL NO. 1 SEAT LEG SUB-ASSEMBLY LH 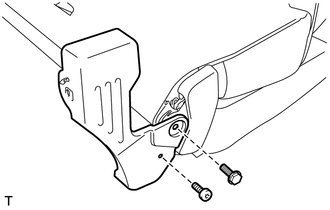
(a) Install the No. 1 seat leg sub-assembly LH with the bolt. Torque: 60 N·m {612 kgf·cm, 44 ft·lbf} (b) Using a T45 "TORX" socket wrench, install the bolt. Torque: 30 N·m {306 kgf·cm, 22 ft·lbf} 35. INSTALL REAR SEAT ASSEMBLY LH 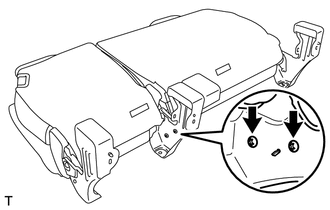
(a) Using a T50 "TORX" socket wrench, install the rear seat assembly LH with the 2 bolts. Torque: 45 N·m {459 kgf·cm, 33 ft·lbf} |
Toyota Tundra Service Manual > Combination Meter: Removal
REMOVAL PROCEDURE 1. PRECAUTION NOTICE: After turning the ignition switch off, waiting time may be required before disconnecting the cable from the battery terminal. Therefore, make sure to read the disconnecting the cable from the battery terminal notice before proceeding with work. Click here 2. D ...