INSTALLATION CAUTION / NOTICE / HINT NOTICE: When replacing the windshield glass of a vehicle equipped with a forward recognition camera, make sure to use a Toyota genuine part. If a non-Toyota genuine part is used, the forward recognition camera may not be able to be installed due to a missing bracket. Also, the dynamic radar cruise control system, forward recognition camera system, lane departure alert system, pre-collision system may not operate properly due to a difference in the transmissivity or black ceramic border. PROCEDURE 1. INSTALL NO. 2 WINDSHIELD GLASS STOPPER (a) Apply glass primer to the windshield glass where the 2 No. 2 windshield glass stoppers will be installed. NOTICE:
(b) Install 2 new No. 2 windshield glass stoppers onto the windshield glass as shown in the illustration. 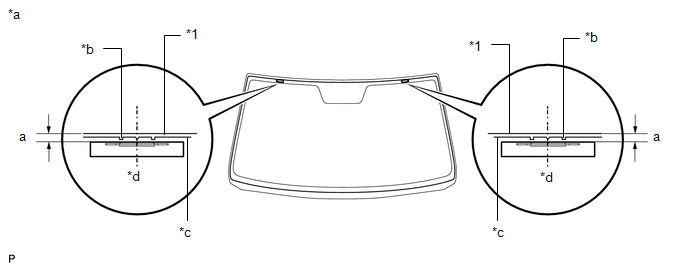
Standard:
2. INSTALL NO. 1 WINDSHIELD GLASS STOPPER 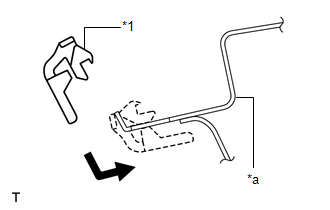
(a) Install 2 new No. 1 windshield glass stoppers to the vehicle body as shown in the illustration. 3. INSTALL WINDSHIELD GLASS ADHESIVE DAM (a) Apply glass primer to the windshield glass where the windshield glass adhesive dams will be installed. NOTICE:
(b) Remove the peeling paper from the adhesive part of the windshield glass adhesive dam. While aligning the dam to the ceramic notch and dam reference line, install the dam (adhesive side) to the windshield glass (glass primer area). 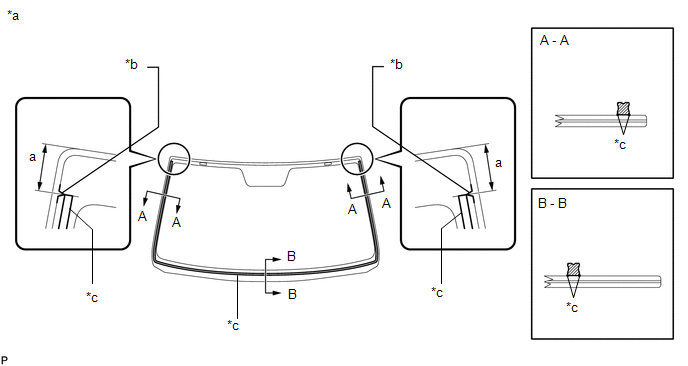
Standard:
4. INSTALL UPPER WINDSHIELD OUTSIDE MOULDING 
(a) Using a brush or sponge, coat the edge of the windshield glass and the contact surface with glass primer. NOTICE:
(b) Install the upper windshield outside moulding, as shown in the illustration. NOTICE: Do not drive the vehicle for the amount of time written in the table below. Usage time frame:
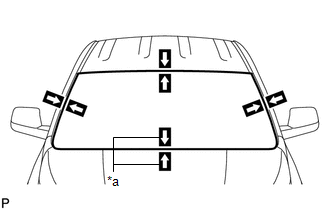
5. INSTALL WINDSHIELD GLASS
(b) Using a brush or sponge, apply glass primer to the contact surface of the windshield glass. 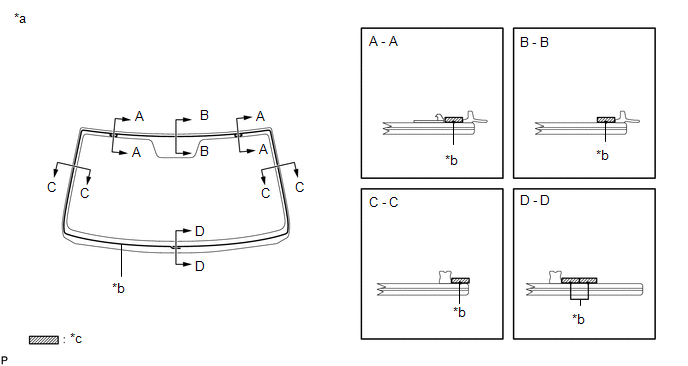
HINT: If the primer is applied to an area that is not specified, apply non-residue solvent to a clean cloth and wipe off the excess primer. NOTICE:
(c) Apply adhesive to the windshield glass. Adhesive: Toyota Genuine Windshield Glass Adhesive or equivalent (1) Cut off the tip of the cartridge nozzle as shown in the illustration. HINT: After cutting off the tip, use all adhesive within the time written in the table below. Usage time frame:
(2) Load the sealer gun with the cartridge. (3) Apply adhesive to the windshield glass as shown in the illustration. 
Standard:
(e) w/ Windshield Deicer: Install the clip and connect the connector. 6. INSTALL OUTSIDE WINDSHIELD MOULDING 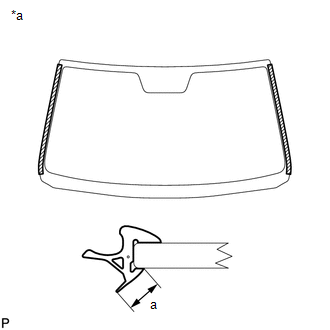
(a) Install the outside windshield moulding, as shown in the illustration. (b) Apply glass primer to the outside windshield moulding area "a" shown in the illustration. 7. CHECK FOR LEAK AND REPAIR (a) After the adhesive has hardened, apply water from the outside of the vehicle. Check that no water leaks into the cabin. (b) If water leaks into the cabin, allow the water to dry and add adhesive. (c) Remove the protective tape. 8. INSTALL ROOF DRIP SIDE FINISH MOULDING CLIP Click here 9. INSTALL ROOF DRIP SIDE FINISH MOULDING LH Click here 10. INSTALL ROOF DRIP SIDE FINISH MOULDING RH HINT: Use the same procedures described for the LH side. 11. INSTALL REAR ROOF DRIP SIDE FINISH MOULDING LH Click here 12. INSTALL REAR ROOF DRIP SIDE FINISH MOULDING RH HINT: Use the same procedures described for the LH side. 13. INSTALL ROOF HEADLINING ASSEMBLY (a) Return the roof headlining to its original position. Click here 14. INSTALL FORWARD RECOGNITION WITH HEATER HOOD SUB-ASSEMBLY (w/ Lane Departure Alert System) Click here 15. INSTALL FORWARD RECOGNITION CAMERA (w/ Lane Departure Alert System) Click here 16. INSTALL FORWARD RECOGNITION LATCH (w/ Lane Departure Alert System) Click here 17. INSTALL NO. 1 FORWARD RECOGNITION COVER (w/ Lane Departure Alert System) Click here 18. INSTALL COAT HOOK Click here 19. INSTALL ASSIST GRIP SUB-ASSEMBLY (a) for Double Cab: Click here (b) for CrewMax: Click here 20. INSTALL VISOR HOLDER (a) for Double Cab, w/o Illumination: Click here (b) for CrewMax, w/o Illumination: Click here 21. INSTALL VISOR ASSEMBLY LH (a) for Double Cab: Click here (b) for CrewMax: Click here 22. INSTALL VISOR ASSEMBLY RH HINT: Use the same procedures described for the LH side. 23. INSTALL NO. 1 ROOM LIGHT ASSEMBLY Click here 24. INSTALL ROOF CONSOLE BOX ASSEMBLY Click here 25. INSTALL INNER REAR VIEW MIRROR ASSEMBLY Click here 26. INSTALL FRONT PILLAR GARNISH LH Click here 27. INSTALL FRONT PILLAR GARNISH RH Click here 28. INSTALL FRONT DOOR OPENING TRIM WEATHERSTRIP LH Click here 29. INSTALL FRONT DOOR OPENING TRIM WEATHERSTRIP RH Click here 30. INSTALL COWL TOP VENTILATOR LOUVER SUB-ASSEMBLY Click here 31. INSTALL FRONT FENDER TO COWL SIDE SEAL LH Click here 32. INSTALL FRONT FENDER TO COWL SIDE SEAL RH Click here 33. INSTALL FRONT WIPER ARM AND BLADE ASSEMBLY LH Click here 34. INSTALL FRONT WIPER ARM AND BLADE ASSEMBLY RH Click here 35. ADJUST FORWARD RECOGNITION CAMERA (w/ Lane Departure Alert System) Click here |
Toyota Tundra Service Manual > Occupant Classification System: Sleep Operation Failure of Occupant Classification ECU (B1796)
DESCRIPTION During sleep mode, the occupant classification ECU monitors the condition of each sensor while the ignition switch is off. In this mode, if the occupant classification ECU detects an internal malfunction, DTC B1796 is set. DTC Code DTC Detection Condition Trouble Area B1796 Occupant clas ...