REMOVAL PROCEDURE 1. PRECAUTION NOTICE: After
turning the ignition switch off, waiting time may be required before
disconnecting the cable from the battery terminal. Therefore, make sure
to read the disconnecting the cable from the battery terminal notice
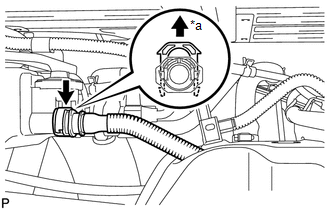
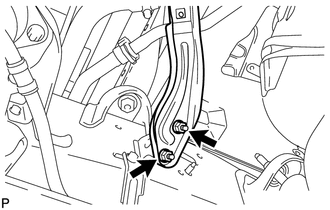
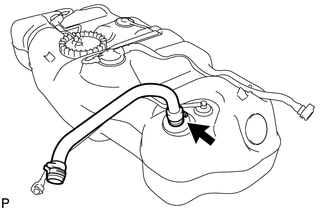
before proceeding with work (See page 2. DISCHARGE FUEL SYSTEM PRESSURE 3. DISCONNECT CABLE FROM NEGATIVE BATTERY TERMINAL 4. REMOVE FUEL TANK CAP 5. REMOVE NO. 1 FUEL TANK PROTECTOR SUB-ASSEMBLY (for Rough Road Area Specification Vehicles) (a) Remove the 2 bolts, 2 nuts and No. 1 fuel tank protector sub-assembly. 6. DISCONNECT FUEL TANK MAIN TUBE SUB-ASSEMBLY 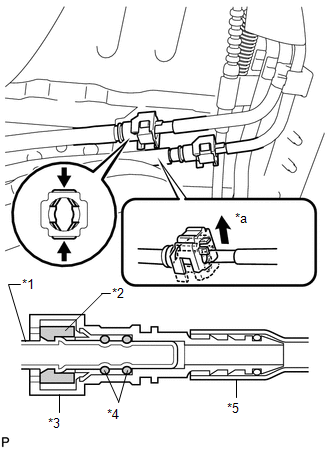 (a) Detach the lock claw by lifting up the cover as shown in the illustration. Text in Illustration
(b) Pinch and pull the fuel tank main tube connector to disconnect the fuel tank main tube sub-assembly from the pipe. NOTICE:
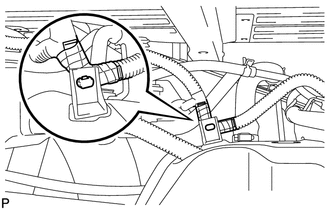
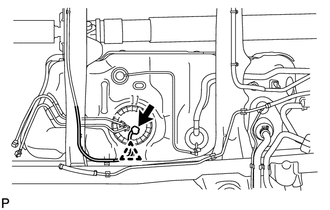
7. DISCONNECT FUEL TANK RETURN TUBE 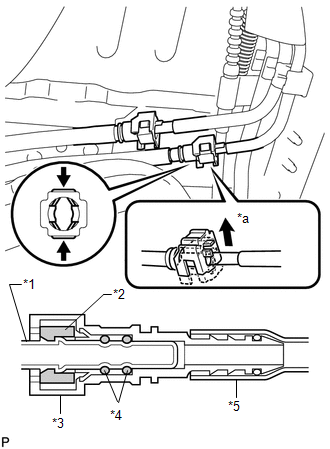 (a) Detach the lock claw by lifting up the cover as shown in the illustration. Text in Illustration
(b) Pinch and pull the fuel tank return tube connector to disconnect the fuel tank return tube from the pipe. NOTICE:
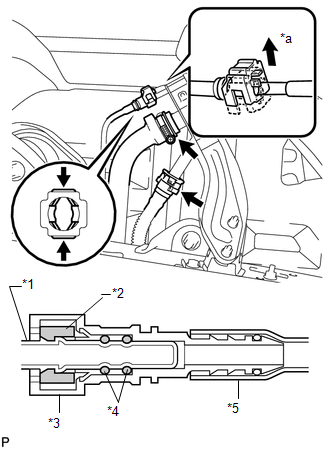
8. DISCONNECT VENT LINE HOSE
9. DISCONNECT WIRE HARNESS
10. DISCONNECT FUEL TANK TO FILLER PIPE HOSE
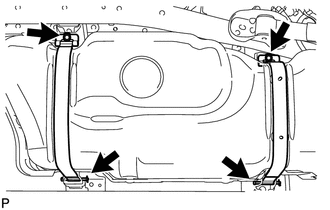
(b) Disconnect the fuel tank breather tube from the inlet fuel tank pipe sub-assembly. (c) Disconnect the fuel tank to filler pipe hose from the inlet fuel tank pipe sub-assembly. (d) Detach the filler pipe hose and fuel tank breather tube from the No. 1 breather tube clamp. 11. DISCONNECT OUTLET NO. 1 CHARCOAL CANISTER HOSE (a) Disconnect the outlet No. 1 charcoal canister hose from the inlet fuel tank pipe sub-assembly. (b) Detach the hose from the No. 1 breather tube support. 12. REMOVE FUEL TANK ASSEMBLY (a) Set a transmission jack underneath the fuel tank assembly.
(c) Slowly lower the transmission jack slightly. NOTICE: Be careful not to cut the wiring.
(f) Disconnect the fuel pump and fuel sender gauge connector and lower the transmission jack. NOTICE:
13. REMOVE INLET FUEL TANK PIPE SUB-ASSEMBLY
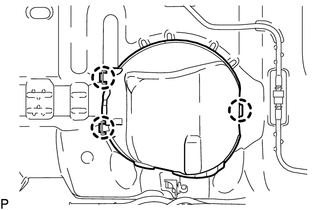
14. REMOVE NO. 1 FUEL TANK HEAT INSULATOR 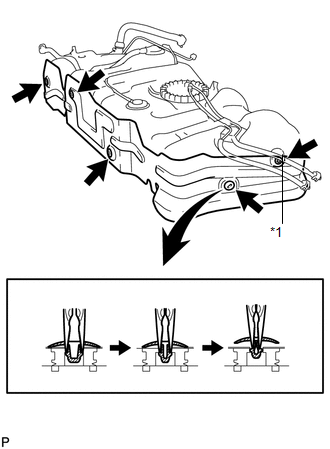 (a) Remove the nut from the No. 1 fuel tank heat insulator. Text in Illustration
(b) Using needle-nose pliers, remove the 4 clips shown in the illustration and then remove the No. 1 fuel tank heat insulator. 15. REMOVE FUEL TANK TO FILLER PIPE HOSE
16. REMOVE FUEL SUCTION WITH PUMP AND GAUGE TUBE ASSEMBLY
17. REMOVE NO. 1 FUEL TANK PROTECTOR (w/ Cover)  HINT: Only perform this procedure when replacement of the No. 1 fuel tank protector is necessary. (a) Detach the 4 clamps to remove the No. 1 fuel tank protector. |
Toyota Tundra Service Manual > Fog Light Assembly(for Led Fog Light): Installation
INSTALLATION CAUTION / NOTICE / HINT HINT: Use the same procedure for the RH and LH sides. The procedure listed below is for the LH side. PROCEDURE 1. INSTALL FOG LIGHT ASSEMBLY LH (a) for Type A: (1) Attach the 2 guides to set the fog light assembly LH. (2) Install the screw. (b) for Type B: (1) At ...