Components COMPONENTS ILLUSTRATION 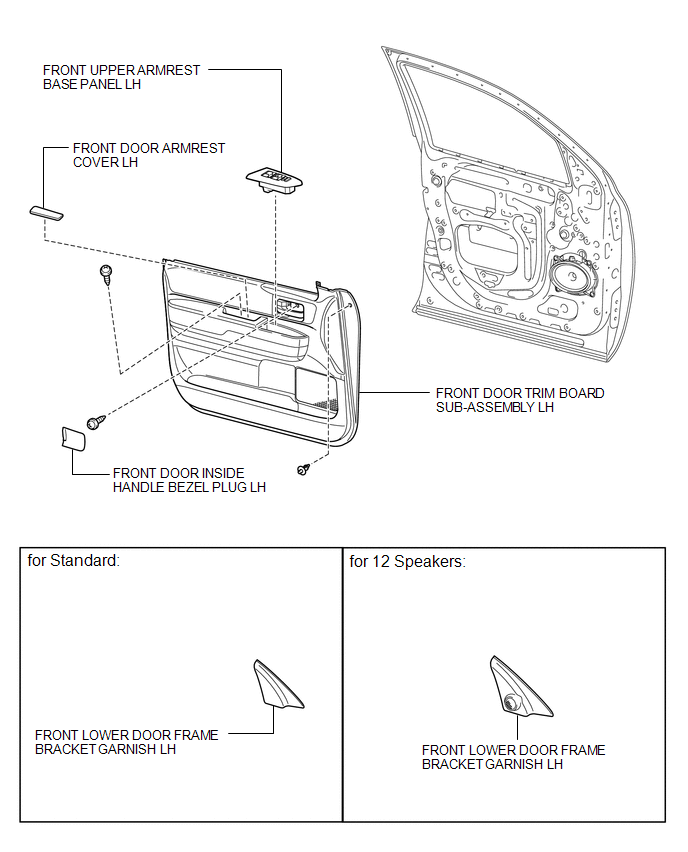
ILLUSTRATION 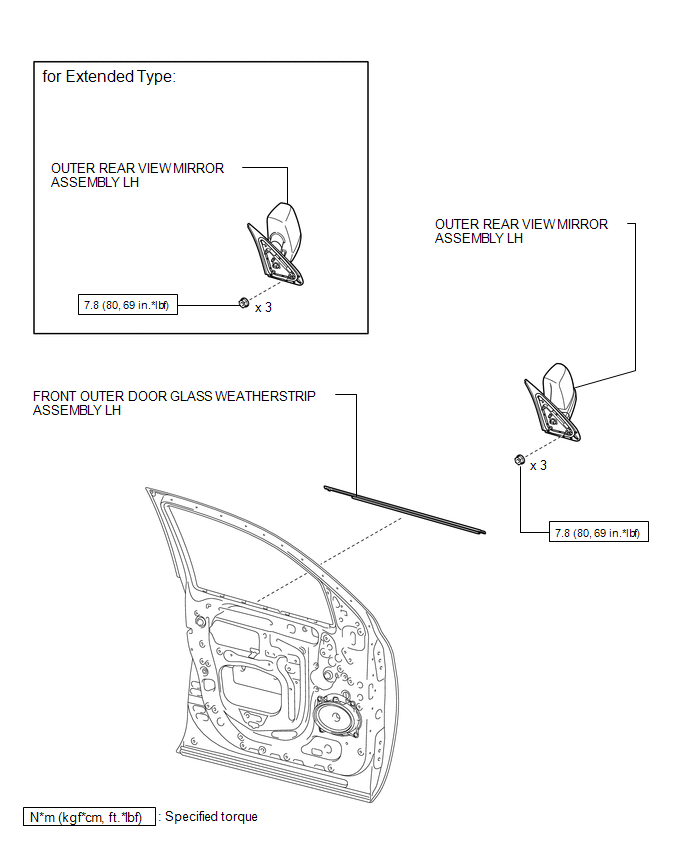
Installation INSTALLATION CAUTION / NOTICE / HINT HINT:
PROCEDURE 1. INSTALL FRONT OUTER DOOR GLASS WEATHERSTRIP ASSEMBLY LH 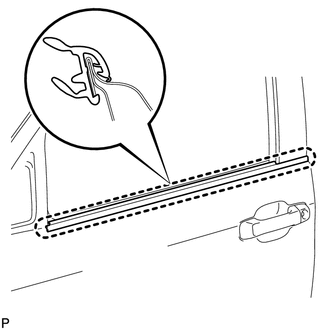
(a) Attach the claw to install the weatherstrip. 2. INSTALL OUTER REAR VIEW MIRROR ASSEMBLY LH
3. INSTALL FRONT DOOR TRIM BOARD SUB-ASSEMBLY LH
4. INSTALL FRONT DOOR ARMREST COVER LH 5. INSTALL FRONT LOWER DOOR FRAME BRACKET GARNISH LH
6. INSTALL FRONT UPPER ARMREST BASE PANEL LH
7. INSTALL FRONT DOOR INSIDE HANDLE BEZEL PLUG LH
Removal REMOVAL CAUTION / NOTICE / HINT HINT:
PROCEDURE 1. REMOVE FRONT DOOR INSIDE HANDLE BEZEL PLUG LH
2. REMOVE FRONT UPPER ARMREST BASE PANEL LH
3. REMOVE FRONT LOWER DOOR FRAME BRACKET GARNISH LH
4. REMOVE FRONT DOOR ARMREST COVER LH 5. REMOVE FRONT DOOR TRIM BOARD SUB-ASSEMBLY LH
6. REMOVE OUTER REAR VIEW MIRROR ASSEMBLY LH
7. REMOVE FRONT OUTER DOOR GLASS WEATHERSTRIP ASSEMBLY LH 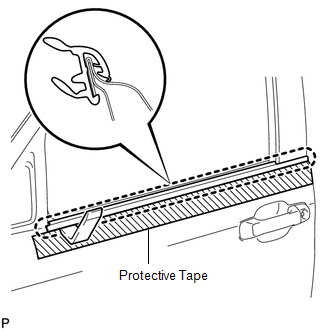
(a) Put protective tape around the weatherstrip outer. (b) Using a moulding remover, detach the claw and remove the weatherstrip. |
Toyota Tundra Service Manual > Terms: Glossary Of Sae And Toyota Terms
GLOSSARY OF SAE AND TOYOTA TERMS This glossary lists all SAE-J1930 terms and abbreviations used in this manual in compliance with SAE recommendations, as well as their TOYOTA equivalents. SAE ABBREVIATIONS SAE TERMS TOYOTA TERMS ( )-ABBREVIATIONS A/C Air Conditioning Air Conditioner ACL Air Cleaner ...


