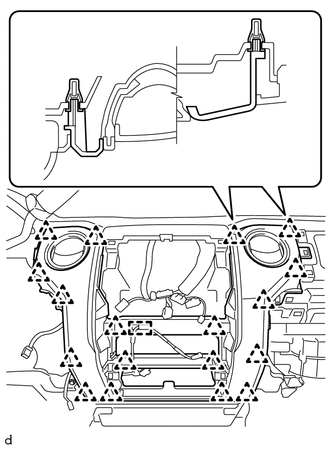
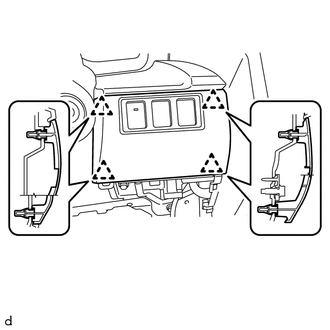
INSTALLATION CAUTION / NOTICE / HINT HINT: A bolt without a torque specification is shown in the standard bolt chart. Click here PROCEDURE 1. INSTALL NO. 1 INSTRUMENT PANEL CLIP (a) Attach the 2 claws to install the 2 No. 1 instrument panel clips. 2. INSTALL NO. 3 INSTRUMENT PANEL STAY (a) Attach the 3 claws to install the 3 No. 3 instrument panel stays. 3. INSTALL INSTRUMENT PANEL SUB-ASSEMBLY (a) Set the instrument panel sub-assembly and attach the 5 claws. (b) Install the 2 nuts <C> and 3 bolts <B>. (c) Install the 2 bolts <G>. Torque: 20 N·m {204 kgf·cm, 15 ft·lbf} 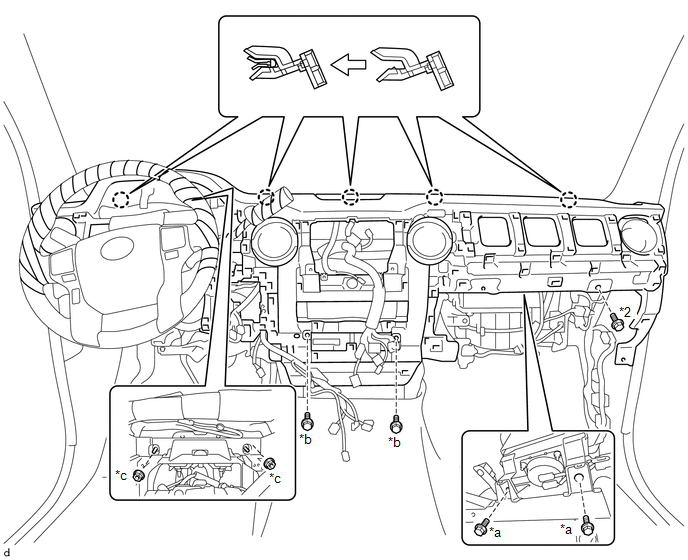
(d) Connect each connector and attach each wire harness clamp. 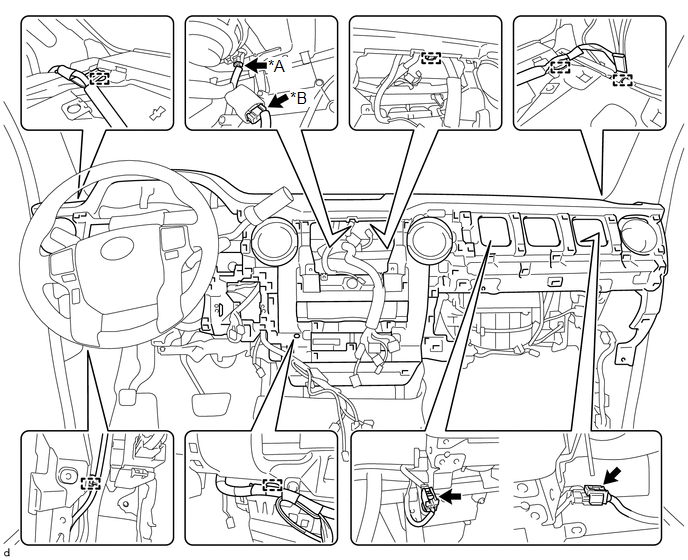
4. INSTALL FRONT NO. 2 SPEAKER ASSEMBLY LH Click here 5. INSTALL INSTRUMENT PANEL SPEAKER PANEL SUB-ASSEMBLY
6. INSTALL FRONT NO. 2 SPEAKER ASSEMBLY RH Click here 7. INSTALL NO. 2 INSTRUMENT PANEL SPEAKER PANEL SUB-ASSEMBLY HINT: Use the same procedure described for the instrument panel speaker panel sub-assembly. 8. INSTALL FRONT PILLAR GARNISH LH Click here 9. INSTALL FRONT DOOR OPENING TRIM WEATHERSTRIP LH (a) for Double Cab: Click here (b) for CrewMax: Click here 10. INSTALL FRONT PILLAR GARNISH RH Click here 11. INSTALL FRONT DOOR OPENING TRIM WEATHERSTRIP RH HINT: Use the same procedure described for the LH side. 12. INSTALL CENTER INSTRUMENT CLUSTER FINISH PANEL SUB-ASSEMBLY (a) for 4WD: Connect the connector.
13. INSTALL RADIO AND DISPLAY RECEIVER ASSEMBLY WITH BRACKET Click here 14. INSTALL LOWER CENTER INSTRUMENT PANEL FINISH PANEL WITH AIR CONDITIONING CONTROL ASSEMBLY (a) Connect each connector. (b) Attach the 8 clips, 2 claws and guide to install the lower center instrument panel finish panel together with the air conditioning control assembly. 
15. INSTALL NO. 2 INSTRUMENT CLUSTER FINISH PANEL GARNISH
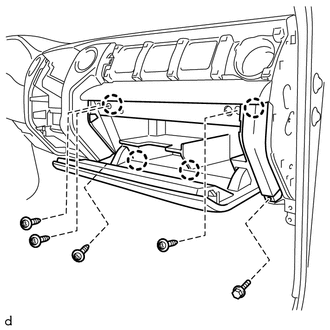
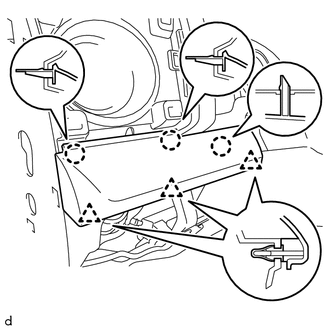
16. INSTALL LOWER INSTRUMENT PANEL FINISH PANEL SUB-ASSEMBLY RH
(b) Install the 4 screws <F> and bolt <A>. 17. INSTALL INSTRUMENT SIDE PANEL RH
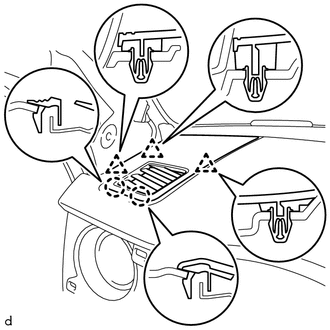
18. INSTALL NO. 4 INSTRUMENT REGISTER SUB-ASSEMBLY 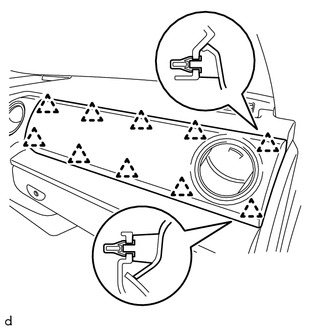
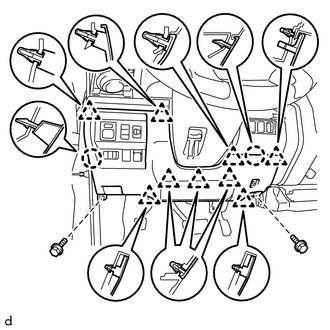
(a) Attach the 10 clips to install the No. 4 instrument register sub-assembly. 19. INSTALL LOWER NO. 2 INSTRUMENT PANEL AIRBAG ASSEMBLY Click here 20. INSTALL LOWER INSTRUMENT PANEL (a) Attach the 3 claws to install the lower instrument panel. (b) Install the bolt <A> and screw <D>. 21. INSTALL NO. 2 INSTRUMENT PANEL UNDER COVER SUB-ASSEMBLY (a) Attach the 2 guides, 4 claws and clip to install the No. 2 instrument panel under cover sub-assembly. 22. INSTALL COMBINATION METER ASSEMBLY Click here 23. INSTALL INSTRUMENT CLUSTER FINISH PANEL ASSEMBLY (a) Attach the 6 clips to install the instrument cluster finish panel assembly. (b) Install the 2 clips. 24. INSTALL INSTRUMENT CLUSTER FINISH PANEL ORNAMENT 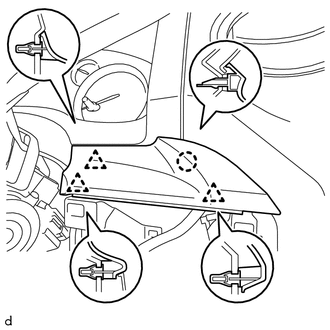
(a) Attach the 3 clips and claw to install the instrument cluster finish panel ornament. 25. INSTALL NO. 2 SWITCH HOLE BASE (a) Connect each connector.
26. INSTALL UPPER STEERING COLUMN COVER Click here 27. INSTALL LOWER STEERING COLUMN COVER (a) Attach the 2 claws to install the lower steering column cover. (b) While turning the steering wheel assembly to the right and left, install the 2 screws. 28. INSTALL NO. 1 INSTRUMENT CLUSTER FINISH PANEL GARNISH
29. INSTALL LOWER NO. 1 INSTRUMENT PANEL AIRBAG ASSEMBLY Click here 30. INSTALL LOWER INSTRUMENT PANEL FINISH PANEL SUB-ASSEMBLY LH (a) Connect the hood lock control cable to the hood lock control lever, rotate the hood lock control cable, and then slide and push the hood lock control cable into place. 
(b) Attach the 3 hooks to connect the hood lock control lever to the lower instrument panel finish panel sub-assembly LH. (c) Connect each connector.
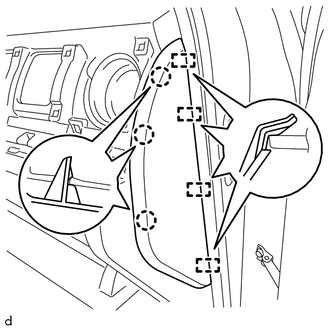
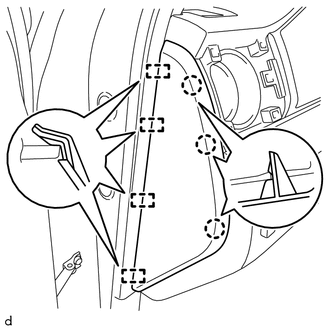
(e) Install the 2 bolts <A>. 31. INSTALL COWL SIDE TRIM BOARD LH Click here 32. INSTALL FRONT DOOR SCUFF PLATE LH (a) for Double Cab: Click here (b) for CrewMax: Click here 33. INSTALL COWL SIDE TRIM BOARD RH HINT: Use the same procedure described for the LH side. 34. INSTALL FRONT DOOR SCUFF PLATE RH HINT: Use the same procedure described for the LH side. 35. INSTALL LOWER CENTER INSTRUMENT COVER (a) Attach the 2 guides and 2 clips to install the lower center instrument cover. (b) Install the 2 clips. 36. INSTALL INSTRUMENT SIDE PANEL LH
37. INSTALL NO. 1 INSTRUMENT PANEL REGISTER SUB-ASSEMBLY
38. CONNECT CABLE TO NEGATIVE BATTERY TERMINAL NOTICE: When disconnecting the cable, some systems need to be initialized after the cable is reconnected. Click here 39. CHECK SRS WARNING LIGHT Click here |
Toyota Tundra Owners Manual > Before driving: Vehicle load limits
Vehicle load limits include total load capacity, seating capacity, TWR (Trailer Weight Rating) and cargo capacity. Total load capacity (vehicle capacity weight) Total load capacity means the combined weight of occupants, cargo and luggage. Seating capacity Vehicles with front separated type seats - ...