REASSEMBLY CAUTION / NOTICE / HINT CAUTION: Wear protective gloves. Sharp areas on the parts may injure your hands. HINT:
PROCEDURE 1. INSTALL FRONT SEAT CUSHION SHIELD WIRE LH (a) Install the front seat cushion shield wire LH with the 2 screws. Torque: 3.0 N·m {31 kgf·cm, 27 in·lbf} 2. INSTALL FRONT SEAT CUSHION SHIELD WIRE RH (for Front Passenger Side) (a) Install the front seat cushion shield wire RH with the 2 screws. Torque: 3.0 N·m {31 kgf·cm, 27 in·lbf} 3. INSTALL UPPER NO. 4 SEAT TRACK COVER (a) Attach the 2 claws to install the upper No. 4 seat track cover. 4. INSTALL UPPER NO. 3 SEAT TRACK COVER HINT: Use the same procedure described for the upper No. 4 seat track cover. 5. INSTALL UPPER SEAT TRACK COVER (a) Attach the 2 claws to install the upper seat track cover. HINT: Use the same procedure for all upper seat track covers. 6. INSTALL FRONT LOWER SEAT CUSHION SHIELD LH (for Driver Side) (a) Attach the claw to install the front lower seat cushion shield LH. (b) Install the screw and attach the hook. Torque: 3.0 N·m {31 kgf·cm, 27 in·lbf} 7. INSTALL FRONT LOWER SEAT CUSHION SHIELD RH (for Driver Side) HINT: Use the same procedure described for the LH side. 8. INSTALL FRONT LOWER SEAT CUSHION SHIELD LH (for Front Passenger Side) (a) Attach the 2 claws to install the front lower seat cushion shield LH. 9. INSTALL FRONT LOWER SEAT CUSHION SHIELD RH (for Front Passenger Side) HINT: Use the same procedure described for the LH side. 10. INSTALL SEPARATE TYPE FRONT SEAT CUSHION SPRING ASSEMBLY (a) Attach the 4 hooks of the rear side to install the separate type front seat cushion spring assembly. (b) Attach the hook of the front side. 11. INSTALL FRONT SEAT CUSHION PANEL SUB-ASSEMBLY (a) Install the front seat cushion panel sub-assembly with the 4 bolts. Torque: 10 N·m {102 kgf·cm, 7 ft·lbf} 12. INSTALL FRONT SEAT CUSHION WIRE LH (for Driver Side) (a) for 8 Way Seat Type:
13. INSTALL FRONT SEAT CUSHION WIRE RH (for Front Passenger Side)
14. INSTALL SEAT CLIMATE CONTROL BLOWER LH (w/ Climate Control Seat System) (a) Install the seat climate control blower LH with the 3 nuts. Torque: 8.0 N·m {82 kgf·cm, 71 in·lbf} (b) Attach the clamp. 15. INSTALL SEAT CUSHION CLIMATE CONTROL DUCT LH (w/ Climate Control Seat System) (a) Attach the 2 claws to install the seat cushion climate control duct LH. (b) Attach the 2 clips. 16. INSTALL SEAT HEATER CONTROL SUB-ASSEMBLY LH (w/ Seat Heater System) (a) Attach the clamp to install the seat heater control sub-assembly LH. (b) Connect the connector. 17. INSTALL OCCUPANT CLASSIFICATION ECU (for Front Passenger Side)
18. INSTALL FRONT SEAT CUSHION HEATER ASSEMBLY LH (w/ Seat Heater System)
19. INSTALL SEPARATE TYPE FRONT SEAT CUSHION COVER (a) Set the separate type front seat cushion cover in place.
(c) Attach the 2 fasteners. Text in Illustration
20. INSTALL SEPARATE TYPE FRONT SEAT CUSHION COVER WITH PAD (a) Set the separate type front seat cushion cover with pad on the front seat cushion frame sub-assembly LH. (b) for Driver Side:
(2) w/ Leg Support Adjustment Switch: Attach the 4 hooks. (3) Attach the 11 hooks to install the separate type front seat cushion cover with pad. 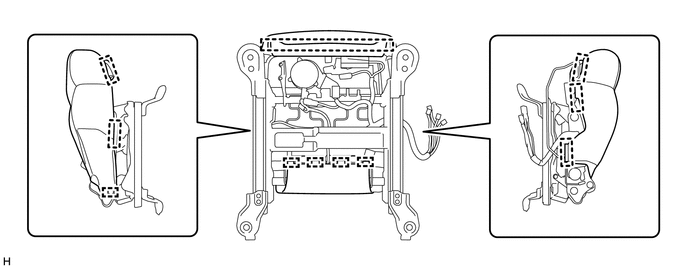
(c) for Front Passenger Side: (1) Attach the 12 hooks to install the separate type front seat cushion cover with pad. 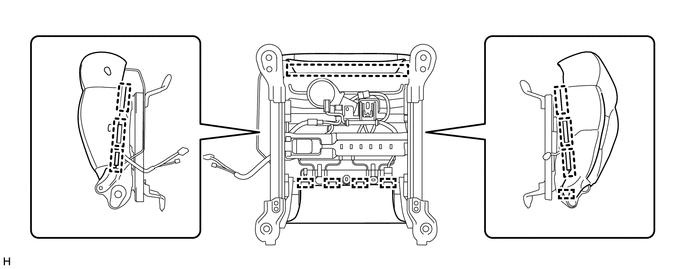
(e) Connect the connector. 21. INSTALL SEATBACK CLIMATE CONTROL BLOWER LH (w/ Climate Control Seat System)
22. INSTALL FRONT SEATBACK HOOK
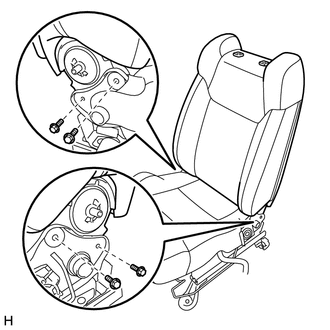
23. INSTALL LUMBAR SUPPORT ADJUSTER ASSEMBLY LH
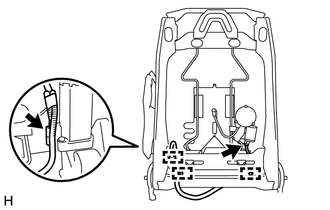
24. INSTALL FRONT SEATBACK WIRE LH (for Driver Side)
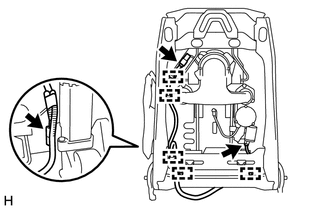
25. INSTALL FRONT SEATBACK WIRE RH (for Front Passenger Side)
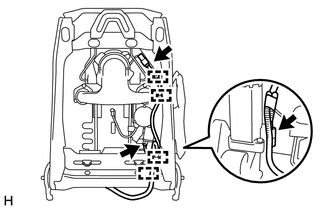
(b) Connect the 3 connectors. 26. INSTALL FRONT SEAT AIRBAG ASSEMBLY LH
27. INSTALL SEPARATE TYPE FRONT SEATBACK PAD (a) Install the separate type front seatback pad to the front seatback frame sub-assembly LH. (b) w/ Climate Control Seat System: (1) Attach the 6 clips. 28. INSTALL FRONT SEATBACK HEATER ASSEMBLY LH (w/ Seat Heater System)
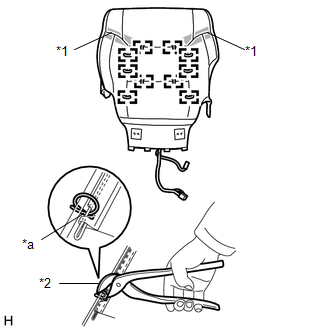
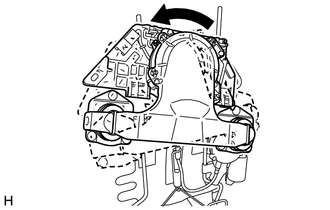
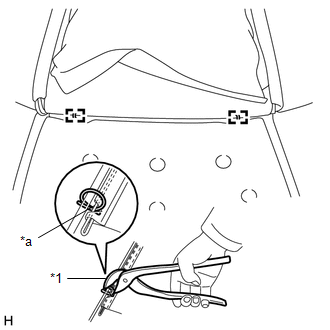
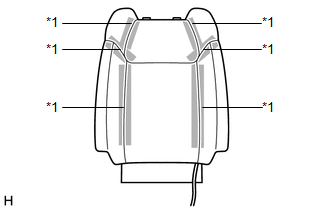
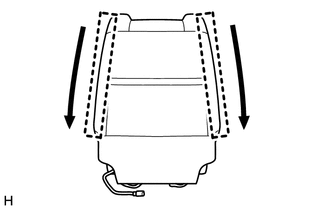
29. INSTALL SEPARATE TYPE FRONT SEATBACK COVER (a) Set the separate type front seatback cover in place. (b) Attach the 4 claws to install the 2 front seat headrest supports.
(e) Pass the 4 straps of the separate type front seatback cover through the separate type front seatback pad. (f) Attach the 2 hooks. CAUTION:
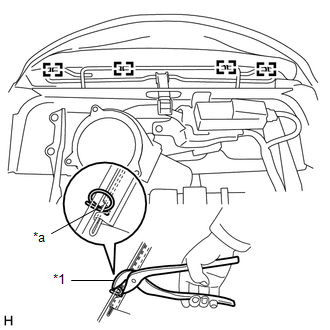
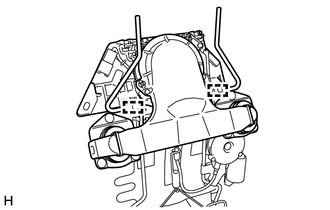
(1) Slide each hook to attach them. (2) Install the 4 clips.
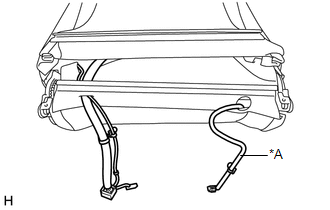
(i) w/ Seat Heater System: (1) Pass the 3 wire harnesses through the separate type front seatback cover. Text in Illustration
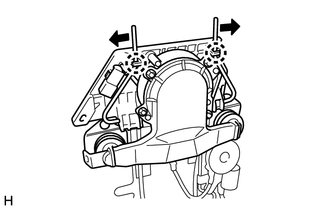
(j) Detach the hook. 30. INSTALL SEPARATE TYPE FRONT SEATBACK ASSEMBLY (a) When reusing a bolt: (1) Clean the threads of the bolt with non-residue solvent. (2) Apply adhesive to the threads of the bolt. Adhesive: Toyota Genuine Adhesive 1324, Three Bond 1324 or equivalent.
(e) Connect the connector.
31. INSTALL FRONT INNER NO. 1 SEAT CUSHION SHIELD LH
(b) Install the 2 screws. Torque: 3.0 N·m {31 kgf·cm, 27 in·lbf} 32. INSTALL FRONT NO. 2 SEAT WIRE LH (w/ Leg Support Adjustment Switch) (a) Attach the 2 clamps to install the front No. 2 seat wire LH. 33. INSTALL SEAT VARIABLE CUSHION SWITCH (w/ Leg Support Adjustment Switch)
34. INSTALL FRONT POWER SEAT LUMBAR SWITCH LH
35. INSTALL FRONT POWER SEAT SWITCH LH (w/o Seat Position Memory System)
36. INSTALL POSITION CONTROL ECU AND SWITCH ASSEMBLY (w/ Seat Position Memory System) (a) Install the position control ECU and switch with the 3 screws. 37. INSTALL RECLINING POWER SEAT SWITCH KNOB (a) Attach the 2 claws to install the reclining power seat switch knob. 38. INSTALL SLIDE AND VERTICAL POWER SEAT SWITCH KNOB (a) Attach the 2 claws to install the slide and vertical power seat switch knob. 39. INSTALL FRONT SEAT CUSHION SHIELD LH
(b) w/ Leg Support Adjustment Switch: (1) Connect the 4 connectors and attach the clamp to install the front seat cushion shield LH. Text in Illustration
(d) Install the 2 screws. Torque: 3.0 N·m {31 kgf·cm, 27 in·lbf} (e) Connect the 2 rubber bands. 40. INSTALL SEAT POSITION AIRBAG SENSOR
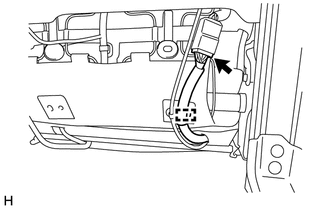
41. INSTALL FRONT SEAT INNER BELT ASSEMBLY LH (for Driver Side)
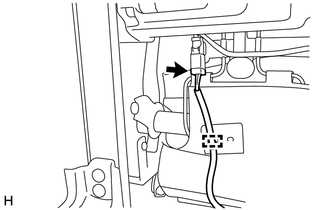
42. INSTALL FRONT SEAT INNER BELT ASSEMBLY RH (for Front Passenger Side)
|
Toyota Tundra Service Manual > Forward Recognition Camera System: Vehicle Speed Sensor Circuit (C1AA3)
DESCRIPTION The forward recognition camera receives vehicle speed signals from the skid control ECU (brake actuator assembly). If the skid control ECU (brake actuator assembly) receives a vehicle speed sensor malfunction signal, it informs the forward recognition camera via CAN communication, and DT ...

 ).
).