REASSEMBLY PROCEDURE 1. INSTALL REAR SLIDING ROOF HOUSING MOUNTING BRACKET LH
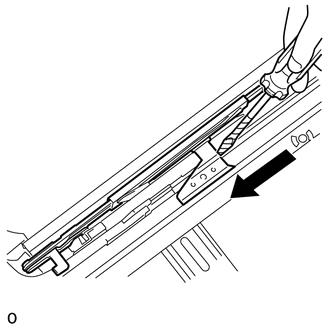
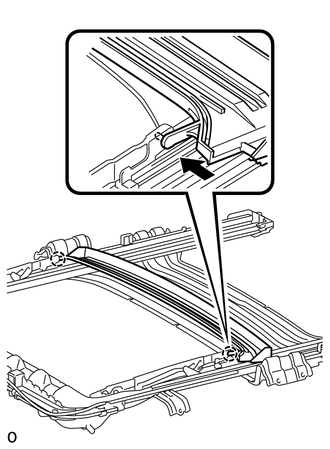
2. INSTALL REAR SLIDING ROOF HOUSING MOUNTING BRACKET RH HINT: Use the same procedures described for the LH side. 3. INSTALL SLIDING ROOF DRIVE CABLE SUB-ASSEMBLY (a) Hold down the window deflector. NOTICE: Make sure that the spring indicated by the arrow in the illustration is securely installed. 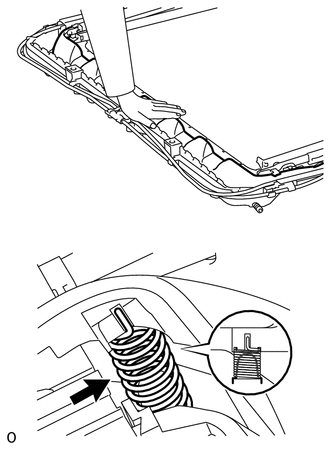
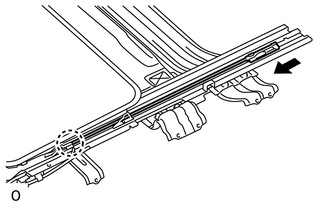
4. ADJUST SLIDING ROOF DRIVE CABLE SUB-ASSEMBLY 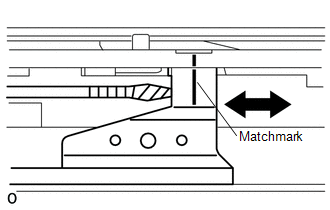
(a) Using a screwdriver, align the matchmarks by sliding the drive cable in the directions indicated by the arrow in the illustration. HINT: Tape the screwdriver tip before use. 5. INSTALL SUNSHADE TRIM SUB-ASSEMBLY
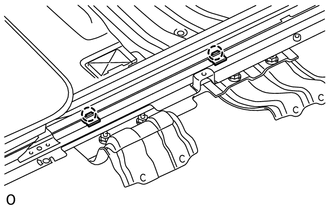
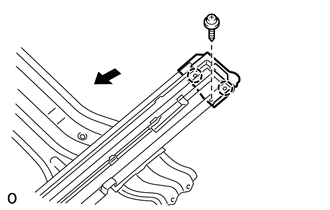
(b) Attach the 4 claws to install the sliding roof piece LH and RH. (c) Install the 2 screws. 6. INSTALL SLIDING ROOF DRIVE GEAR SUB-ASSEMBLY 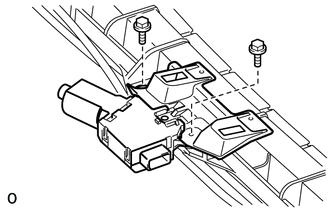
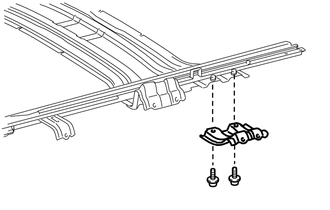
(a) Install the drive gear and room light bracket with the 2 bolts. Torque: 5.4 N·m {5.5 kgf·cm, 48 in·lbf} |
Toyota Tundra Service Manual > Audio And Visual System: Parking Brake Switch Circuit
DESCRIPTION This circuit is from the parking brake switch assembly to the radio and display receiver assembly. WIRING DIAGRAM PROCEDURE 1. CHECK PARKING BRAKE SWITCH ASSEMBLY (a) Enter the "Vehicle Signal Check Mode" screen. [Refer to Check Touch Switch in Operation Check (See page )] (b) Check that ...