
REMOVAL PROCEDURE 1. PRECAUTION NOTICE: After turning the ignition switch off, waiting time may be required before disconnecting
the cable from the battery terminal. Therefore, make sure to read the disconnecting
the cable from the battery terminal notice before proceeding with work (See page
2. DISCONNECT CABLE FROM NEGATIVE BATTERY TERMINAL CAUTION: Wait at least 90 seconds after disconnecting the cable from the negative (-) battery terminal to prevent airbag and seat belt pretensioner activation. 3. REMOVE ROOF HEADLINING ASSEMBLY (a) Remove the roof headlining (See page 4. REMOVE CURTAIN SHIELD AIRBAG ASSEMBLY LH (a) Remove the airbag (See page 5. REMOVE CURTAIN SHIELD AIRBAG ASSEMBLY RH HINT: Use the same procedures described for the LH side. 6. REMOVE SLIDING ROOF SIDE GARNISH LH 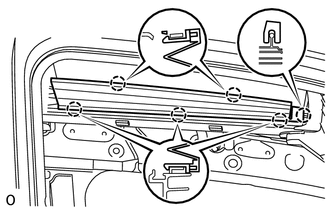
(a) Detach the 6 claws and remove the side garnish. 7. REMOVE SLIDING ROOF SIDE GARNISH RH HINT: Use the same procedures described for the LH side. 8. REMOVE SLIDING ROOF GLASS SUB-ASSEMBLY 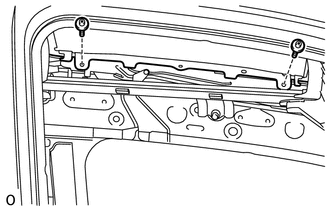
(a) Using a T25 "TORX" driver, remove the 4 screws and glass. 9. REMOVE SLIDING ROOF WEATHERSTRIP (a) Remove the sliding roof weatherstrip. 10. REMOVE SLIDING ROOF HOUSING SUB-ASSEMBLY (a) Disconnect the 4 sliding roof drain hoses. (b) Remove the 10 bolts, 6 nuts and housing. 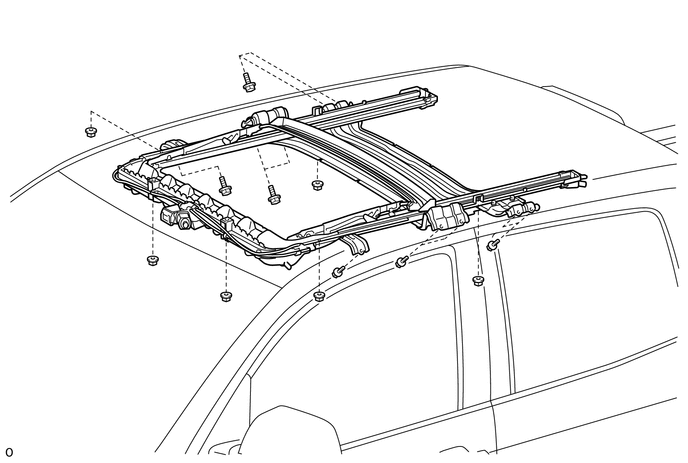 |
Toyota Tundra Owners Manual > Driving tips: Off-road precautions
This vehicle belongs to the utility vehicle class, which has higher ground clearance and narrower tread in relation to the height of its center of gravity to make it capable of performing in a wide variety of off-road applications. Off-road vehicle features Specific design characteristics give it a ...


