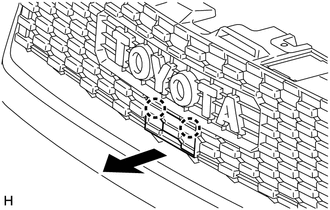
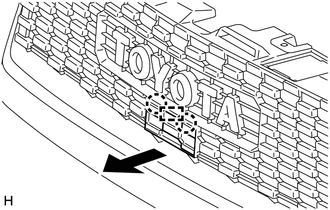
DISASSEMBLY PROCEDURE 1. REMOVE MILLIMETER WAVE RADAR WIRE (w/ Toyota Safety Sense P) Click here 2. REMOVE MILLIMETER WAVE RADAR SENSOR ASSEMBLY (w/ Toyota Safety Sense P) Click here 3. REMOVE RADIATOR GRILLE GARNISH (for Type A) (a) When Replacing the Radiator Grille Garnish: (1) Apply protective tape around the spring nut. 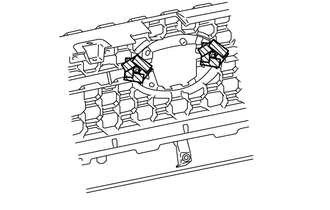
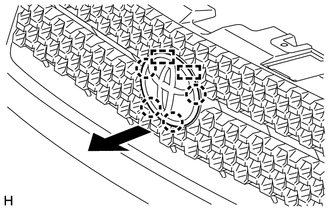
(3) Push the radiator grille garnish to remove the 2 spring nuts as shown in the illustration. CAUTION: Make sure to cover the spring nuts with a piece of cloth or equivalent to prevent them from flying off during removal. 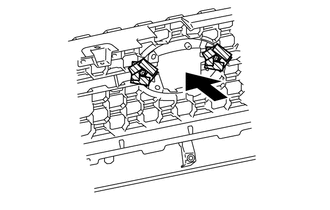
(b) When Replacing the Radiator Grille Sub-Assembly: HINT:
(1) Using a center punch, make a depression at the positions shown in the illustration. 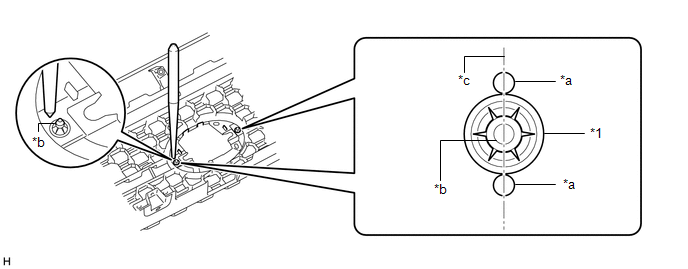
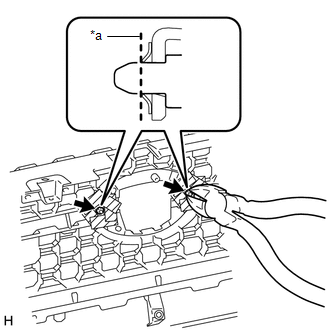
(2) Using a plier nipper (side cutters), rotate the 2 spring nuts to align the cutouts of each spring nut as shown in the illustration. 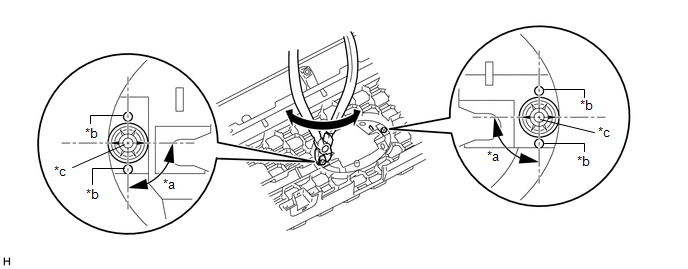
(3) Using a piler nipper (side cutters), deform each spring nut as shown in the illustration and then remove the 2 spring nuts. 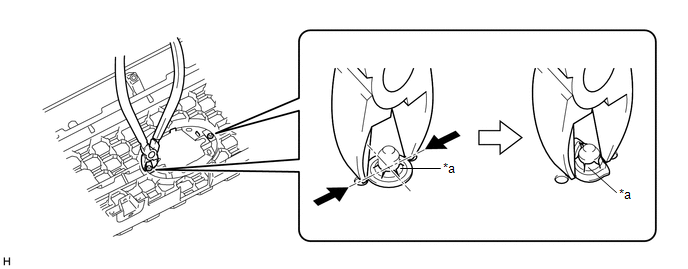
4. REMOVE RADIATOR GRILLE GARNISH (for Type B) (a) When Replacing the Radiator Grille Garnish: (1) Apply protective tape around the spring nut. 
(3) Push the radiator grille garnish to remove the 2 spring nuts as shown in the illustration. CAUTION: Make sure to cover the spring nuts with a piece of cloth or equivalent to prevent them from flying off during removal. 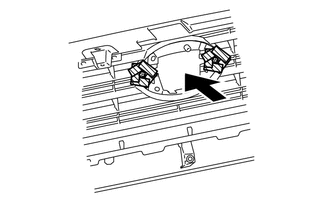
(b) When Replacing the Radiator Grille Sub-Assembly: HINT:
(1) Using a center punch, make a depression at the positions shown in the illustration. 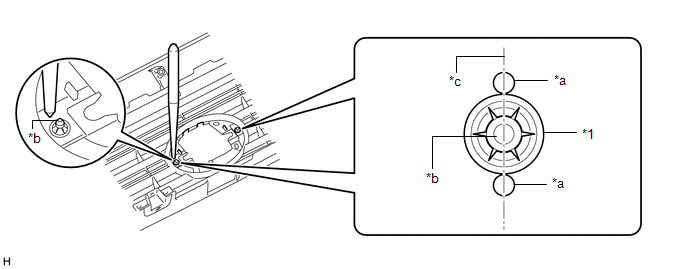
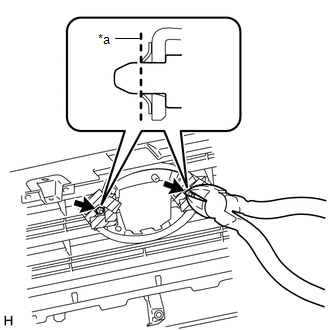
(2) Using a plier nipper (side cutters), rotate the 2 spring nuts to align the cutouts of each spring nut as shown in the illustration. 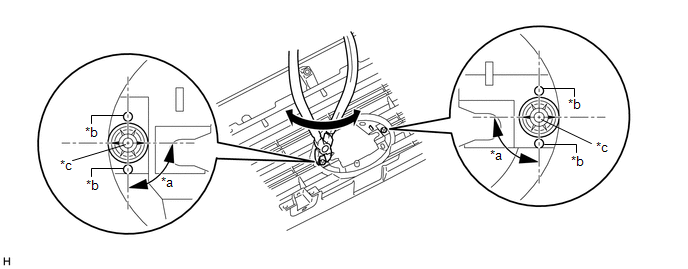
(3) Using a piler nipper (side cutters), deform each spring nut as shown in the illustration and then remove the 2 spring nuts. 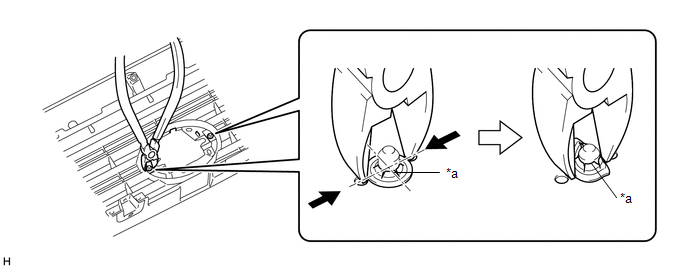
5. REMOVE RADIATOR GRILLE GARNISH (for Type C) (a) When Replacing the Radiator Grille Garnish: (1) Apply protective tape around the spring nut. 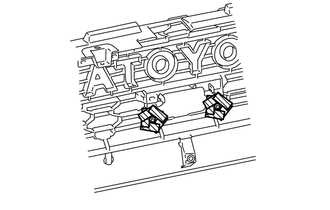
(3) Push the radiator grille garnish to remove the 2 spring nuts as shown in the illustration. CAUTION: Make sure to cover the spring nuts with a piece of cloth or equivalent to prevent them from flying off during removal. 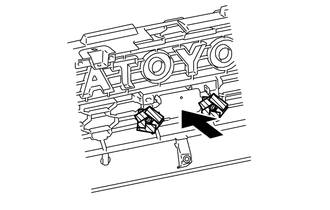
(b) When Replacing the Radiator Grille Sub-Assembly: HINT:
(1) Using a center punch, make a depression at the positions shown in the illustration. 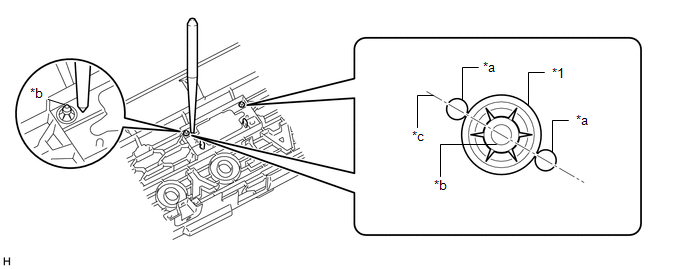
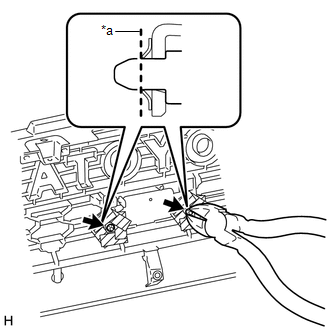
(2) Using a plier nipper (side cutters), rotate the 2 spring nuts to align the cutouts of each spring nut as shown in the illustration. 
(3) Using a piler nipper (side cutters), deform each spring nut as shown in the illustration and then remove the 2 spring nuts. 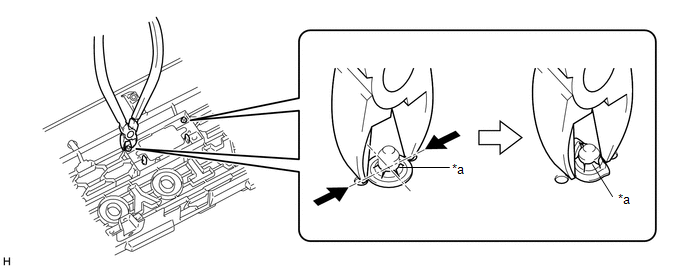
|
Toyota Tundra Service Manual > Vehicle Stability Control System: Performance Decline of Brake Function (C1441)
DESCRIPTION The skid control ECU judges brake failure conditions have occurred based on signals from the brake pedal load sensing switch and master cylinder pressure sensor. NOTICE: Do not intentionally stop the engine when driving. Even when no malfunction has occurred in the brake system, DTC C144 ...